第1步:需要的零件,耗材和工具
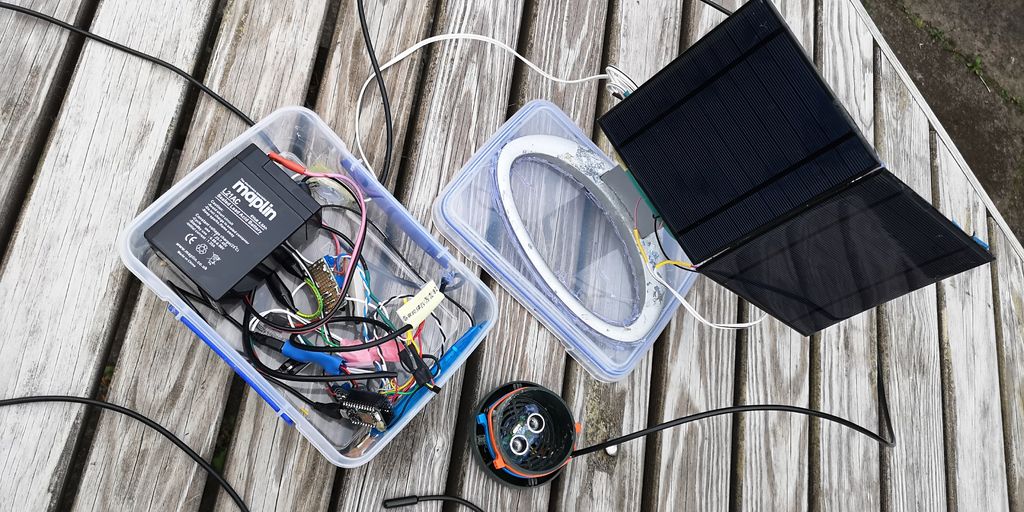
粒子光子
US-100超聲波測(cè)距儀
Adafruit的Verter降壓/升壓轉(zhuǎn)換器。
低壓差可調(diào)電壓調(diào)節(jié)器:MIC29302WT; 1.25-26V; 3A
6V 4.5Ah密封鉛酸電池“凝膠電池”
2 Maxim Integrated DS18B20數(shù)字溫度傳感器
2太陽(yáng)能電池板,每個(gè)5V 500mA 2.5W
1歐姆10W電阻(掃氣)
瞬間開(kāi)關(guān)(清除)
3 10k Trim電位器(掃氣)
保護(hù)二極管(掃氣)
短microUSB電纜(掃氣)
工具和用品:
焊臺(tái)
剝線鉗
臺(tái)式電源
熱縮管和熱風(fēng)棒
熱膠槍
手鉆或Dremel工具
原型Photon Shield PCB(在Maker Faire免于Bluz)這是Adafruit的一個(gè)不錯(cuò)的選擇。)
PVC管和鋸切割到你的ta的高度nk
包含電子設(shè)備的聚丙烯塑料食品儲(chǔ)存盒
連接線
金屬支架
用于固定系統(tǒng)的帶子,但可以拆下調(diào)試
太陽(yáng)能電池板支架(掃描電腦顯示器支架)
透明5分鐘環(huán)氧樹(shù)脂
PC-7環(huán)氧樹(shù)脂漿 - 非常堅(jiān)固和厚實(shí)!
丁腈手套
硅橡膠膠
步驟2:超聲波測(cè)距儀 - US-100 Wins!
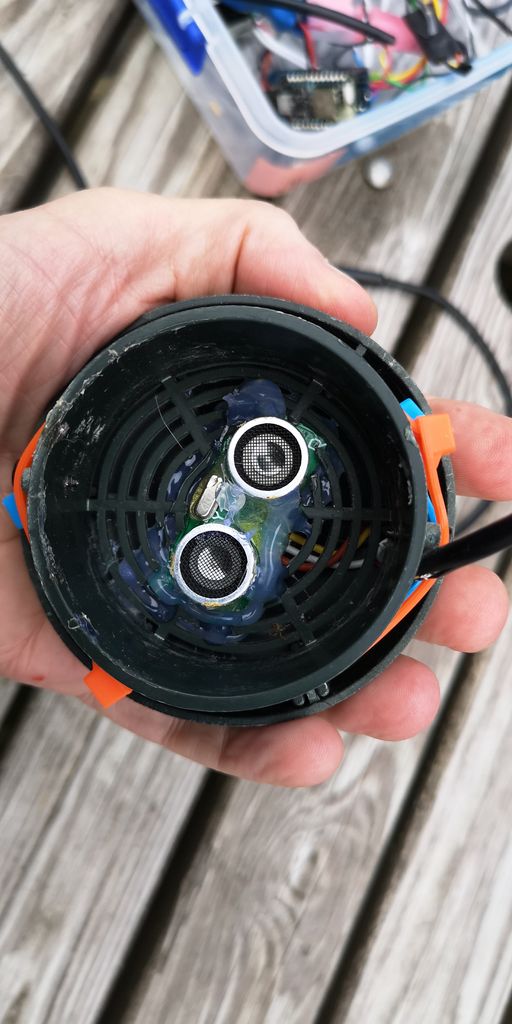
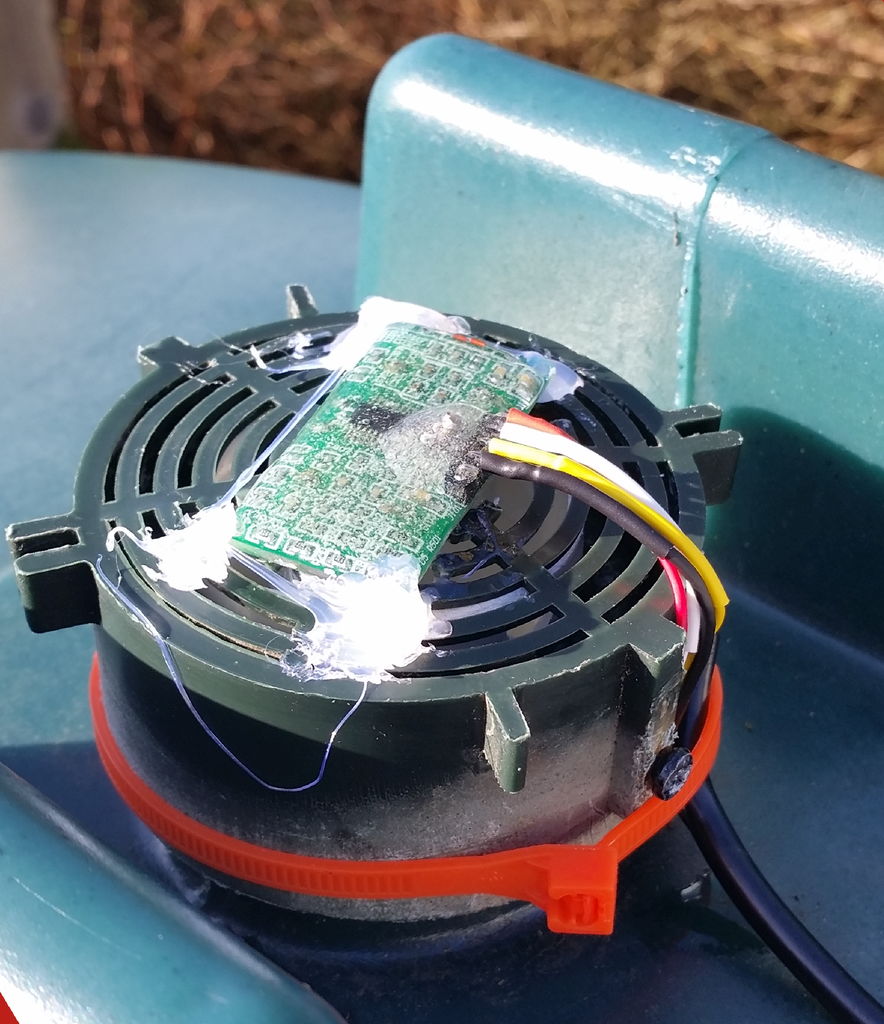
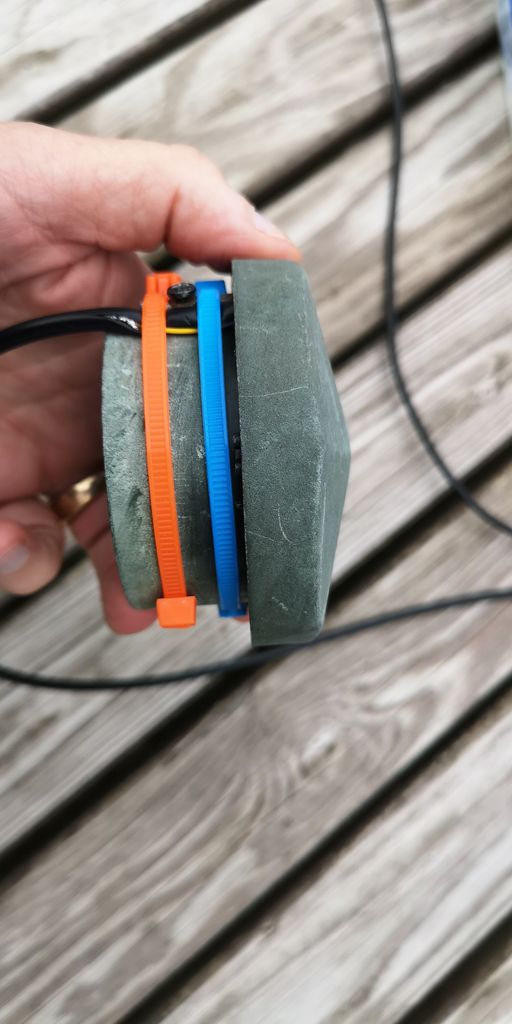
這種坦克級(jí)別監(jiān)控方法的操作理論非常好直截了當(dāng):從流體表面反射聲音脈沖,并通過(guò)測(cè)量回聲的延遲,計(jì)算水平在水箱中的下降程度。在實(shí)踐中,它根本不是直截了當(dāng)?shù)摹V档脩c幸的是,有很多便宜的超聲波測(cè)距儀用于愛(ài)好機(jī)器人,可以做得很好。我最初使用的是HC-SR04。該器件輸出一個(gè)長(zhǎng)度與距離相對(duì)應(yīng)的TTL脈沖,Arduino(或者我的情況下,Photon)必須精確測(cè)量其長(zhǎng)度。事實(shí)證明這非常棘手并且充滿了噪音問(wèn)題。它的準(zhǔn)確性很差(重復(fù)性結(jié)果差異大約2厘米),精度差(使用NewPing庫(kù)最好可能是1厘米),可靠性差(有些數(shù)據(jù)完全錯(cuò)誤)。
感謝Andreas Spiess,我發(fā)現(xiàn)了US-100超聲波測(cè)距儀,其發(fā)現(xiàn)頻率低于€并具有數(shù)字模式,以毫米為單位響應(yīng)目標(biāo)距離(不是厘米,與其他數(shù)字相同)超聲波測(cè)距儀)。與大多數(shù)模擬超聲波測(cè)距儀不同,它在內(nèi)部進(jìn)行從回波延遲到距離的轉(zhuǎn)換,而不是Arduino。我發(fā)現(xiàn)HC-SR04在它和Photon之間的線路上容易受到噪聲的影響。數(shù)字信號(hào)不易出現(xiàn)噪聲問(wèn)題。 US-100還包括一個(gè)溫度傳感器,用于校正聲速隨溫度的變化。另一個(gè)好處是它可以在3.3V下使用,不像大多數(shù)需要5V工作良好的超聲波測(cè)距儀。為了讓它能夠存活在像這樣的全天候應(yīng)用的元件中,我焊接連接線并用5分鐘的環(huán)氧樹(shù)脂封裝電路板。圖為我的坦克通風(fēng)帽,傳感器用熱膠固定。煤油(加熱油)幾乎不像汽油一樣易揮發(fā)或易燃,因此這類(lèi)裝置幾乎沒(méi)有爆炸危險(xiǎn)。 (顯然,如果你測(cè)量的是更易燃的液體,你需要小心地將任何電子設(shè)備與蒸汽隔離開(kāi)來(lái))
香蕉機(jī)器人以5美元的價(jià)格銷(xiāo)售US-100,并且在數(shù)字(串行數(shù)據(jù))和模擬(脈沖寬度)模式下可以找到最佳描述,您可以通過(guò)跳線選擇它。如果您在本Instructable的末尾掃描我的代碼,您將看到只需要通過(guò)Photon的TX線向US-100發(fā)送一個(gè)命令(0x55或0x50)來(lái)查詢傳感器,它將在幾毫秒內(nèi)通過(guò)RX回復(fù)以mm為單位的距離或以攝氏度為單位的溫度。
第3步:錯(cuò)誤的回聲問(wèn)題 - 錯(cuò)誤修復(fù)!

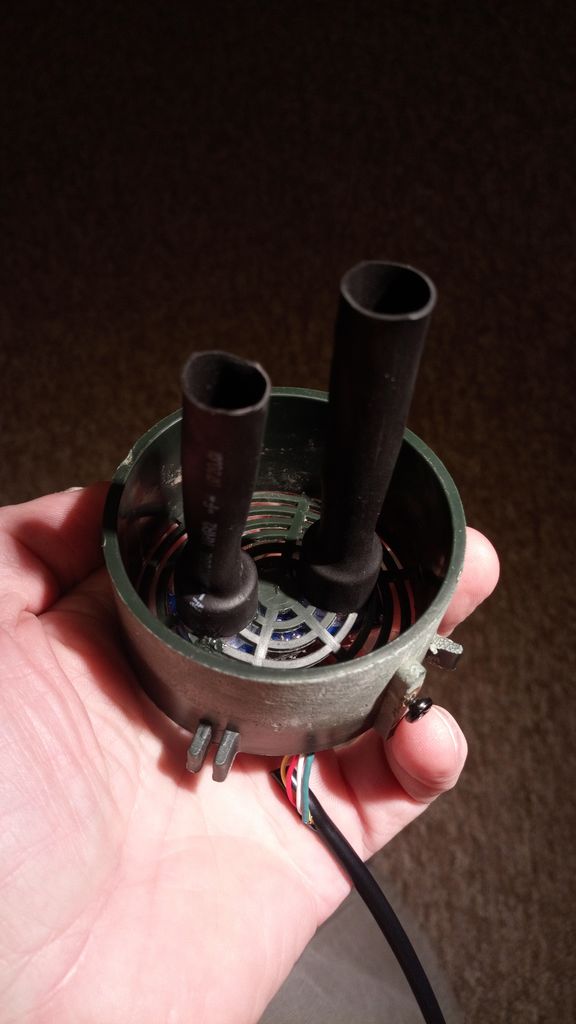
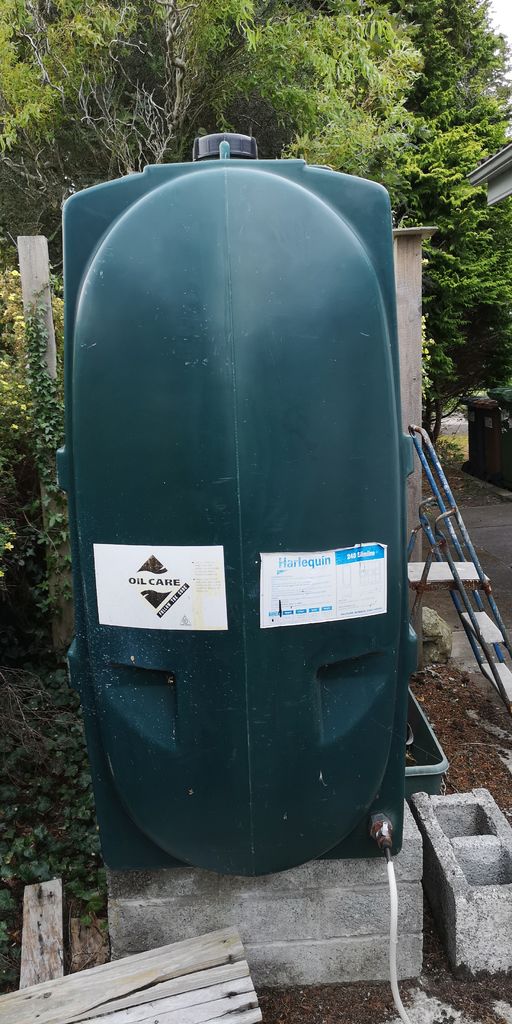
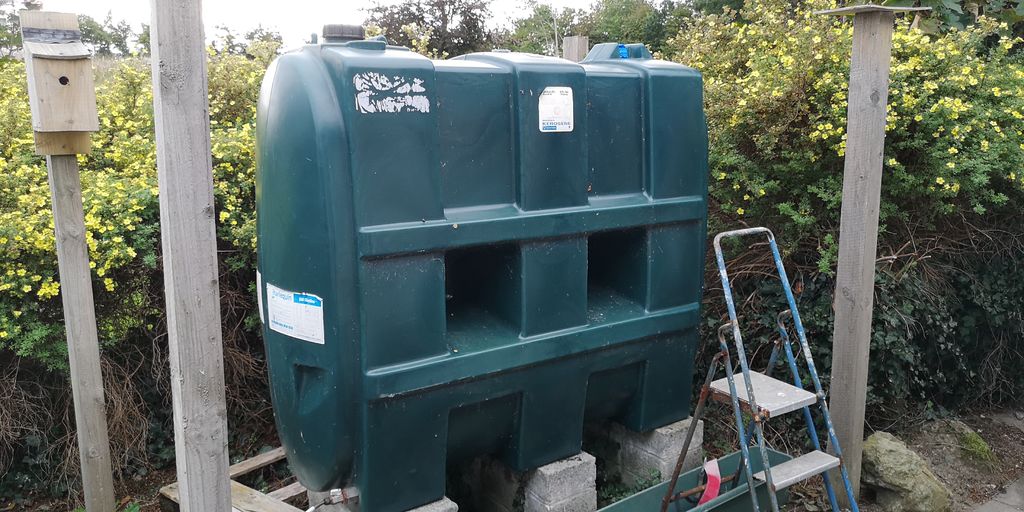
正如你在照片中看到的那樣,我的坦克有很多內(nèi)部結(jié)構(gòu)形狀,這給我?guī)?lái)了許多問(wèn)題,這些錯(cuò)誤的回聲并非來(lái)自油面。即使鍋爐正在燃燒燃油,油耗也會(huì)在某些時(shí)候停止。在油位下降,暴露內(nèi)部油箱結(jié)構(gòu)之前,不會(huì)發(fā)現(xiàn)虛假回波問(wèn)題。我成功地將超聲波束與10cm的熱縮管聚焦在發(fā)送和接收傳感器上(見(jiàn)圖)。但是這種方法對(duì)我如何將蓋子放回油箱非常敏感。比起小型熱縮管好,我想出了一個(gè)想法,事實(shí)證明,這個(gè)想法很久以前就被發(fā)明了,被稱(chēng)為“靜止管”。我的是PVC管,從罐的最底部延伸到頂部,超聲波應(yīng)答器放置在其頂端內(nèi)。在其底端有兩個(gè)凹口,允許油從下方輕松地從管道中流入和流出管道,因此管道內(nèi)的水平始終與水箱的其余部分相同。它被稱(chēng)為靜止管,因?yàn)榧词乖谔畛溥^(guò)程中,內(nèi)部的水平也會(huì)相對(duì)平坦和平靜。 (這在校準(zhǔn)期間很重要。)并且因?yàn)楣艿赖膬?nèi)表面非常光滑,所以不需要擔(dān)心錯(cuò)誤的回聲。 除了earwigs!我很少隨機(jī)獲得奇怪的讀數(shù)。當(dāng)我拿下帽子進(jìn)行調(diào)查時(shí),我看到大約5個(gè)蠕蟲(chóng)漏掉了,一個(gè)人朝著PVC管道走去!我認(rèn)為我的數(shù)據(jù)中的錯(cuò)誤不是由于我的代碼中的錯(cuò)誤,而是我的坦克中的實(shí)際錯(cuò)誤,這很滑稽!現(xiàn)在,我已經(jīng)用丁腈手套和一些硅橡膠更加安全地關(guān)閉了通風(fēng)帽,以“調(diào)試”它,并阻止了穗和蜘蛛在那里開(kāi)店。它不是一個(gè)完美的密封,允許坦克中的空氣膨脹和收縮。
步驟4:粒子光子是和不是Arduino

此IoT項(xiàng)目需要一個(gè)帶Wifi的微處理器。我選擇了粒子光子,因?yàn)檫@是Ventz用于他的坦克監(jiān)視器的。
如果我現(xiàn)在開(kāi)始這個(gè)項(xiàng)目,我可能會(huì)使用Arduino.cc提供的一個(gè)支持WiFi的Arduinos,例如Arduino MKR WiFi 1010。我對(duì)粒子光子并不滿意,但他們基本上創(chuàng)建了自己的并行Arduino類(lèi)宇宙,而不僅僅是讓他們的產(chǎn)品可以與Arduino IDE一起使用。他們的Web IDE非常類(lèi)似于Arduino IDE,但您可能想要使用的每個(gè)庫(kù)都必須由他們導(dǎo)入和驗(yàn)證才能輕松地將其添加到草圖中。像通過(guò)USB重新編程Photon或甚至使用串行監(jiān)視器進(jìn)行調(diào)試一樣簡(jiǎn)單,因?yàn)樗枰惭b軟件層(Homebrew,dfu-util,NPM,Xcode等)并學(xué)習(xí)命令行接口(CLI)。他們希望您通過(guò)無(wú)線方式重新編程(OTA),但這并不總是可行的,因?yàn)樵O(shè)備在大多數(shù)時(shí)間處于脫機(jī)狀態(tài)并且處于休眠狀態(tài)。由于MacOS X High Sierra的過(guò)度安全性變化,很難安裝Particle的CLI。盡管Particle的在線文檔通常非常好,但導(dǎo)航和查找內(nèi)容卻過(guò)于復(fù)雜。我通常只是放棄并使用谷歌搜索。從好的方面來(lái)說(shuō),Particle的客戶服務(wù)優(yōu)秀,并且問(wèn)題會(huì)在一天或更短的時(shí)間內(nèi)得到技術(shù)支持的詳細(xì)回復(fù)。另一種選擇是使用ESP32,它現(xiàn)在似乎在Arduino IDE中具有相當(dāng)不錯(cuò)的功能,并且整體功耗更低。
Photon是一款3.3V器件,由microUSB(5V)或3.6供電其Vin引腳為-5.5V。它的數(shù)字輸入均為5V耐壓(“FT”),但其模擬引腳不是。確保不要對(duì)它們施加超過(guò)3.3V的電壓。
步驟5:電池:密封的鉛酸凝膠電池

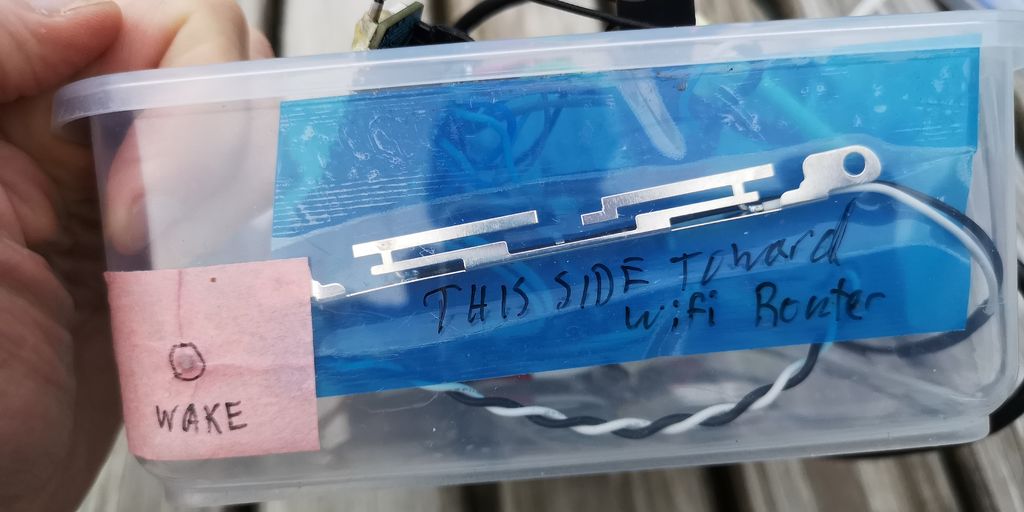
我第一次嘗試使用LiPo電池,但很快發(fā)現(xiàn)當(dāng)溫度低于冰點(diǎn)時(shí),它幾乎毫無(wú)價(jià)值。這就是為什么電動(dòng)汽車(chē)需要電池加熱器才能在冬季獲得合理的范圍。據(jù)我所知,在寒冷的冬天早晨開(kāi)始使用老式汽油/汽油車(chē)時(shí),鉛酸電池在寒冷中運(yùn)作良好。通過(guò)在冰凍條件下充電,可以迅速破壞LiPo。
我使用的電子設(shè)備在激活時(shí)吸收大約80 mA,可能用于WiFi連接的很多。
所以從理論上說(shuō),這個(gè)電池應(yīng)該可以為系統(tǒng)供電幾天沒(méi)有太陽(yáng)。由于愛(ài)爾蘭可能有超過(guò)幾天的陰天,我通常會(huì)在每次循環(huán)結(jié)束時(shí)讓我的Photon睡5-10分鐘,如下所示:
System.sleep(WAKEPIN, RISING, SleepSecs);
WAKEPIN連接到瞬時(shí)開(kāi)關(guān)(將線路從0上拉至3.3V),我可以使用它來(lái)幫助重新編程Photon,而無(wú)需打開(kāi)盒子,如果它正在睡覺(jué)。我還在循環(huán)中添加了大約10秒的延遲,因此如果我正確計(jì)時(shí),我可以通過(guò)WiFi重新閃爍Photon OTA(無(wú)線),然后再進(jìn)入睡眠狀態(tài)。
這些鉛酸電池是“密封的”,但有一個(gè)通風(fēng)口,當(dāng)快速充電時(shí)會(huì)散發(fā)出易燃的氫氣,因此最好確保外殼上有某種防雨通風(fēng)口。
第6步:Oilwatcher原理圖


這里我已經(jīng)勾畫(huà)了整個(gè)項(xiàng)目的接線圖。它經(jīng)歷了許多版本和升級(jí),都散落在我的制造商筆記本電腦中。所以我把它拿下來(lái),打開(kāi)盒子,然后回溯現(xiàn)在的一切。它并不完美,但它有效!。..有關(guān)設(shè)置裝飾罐的信息,請(qǐng)參閱校準(zhǔn)步驟。
我歡迎您提出改進(jìn)建議和想法。如果您為自己制作版本,請(qǐng)?jiān)谠u(píng)論中告訴我們,或者更好,編寫(xiě)自己的Instructable!
步驟7:太陽(yáng)能和安裝
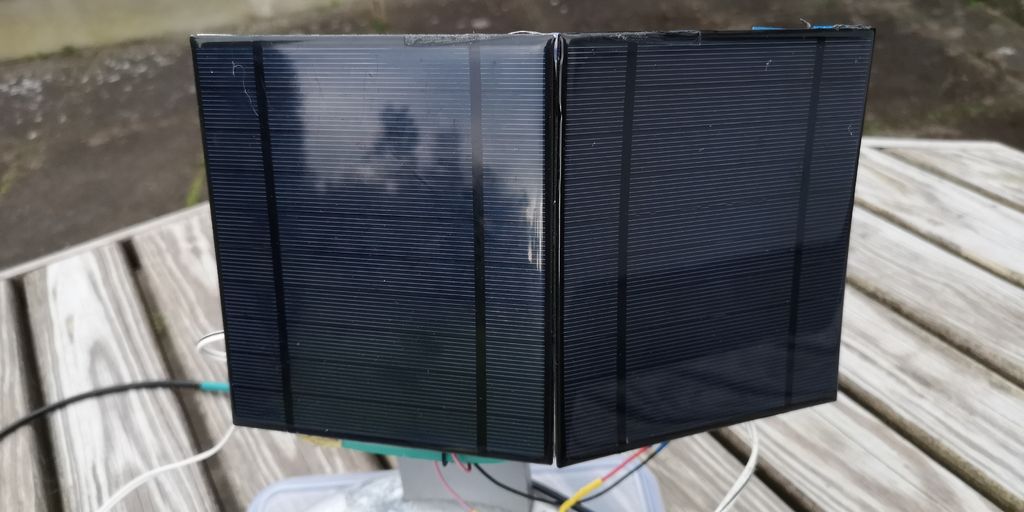


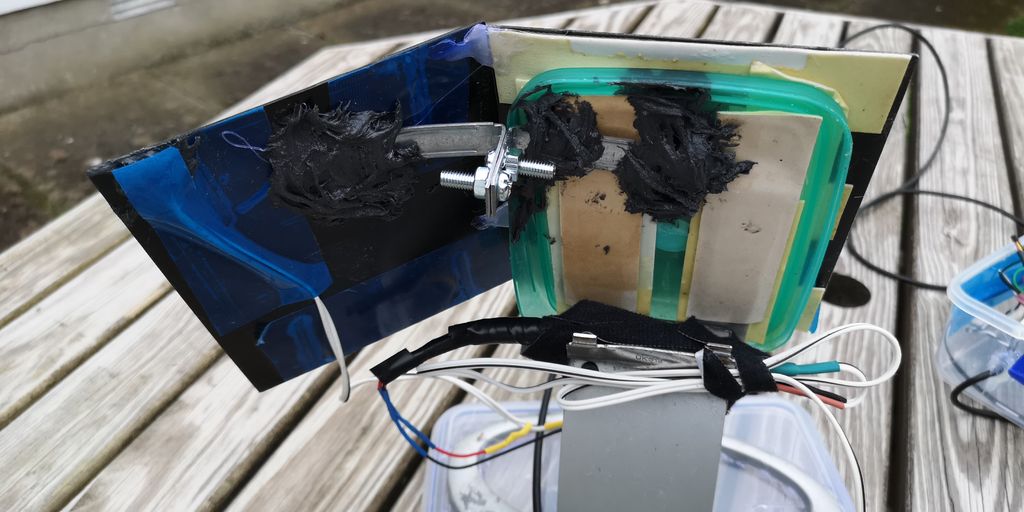
我通過(guò)低壓差可調(diào)電壓調(diào)節(jié)器焊接兩個(gè)串聯(lián)的太陽(yáng)能電池板,為“6V”鉛酸電池充電(MIC29302)。這些面板的額定電壓為5V 500mA 2.5W,每個(gè)面板為13 x 15cm。它們絕對(duì)沒(méi)有電路,只有太陽(yáng)能電池,所以我將可調(diào)電壓調(diào)節(jié)器設(shè)置為7.3V,電池前面說(shuō)的是一個(gè)很好的充電電壓。我發(fā)現(xiàn)太陽(yáng)能電池板在昏暗的燈光下成為放電的好方法。我發(fā)明了太陽(yáng)能電池板除霜系統(tǒng)!所以我將一個(gè)二極管串聯(lián)起來(lái),以確保電流僅從它們流入電池而不是電池。確保它是一個(gè)堅(jiān)固的二極管,因?yàn)槌潆婋娏骺赡芨哌_(dá)1A。務(wù)必使用環(huán)氧樹(shù)脂或硅橡膠防風(fēng)雨,以免腐蝕。與我的老鼠窩不同,將所有暴露的PCB引線,焊料,電線等絕緣,以防止釋放出使其全部工作的神奇煙霧。對(duì)于我的外部DS18B20溫度傳感器,我選擇了更昂貴的防水版本。
為了給Photon供電,我將電池連接到Adafruit的Verter Buck/boost轉(zhuǎn)換器。這可以采用各種直流電壓(3-12VDC)并將其轉(zhuǎn)換為Photon通過(guò)其微型USB端口所需的5VDC。因此,我的Oilwatcher一直在黑暗中工作,直到鉛酸電池真的死了。與LiPo電池不同,鉛酸凝膠電池不會(huì)因完全放電而損壞。
我在太陽(yáng)能電池板上安裝了幾個(gè)金屬支架和一些強(qiáng)力防風(fēng)雨環(huán)氧樹(shù)脂膏(PC-7)電腦顯示器支架。我在Artificial Window Instructable項(xiàng)目中有幾個(gè)看臺(tái)。您應(yīng)該仔細(xì)定位并指向您的太陽(yáng)能電池板,以避免陰影和收集最多的陽(yáng)光,特別是在較短的冬季。出于這個(gè)原因,我把它們瞄準(zhǔn)在正午的太陽(yáng)高度,在冬日,并有一個(gè)面板傾斜,以捕捉更多的早晨的陽(yáng)光和一個(gè)更多的午后陽(yáng)光。通過(guò)監(jiān)控充電電流,您可以優(yōu)化此功能。根據(jù)您的自由度,有些應(yīng)用和網(wǎng)站也可以提供幫助。您應(yīng)該牢固地安裝面板以抵御風(fēng)和其他外部危險(xiǎn)。我的是一個(gè)4x4的木柱子,用來(lái)?yè)踝∥覀兲箍酥車(chē)臇艡凇?/p>
步驟8:校準(zhǔn):體積和電壓


油箱mm到L校準(zhǔn)
制作一個(gè)有用的設(shè)備來(lái)測(cè)量你剩下多少升(或加侖)在您的坦克中,您需要將測(cè)距儀的信號(hào)(毫米(或厘米))轉(zhuǎn)換為升。如果坦克是垂直圓柱體或完美的矩形棱柱,這將是一個(gè)簡(jiǎn)單的問(wèn)題,測(cè)量坦克的尺寸和做一些數(shù)學(xué)。但是如你所見(jiàn),我的坦克是一個(gè)凸出的橢圓形,中間有兩個(gè)空洞,各種山脊和諸如此類(lèi)的東西。這向我表明,1厘米的回波距離變化將代表不同水平的不同數(shù)量的升。為了直接測(cè)量體積隨油位變化的變化,我寫(xiě)了一個(gè)草圖,以便在油箱加注過(guò)程中盡快收集數(shù)據(jù)(考慮到Particle Photon云服務(wù)的限制,大約每2秒鐘)。我假設(shè)裝滿水箱的卡車(chē)有一個(gè)泵,它以恒定的流速泵送,駕駛員用大杠桿設(shè)置。卡車(chē)正在仔細(xì)計(jì)量交付的量(總共1000升)。我很驚訝地看到在填充過(guò)程中收集的應(yīng)答器數(shù)據(jù)的附圖中,曲線在整個(gè)范圍內(nèi)非常線性!也許坦克設(shè)計(jì)師調(diào)整了坦克中心的空隙,以補(bǔ)償其中心增加的寬度。我將時(shí)間軸轉(zhuǎn)換為升,并使用曲線的線性擬合測(cè)量轉(zhuǎn)換因子:1.10 L/mm。我還注意到當(dāng)油箱空了時(shí)轉(zhuǎn)發(fā)器讀數(shù),這意味著當(dāng)龍頭吸入空氣并且鍋爐停止時(shí)。事實(shí)證明我的坦克是1304毫米。這對(duì)于設(shè)置有用的警報(bào)很重要;你需要知道鍋爐什么時(shí)候退出,而不是在水箱干燥的時(shí)候。 (套管不夠低,無(wú)法將油箱排干。)
電壓和電流校準(zhǔn)
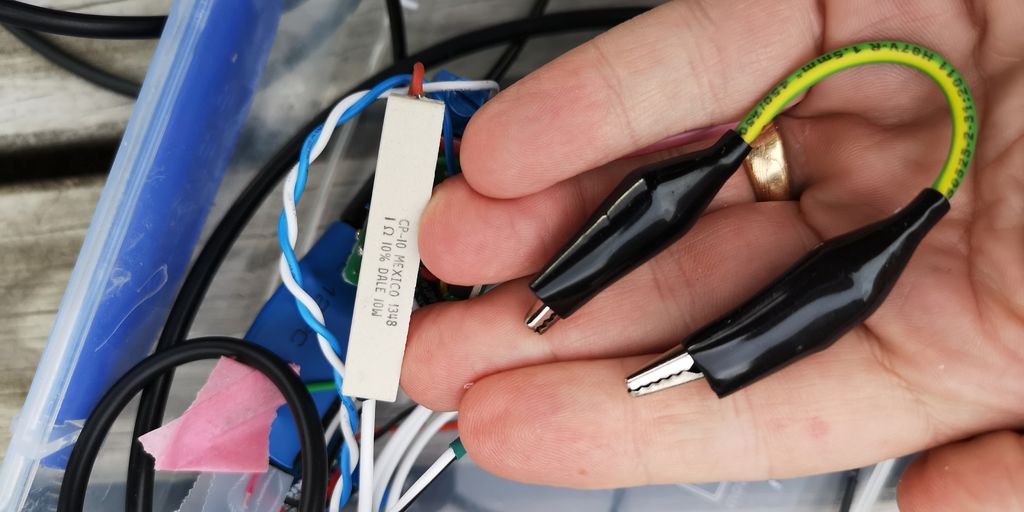
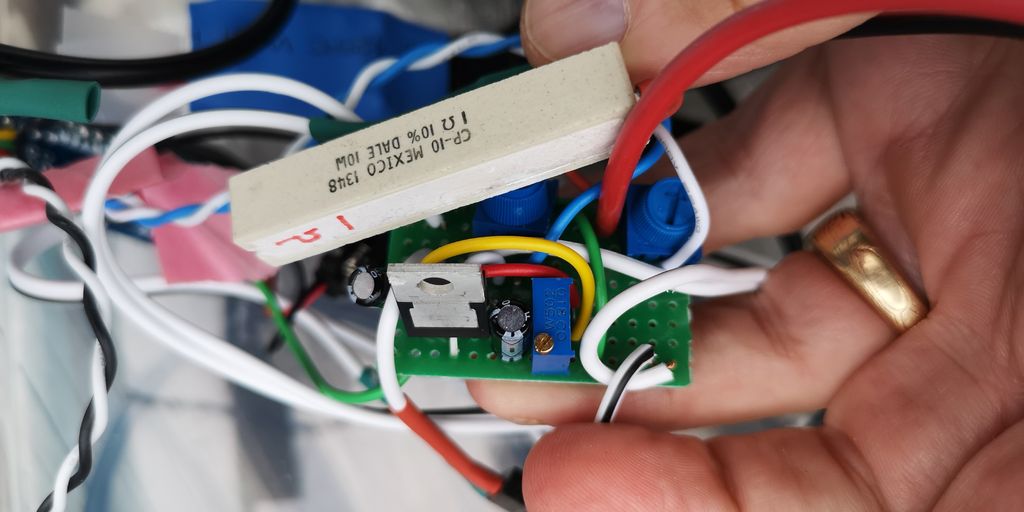
我想要校準(zhǔn)的另一件事是,預(yù)測(cè)如果連續(xù)陰天太多,電池何時(shí)會(huì)死亡,是整個(gè)系統(tǒng)吸收的電流和電池電壓。為此,我使用1歐姆分流電阻與電池的(+)電源串聯(lián)制作了一個(gè)粗略的“高端”雙向電流傳感器。我測(cè)量該電阻相對(duì)于地的每一側(cè)(“抽頭”)的電壓。兩個(gè)測(cè)量電壓之間的差值,或該電阻上的電壓降與通過(guò)它的電流成正比(歐姆定律,I = V/R)。當(dāng)R = 1歐姆時(shí),I = V,所以80mV是80mA。我將每個(gè)抽頭電壓除以一個(gè)已知量(約7/3因子,使7.2V降至~3.3V)和分壓器(10k微調(diào)電位器,參見(jiàn)本Instructable后面的原理圖),以防止超過(guò)3.3V最大值Photon的模擬輸入。所以我使用了兩個(gè)Photon的模擬輸入線來(lái)測(cè)量這個(gè)電壓降(另一個(gè)用來(lái)測(cè)量Vbatt)。為了校準(zhǔn)這種設(shè)置,我使用具有良好電流讀數(shù)的數(shù)字臺(tái)式電源為整個(gè)設(shè)備供電,并在各種條件下獲得電流測(cè)量:WiFi連接和光子激活(~90 mA)和休眠(~1-4mA)。因?yàn)?歐姆電阻上的電壓降,特別是在分壓器之后,實(shí)際上很小(并且光子的A/D線只有12位= 4096級(jí)),我需要平均100次測(cè)量以獲得合理的無(wú)噪聲當(dāng)前值。這些可以很快收集。理想情況下,我應(yīng)該制作一個(gè)差分放大器來(lái)增強(qiáng)電流信號(hào),但這種簡(jiǎn)單的平均方法非常適合測(cè)量雙向電流(充電和放電)。我嘗試使用10歐姆分流器來(lái)增加信號(hào),但光子無(wú)法通過(guò)它獲得足夠的汁液來(lái)工作。它陷入了掉電模式。我可以使用小于10k的微調(diào)電池來(lái)獲得更好的抗噪性,但是會(huì)浪費(fèi)電池加熱微調(diào)電位器。 1k將是每個(gè)裝配罐浪費(fèi)7mA。
因此,模擬線路為我提供0-4095的數(shù)字單位,并且通過(guò)臺(tái)式電源進(jìn)行電流和電壓測(cè)量,我能夠?qū)⑥D(zhuǎn)換因子放入我的草圖(見(jiàn)最后一步的代碼)。顯然,您需要自己校準(zhǔn)設(shè)置以獲得良好的數(shù)據(jù)。
我意識(shí)到我不需要使用單獨(dú)的模擬輸入線和自己的分壓器來(lái)測(cè)量Vbatt,但我保留了因?yàn)樗诟拍钌细逦⑶乙驗(yàn)殡娏鞅O(jiān)視器抽頭必須對(duì)稱(chēng)地位于1歐姆電阻旁邊。 (在添加電流測(cè)量系統(tǒng)之前,我已經(jīng)在單獨(dú)的電路板上安裝了電壓監(jiān)控器。)
步驟9:使用Pushbullet發(fā)送警報(bào)
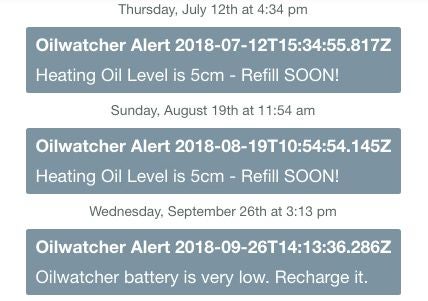
Pushbullet是一種跨平臺(tái)的警報(bào)和消息服務(wù)。您的Photon草圖將包含一些“警報(bào)”消息,這些消息將“發(fā)布”到粒子云,例如,當(dāng)油位低于某個(gè)閾值時(shí)。在手機(jī)上安裝Pushbullet應(yīng)用程序,它將回顯您希望所有其他設(shè)備發(fā)送的任何警報(bào),通知和消息。因此,一旦你正確設(shè)置,就很難錯(cuò)過(guò)重要的“油低!”警告您的Oilwatcher設(shè)備將啟動(dòng)。
在pushbullet.com上注冊(cè)一個(gè)帳戶并閱讀其API(應(yīng)用程序編程接口)上的文檔。您還可以閱讀粒子控制臺(tái) - 集成部分的關(guān)鍵背景:https://docs.particle.io/guide/tools-and-features/。..
當(dāng)您開(kāi)始不堪重負(fù)時(shí),請(qǐng)閱讀Ventz Petkov的博客是關(guān)于如何設(shè)置的一步一步。
https://blog.vpetkov.net/2017/11/12/diy-monitor-heating-oil-tank-gallons-with-pushbullet-sms-and-email-alerting/
他還介紹了如何開(kāi)始使用粒子光子。這個(gè)過(guò)程的很多截圖都在他的Instructable中。他提到他轉(zhuǎn)移到Pushover而不是Pushbullet,所以有一些選項(xiàng)可以確切地實(shí)現(xiàn)如何在手機(jī)上獲取警報(bào)。
步驟10:使用ThingSpeak記錄和共享您的數(shù)據(jù)

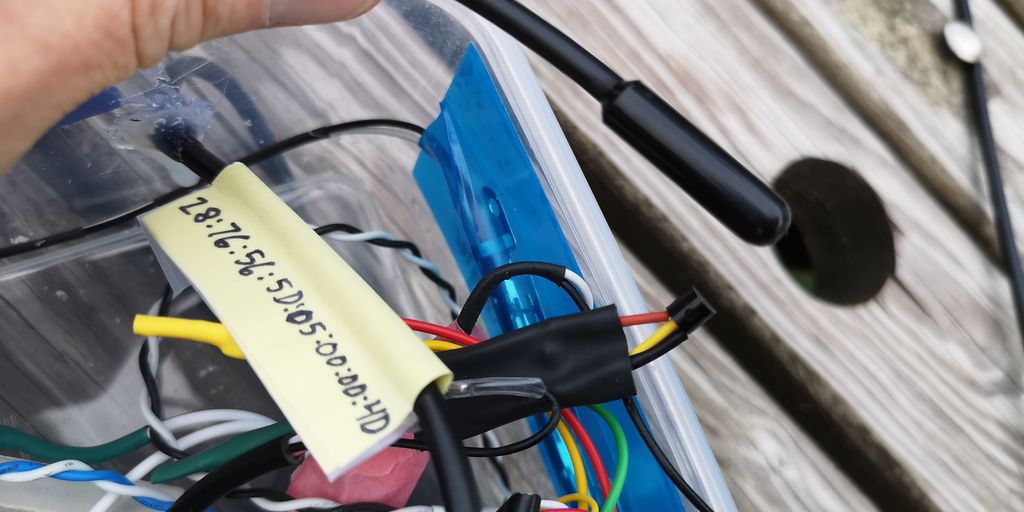
如果您只是想生活并忘記加熱油,直到它耗盡,你可以跳過(guò)這一部分。
對(duì)于那些對(duì)我們?cè)谝荒曛胁煌瑫r(shí)間使用多少油的科學(xué)和令人討厭的細(xì)節(jié)感興趣的人,或者發(fā)生了多少陽(yáng)光或寒冷,ThingSpeak是給你的!太陽(yáng)能電池板作為太陽(yáng)傳感器,以及我項(xiàng)目中包含的溫度傳感器,我正在慢慢建立一個(gè)合適的氣象站! Thingspeak是一個(gè)收集和分析任何類(lèi)型數(shù)據(jù)的地方,使用大量圖表,如果您愿意,可以使用復(fù)雜的數(shù)學(xué)。它由The MathWorks創(chuàng)建,他也創(chuàng)建了Matlab,這是像我這樣處理大數(shù)據(jù)的科學(xué)家的最?lèi)?ài)。 “使用MATLAB分析的開(kāi)放式物聯(lián)網(wǎng)平臺(tái)”是他們的標(biāo)語(yǔ)。您可以將其全部保密,或與全世界分享您的數(shù)據(jù),就像我在這里所做的那樣。您可以讓Photon草圖每隔幾秒在其云端的通道中將最多8個(gè)不同的變量寫(xiě)入“字段”。在ThingSpeak創(chuàng)建帳戶后,創(chuàng)建一個(gè)頻道作為收集和處理數(shù)據(jù)的地方。請(qǐng)注意其頻道編號(hào)。使用字段名稱(chēng)設(shè)置頻道并記下其字段編號(hào)。然后,您可以從API密鑰選項(xiàng)卡中獲取API密鑰。在Oilwatcher草圖設(shè)置中使用它:
unsigned long ThingSpeakChannelNumber = 123456;
const char * ThingSpeakWriteAPIKey = “THIS1ISAFAKEKEY45678”;
在主循環(huán)中,每當(dāng)感興趣的變量更新為新值時(shí),調(diào)用ThingSpeak.setField(5, US100tempData); // Field 5 is for the US-100‘s onboard temperature sensor
ThingSpeak.setField(6, litres_of_oil); // Field 6 is for my Litres Remaining data
并接近每個(gè)循環(huán)的結(jié)束草圖,您可以一次性發(fā)送所有數(shù)據(jù)字段:ThingSpeak.writeFields(ThingSpeakChannelNumber, ThingSpeakWriteAPIKey);
然后在您的頻道的私人和/或公共視圖選項(xiàng)卡中,創(chuàng)建數(shù)據(jù)的可視化(圖表),每次新的一組時(shí),它們都會(huì)自動(dòng)更新數(shù)據(jù)由草圖廣播。
步驟11:Oilwatcher草圖
附件是.ino文件,它是我的Oilwatcher代碼AKA Photon的固件。 .zip文件還包含Rob Tillaart名為RunningMedian的庫(kù),尚未在Particle的Web IDE上使用。我在這里得到了該庫(kù)的最新版本:
https://github.com/RobTillaart/Arduino/tree/master 。..
頂部包含的其他庫(kù)位于Particle的庫(kù)中,但不要忘記在項(xiàng)目中實(shí)際#包含以使代碼正確編譯。
如果你決定使用我所包含的所有鈴聲和口哨聲,比如當(dāng)前的監(jiān)聽(tīng),ThingSpeak等,你必須個(gè)性化的草圖標(biāo)題中會(huì)有一些常量。當(dāng)然,必須仔細(xì)設(shè)置代碼發(fā)出警報(bào)的油位。
快樂(lè)黑客!
請(qǐng)?jiān)谙旅嫣砑幽脑u(píng)論和問(wèn)題。..
這是我的Oilwatcher草圖(也包含在此步驟中):
/*
OilWatcherus100 sketch by Steve M. Potter steve.potter at gmail.com
To monitor heating oil tank level remotely, and send Pushbullet alerts when fuel is getting low.
Uses the Particle Photon board, Adafruit’s Verter voltage buck-boost converter, an additional adjustable voltage regulator, and PushBullet
Verter is available in EU from Pimoroni https://shop.pimoroni.com/products/verter-5v-usb-buck-boost-500ma-from-3v-5v-1000ma-from-5v-12v
Uses US-100 ultrasonic rangefinder.
Inspired by code and design by Ventz: https://blog.vpetkov.net/2017/11/12/diy-monitor-heating-oil-tank-gallons-with-pushbullet-sms-and-email-alerting/
and also from his Instructable: https://www.instructables.com/id/Monitor-Heating-Oil-Tank-Gallons-With-Email-SMS-an/
Last update 2018-10-03
Code is kept on http://build.particle.io called “OilWatcherUS100”
*/
// Libraries to include:
#include “RunningMedian.h” // by Rob.Tillaart at gmail.com
#include // for data logging and analysis, e.g. see https://thingspeak.com/channels/377827
#include // For the DS18B20 digital temperature sensors
#include // For the DS18B20 digital temperature sensors
//#include // Improved communication to the HC-SR04 ultrasonic rangefinder, by Tim Eckel
// Only for use in analog pulse mode.
// CONSTANTS:
#define VBATT A1 // blue wire. Monitors the voltage of the battery, through a 1/10 voltage divider.
#define POSCURPIN A4 // white Wire attached to one side of a 1-ohm shunt resistor in series with the battery, then a voltage divider.
#define NEGCURPIN A5 // blue Wire attached to the other side of a 1-ohm shunt resistor in series with the battery, then a voltage divider.
#define TEMPPIN D5 // yellow Onewire data line for temperature probe.
#define MAX_DISTANCE 1400 // Maximum distance we want to ping for (in mm)。
#define ONBOARDLED D7
#define WAKEPIN A2 // white wire, to wake from sleep with button.
#define SENSORS 2 // number of DS18B20 temperature sensors
// Variables:
TCPClient client; // for ThingSpeak
byte mac[6]; // the MAC address of the Photon
int battThreshold = 30; // Percent (from Dead to Full) below which a LOW BATTERY! warning is triggered (should be 》 2.5V)。
double FullChargeVolts = 6.5; // set for battery being used.
double DeadBattVolts = 5.5; // Lead Acid batt voltage that the system fails.
float voltage = 0.0; // Variable to keep track of battery voltage
double BattVolts = 0.0;
double battCalib = 2.16; //correction factor. TO RECALIBRATE THIS, measure batt at its terminals with o-scope.
double soc = 0.0; // Variable to keep track of battery‘s state-of-charge (SOC)
bool battalert = LOW; // Variable to keep track of whether battery alert has been triggered
double currentConversion = 2.27; //To convert A/D counts to mA of current in and out of the battery.
float BattCurrent = 0.0;
int negCurCounts;
int posCurCounts;
int negCurOffset = 0;
int posCurOffset = -27; // to calibrate the current-measuring lines, jumper the 1ohm resistor and make current zero.
int CurCountsDiff = 0;
int cm = 0; // Distance between sensor and oil surface. NewPing returns it in whole cm.
bool LowOilAlert = LOW; // Goes high when oil level gets below threshold (50mm presently)
int cm_of_oil = 200; // This is zero when it gets down to the spigot, not the bottom of the tank.
int mm_of_oil = 2000; //This is zero when it gets down to the spigot, not the bottom of the tank.
int litres_of_oil = 0;
int ZeroOilmm = 1304; // When my tank begins to suck air, the mm reading is this.
int difference = 0; // variable to hold temporary info during calculations
int q; // for loop counters.
int SleepSecs = 60; // seconds for device to sleep each loop.
unsigned long lastUpdate = 0;
float BoxCelsius = NAN;
float OutsideCelsius = NAN;
String BoxTempStr;
String OutsideTempStr;
DS18B20 TempSensors(TEMPPIN); //Sets name for calls to DS18B20 library, Pin D5 for 1-wire Temp Sensors.
retained uint8_t sensorAddresses[SENSORS][8]; // DS18B20 addresses retained across deep sleep in backup RAM as long as power is on VBAT or VIN of Photon
unsigned long ThingSpeakChannelNumber = ; //Enter your Channel number
const char * ThingSpeakWriteAPIKey = “”; // Enter your API key
// US-100 ultrasonic rangefinder:
unsigned int MSByteDistance = 0;
unsigned int LSByteDistance = 0;
unsigned int mmDistance = 0;
int Median_mm = 0; // Some of these I tried to use unsigned int and got an “ambiguous” compile error.
int TempmmDistance = 0;
int US100tempData = 0;
int junk;
unsigned long beginmillis = 0;
unsigned long nowmillis = 0;
unsigned long elapsedmillis = 0;
RunningMedian US100reading = RunningMedian(9);
// SETUP ______________________________________________________________________________________________
void setup() {
pinMode(ONBOARDLED, OUTPUT);
pinMode(VBATT, INPUT);
pinMode(POSCURPIN, INPUT);
pinMode(NEGCURPIN, INPUT);
pinMode(WAKEPIN, INPUT_PULLDOWN);
ThingSpeak.begin(client);
Particle.variable(“Box °C”, BoxTempStr); // temp sensor in box.
Particle.variable(“mm_of_oil”, mm_of_oil); // mm of oil remaining in tank (to spigot)。
Particle.variable(“L of Oil”, litres_of_oil); // litres of oil remaining in tank (to spigot)。
Particle.variable(“mmDistance”, mm_of_oil); // Average mm measured by rangefinder.
Particle.variable(“BattVolts”, BattVolts); // battery voltage.
Particle.variable(“BattPercent”, soc); // Li-ion battery State of Charge
Particle.variable(“Tank °C”, US100tempData); // Thermometer in ultrasonic sensor
Particle.variable(“Median_mm”, Median_mm); // Median mm measured by rangefinder.
Particle.variable(“Outside °C”, OutsideTempStr); // DS18B20 temperature outside.
Particle.variable(“Raw mm data”, TempmmDistance);
// To read the values from a browser, go to:
// http://api.particle.io/v1/devices/{DEVICE_ID}/{VARIABLE}?access_token={ACCESS_TOKEN}
STARTUP(WiFi.selectAntenna(ANT_EXTERNAL)); // selects the external antenna connector, not chip antenna.
Serial.begin(115200); // Open serial monitor at 115200 baud to see ping results.
Serial.println(“OilWatcher by Steve M. Potter. Last update 2018-10-03”);
Serial1.begin(9600, SERIAL_8N1); // for comm to/from the US-100 via RX and TX pins.
WiFi.macAddress(mac);
Serial.print(“MAC address of Photon: ”);
Serial.print(mac[0]&0x0f,HEX); // This may be in reverse order.
Serial.print(“:”);
Serial.print(mac[1]&0x0f,HEX);
Serial.print(“:”);
Serial.print(mac[2]&0x0f,HEX);
Serial.print(“:”);
Serial.print(mac[3]&0x0f,HEX);
Serial.print(“:”);
Serial.print(mac[4]&0x0f,HEX);
Serial.print(“:”);
Serial.println(mac[5]&0x0f,HEX);
TempSensors.resetsearch(); // initialise for DS18B20 temperature sensor search
for (int i = 0; i 《 SENSORS; i++)
{
TempSensors.search(sensorAddresses[i]); // try to read the 1-wire sensor addresses and if available, store them.
}
} // end setup()
// MAIN LOOP _________________________________________________________________________________________________
void loop() {
mmDistance = 0;
int DataToAvg = 9;
for (int avgloop = 1; avgloop 《 (DataToAvg + 1); avgloop++)
{
Serial1.flush(); // Clear the serial1 buffer.
Serial1.write(0x55); // Send a “distance measure” command to US-100
delay(200); // US100 response time depends on distance.
if (Serial1.available() 》= 2) // at least 2 bytes are in buffer
{
MSByteDistance = Serial1.read(); // Read both bytes
LSByteDistance = Serial1.read();//
TempmmDistance = (MSByteDistance * 256 + LSByteDistance);
Particle.publish(“Raw mm data”, String(TempmmDistance), 60, PRIVATE);
delay(200);
mmDistance = mmDistance + TempmmDistance; // calculate distance in mm. Add to running sum.
if ((TempmmDistance 》 50) && (TempmmDistance 《 MAX_DISTANCE)) // Test that the distance is in range.
{
US100reading.add(TempmmDistance); // put another datum into the buffer for a running median.
} else avgloop--; // discard this datum.
}
}
mmDistance = mmDistance/DataToAvg; // calculate the mean of N measurements.
Serial.print(“Raw mm data: ”);
Serial.print(TempmmDistance);
Median_mm = US100reading.getMedian(); // get the current running median value of mm from sensor to surface of oil.
Particle.publish(“Median_mm”, String(Median_mm), 60, PRIVATE);
Serial.print(“ Median mm data: ”);
Serial.println(Median_mm);
mm_of_oil = ZeroOilmm - Median_mm; // I determined that my boiler quits when mm = 1304.
Particle.publish(“mm_of_oil”, String(mm_of_oil), 60, PRIVATE);
delay(1000); // wait for last publish to finish.
if ((mm_of_oil 》 0) && (mm_of_oil 《 MAX_DISTANCE))
{
ThingSpeak.setField(1, mm_of_oil);
ThingSpeak.setField(7, TempmmDistance);
delay(1000); // wait for last Publish to finish.
// Calculate litres.。..Our tank is 1.10 mm/L
litres_of_oil = 0.909 * mm_of_oil; // Calibrated 2018-02-24 during tank filling.
Particle.publish(“Oil level (L)”, String(litres_of_oil), 60, PRIVATE);
ThingSpeak.setField(6, litres_of_oil);
}
// Monitor the battery voltage
voltage = 0;
for (int z = 1; z 《 101; z++) // It is pretty noisy so we take an average of 100 values.
{
voltage += battCalib * ((analogRead(VBATT) / 4096.0) * 3.3); // battery monitor is via a voltage divider.
}
voltage = (voltage/100);
BattVolts = voltage;
soc = ((voltage - DeadBattVolts) / (FullChargeVolts - DeadBattVolts)) * 100.0;
Particle.publish(“BattVolts”, String(BattVolts, 2), 60, PRIVATE);
ThingSpeak.setField(2,voltage);
delay(1000); // Can only publish 4 variables per second.
Particle.publish(“BattPercent”, String(soc, 1), 60, PRIVATE);
// Monitor the charge/discharge current. Negative values mean the solar panel is effectively charging the battery.
CurCountsDiff = 0;
for (q = 1; q 《 101; q++) // The readings are so noisy, need to average 100 of them.
{
negCurCounts = analogRead(NEGCURPIN);
posCurCounts = (analogRead(POSCURPIN) + posCurOffset);
difference = (posCurCounts - negCurCounts);
CurCountsDiff = CurCountsDiff + difference;
}
CurCountsDiff = (CurCountsDiff/100);
BattCurrent = (currentConversion * (CurCountsDiff));
Particle.publish(“BattCurrent mA”, String(BattCurrent, 0), 60, PRIVATE);
ThingSpeak.setField(4, BattCurrent);
// Send Alerts via Pushbullet:
if ((mm_of_oil 《 50) && (mm_of_oil 》 45)) // Only want Pushbullet to send a few warnings
{
Particle.publish(“Alert”, “Heating Oil Level is 5cm - Refill SOON!”, PRIVATE);
LowOilAlert = HIGH;
}
if (soc 《 battThreshold)
{
Particle.publish(“Alert”, “Oilwatcher battery is very low. Recharge it.”, PRIVATE);
battalert = HIGH;
}
// Read temperature from the US-100 ultrasonic rangefinder’s temp sensor at the top of the tank. The tank air heats up in the sun.
Serial1.flush();
while (Serial1.available() 》= 1) // seemed like flush() was not working so I added this.
{
junk = Serial1.read();
}
Serial1.write(0x50); // send command to request temperature byte.
delay(50); // temp response takes about 2ms after command ends.
if (Serial1.available() 》= 1)
{
US100tempData = Serial1.read();
if ((US100tempData 》 1) && (US100tempData 《 130))
{
US100tempData -= 45; // Correct by the 45 degree offset of the US100.
Particle.publish(“Tank °C”, String(US100tempData), 60, PRIVATE);
ThingSpeak.setField(5, US100tempData);
}
}
// Read temperature from the DS18B20 sensors in electronics box and outside.
BoxCelsius = TempSensors.getTemperature(sensorAddresses[1]); // Will it always find the 1-wire sensor addresses in the same order?
BoxTempStr = String(BoxCelsius, 1);
Particle.publish(“Box °C”, BoxTempStr, PRIVATE);
ThingSpeak.setField(3, BoxTempStr);
OutsideCelsius = TempSensors.getTemperature(sensorAddresses[0]);
OutsideTempStr = String(OutsideCelsius, 1);
Particle.publish(“Outside °C”, OutsideTempStr, PRIVATE);
ThingSpeak.setField(8, OutsideTempStr);
// Send all data to ThingSpeak for graphing and calculations.
ThingSpeak.writeFields(ThingSpeakChannelNumber, ThingSpeakWriteAPIKey);
// give time for temperature to publish before going to sleep.
delay(10000); // In case I need to reprogram it, here is a chance when it is not sleeping.
System.sleep(WAKEPIN, RISING, SleepSecs); // Turn off WiFi and pause execution, preserving variables. Wakes after set # of seconds
// A momentary button on the box allows waking for easier re-programming.
// Hit Flash very soon after hitting the wakeup button. Or just before.
//System.reset(); // This was one way to allow it to not lose its ability connect to wifi when the router‘s IP address changed during sleep.
// Disadvantage is it only loops once thru the code. No variables remembered.
} // end void loop()
-
監(jiān)控系統(tǒng)
+關(guān)注
關(guān)注
21文章
3939瀏覽量
175847
發(fā)布評(píng)論請(qǐng)先 登錄
相關(guān)推薦
如何選擇汽車(chē)油箱氣密性檢測(cè)設(shè)備?
汽車(chē)油箱蓋氣密性檢測(cè)儀的保養(yǎng)方法-岳信儀器
DL/T 1305-2013變壓器油介損測(cè)試儀通用技術(shù)條件
變壓器油滲漏原因分析及處理方法
油浸變壓器與干式變壓器區(qū)別
VirtualFlow案例|油箱燃油晃動(dòng)模擬,高效分析管路及油箱內(nèi)油面變化
電纜油位監(jiān)測(cè)裝置 液位監(jiān)測(cè) 數(shù)據(jù)遠(yuǎn)傳 補(bǔ)償裝置
求幫助設(shè)計(jì)一個(gè)labview簡(jiǎn)易油箱測(cè)量計(jì)
絕緣油介電強(qiáng)度測(cè)試儀校驗(yàn)裝置組成——每日了解電力知識(shí)
電纜油位監(jiān)測(cè)裝置|參數(shù)|特點(diǎn)|分析
絕緣油介電強(qiáng)度測(cè)試儀檢定裝置如何使用呢?——每日了解電力知識(shí)
加油站液位遠(yuǎn)程監(jiān)控系統(tǒng)解決方案
液位傳感器在發(fā)電機(jī)設(shè)備的液位控制
光耦檢測(cè)儀的制作方法有哪些
實(shí)用小知識(shí):如何檢測(cè)油箱蓋是否關(guān)閉?


 油箱油位監(jiān)控儀的制作


評(píng)論