第1步:你需要的東西: -
以下列出了您需要的東西: -
1。伺服電機x 5
美國鏈接: - https://amzn.to/2OxbSH7
歐洲鏈接: - https://amzn.to/2Ddr6Pw
2。電位計x 5(我使用過100k。)
美國鏈接: - https://amzn.to/2ROjhDM
歐洲鏈接: - https://amzn.to/2AYlhE7
3。 Arduino UNO。 (您也可以使用Arduino Nano)
美國鏈接: - https://amzn.to/2DBbENW
歐洲鏈接: - https://amzn.to/2zHCQX7
4 。面包板。 (我建議使用此套件)
美國鏈接: - https://amzn.to/2Dy86w4
歐洲鏈接: - https://amzn.to/2AZa5ao
5。電池。 (可選,我使用的是5v適配器)
6。紙板/木板/太陽板/丙烯板可用或易于找到。
您還需要安裝Arduino IDE。
步驟2:制作手臂: -
在這里,我使用冰棍棒制作手臂。您可以使用任何可用的物資。你可以嘗試不同的機械設計,以制造更好的手臂。我的設計不是很穩定。
我只是用雙面膠帶將舵機粘在冰棒上并用螺絲固定。
對于Master臂我將電位器粘在冰棒上棍棒和手臂。
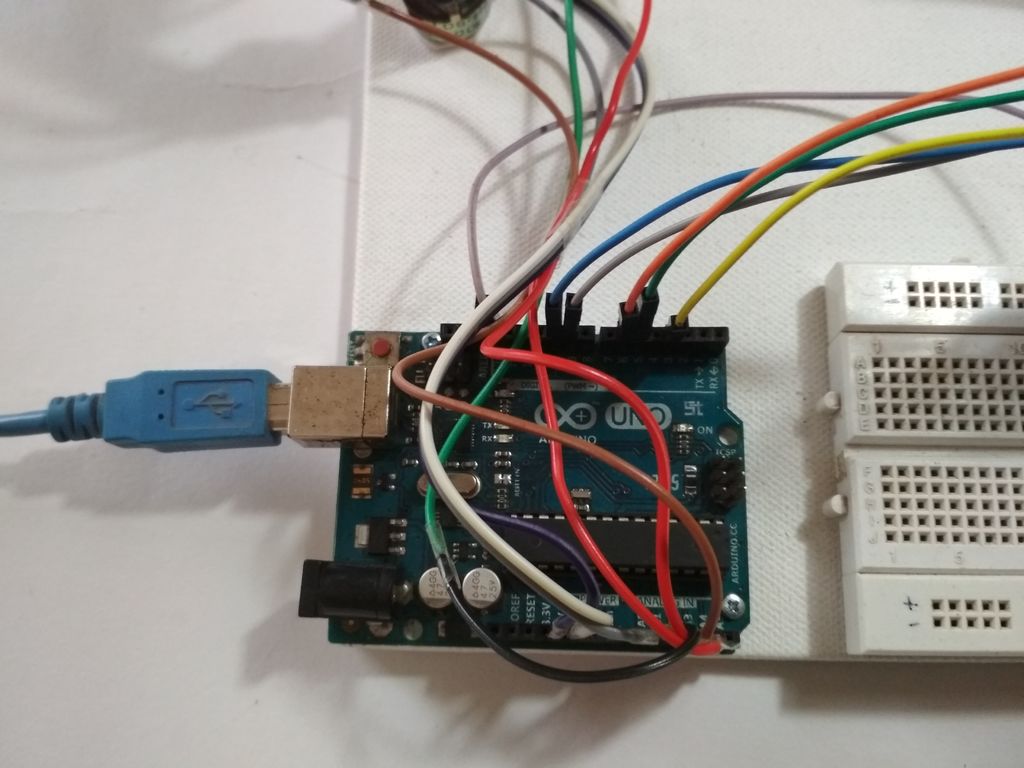
參考圖片會給你一個更好的主意。
我已將所有東西安裝在用作基礎的A4尺寸帆布板上。
步驟3:建立連接: -


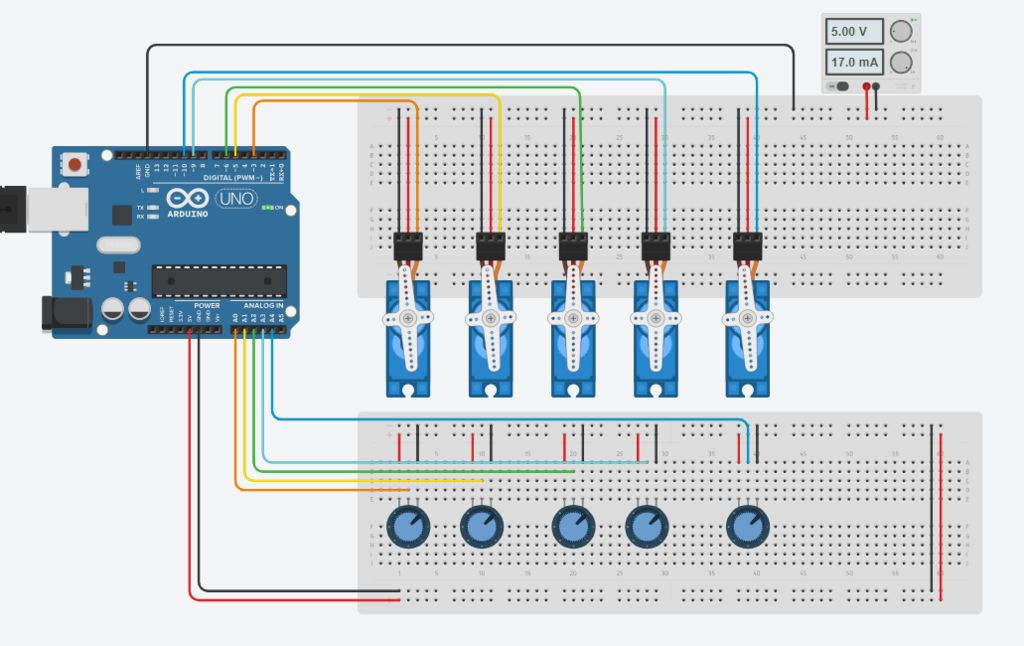
在此步驟中,我們將進行所有必要的連接,請參閱上面的圖片。
首先連接所有伺服器與電源并聯(紅線至+ ve和黑線或棕線至Gnd)
然后將信號線(即黃線或橙線)連接到arduino的PWM引腳。
現在將電位器并聯連接到+ 5v和arduino的Gnd。
此處數字引腳3,5,6,9和10用于控制伺服電壓
模擬引腳A0至A4用于電位計輸入。
連接到引腳3的伺服將由連接到A0的電位器控制
連接到引腳5的伺服將由A1上的電位器控制,依此類推。..。
注意: - 即使Servos不是由arduino供電,也要確保將伺服器的Gnd連接到arduino,否則手臂將無法正常工作。
步驟4:編碼: -

此代碼的邏輯非常簡單,電位計的值存儲在數組中,然后使用for循環遍歷記錄,伺服器按照步驟執行步驟價值。您可以查看本教程,我用作參考“Arduino電位器伺服控制和記憶”
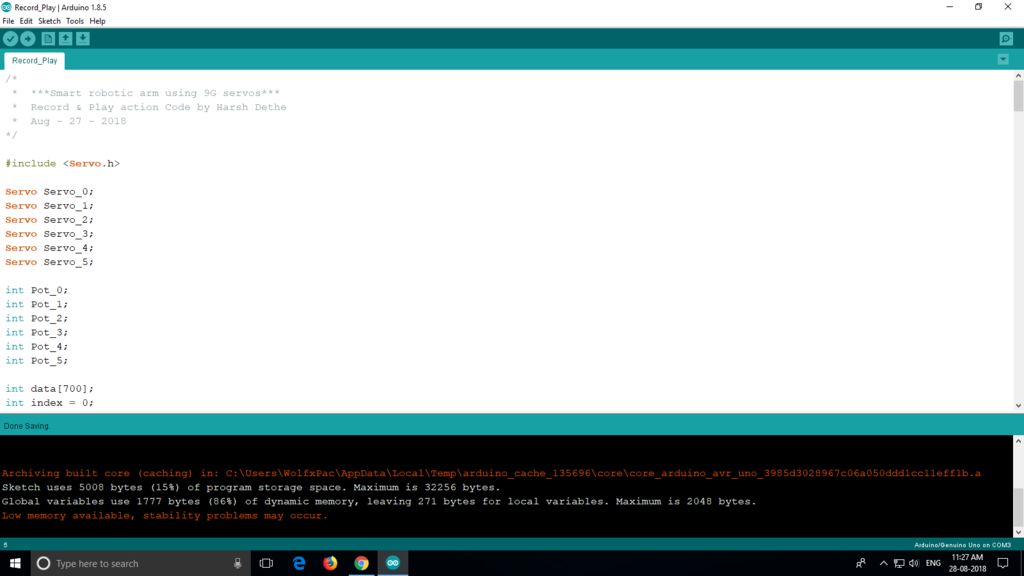
代碼: - (可下載文件附后)。
首先我們將聲明所有全局必要的變量,因此我們可以在整個程序中使用它們。此處不需要特別說明。
#include
//Servo Objects
Servo Servo_0;
Servo Servo_1;
Servo Servo_2;
Servo Servo_3;
Servo Servo_4;
int Pot_0;
int Pot_1;
int Pot_2;
int Pot_3;
int Pot_4;
//Variable to store Servo Position
int Servo_0_Pos;
int Servo_1_Pos;
int Servo_2_Pos;
int Servo_3_Pos;
int Servo_4_Pos;
//Variable to store Previous position values
int Prev_0_Pos;
int Prev_1_Pos;
int Prev_2_Pos;
int Prev_3_Pos;
int Prev_4_Pos;
//Variable to store Current position values
int Current_0_Pos;
int Current_1_Pos;
int Current_2_Pos;
int Current_3_Pos;
int Current_4_Pos;
int Servo_Position; //Stores the angle
int Servo_Number; //Stores no of servo
int Storage[600]; //Array to store data (Increasing array size will consume more memory)
int Index = 0; // Array index starts from 0th position
char data = 0; //variable to store data from serial input.
現在我們將編寫一個設置功能,我們設置引腳及其功能。這是首先執行的主要功能。
void setup()
{
Serial.begin(9600); //For Serial communication between arduino and IDE.
//Servo objects are attached to PWM pins.
Servo_0.attach(3);
Servo_1.attach(5);
Servo_2.attach(6);
Servo_3.attach(9);
Servo_4.attach(10);
//Servos are set to 100 position at initialization.
Servo_0.write(100);
Servo_1.write(100);
Servo_2.write(100);
Servo_3.write(100);
Servo_4.write(100);
Serial.println(“Press ‘R’ to Record and ‘P’ to play”);
}
現在我們必須使用模擬輸入引腳讀取電位計的值并將它們映射到控制伺服系統。為此我們將定義一個函數并將其命名為 Map_Pot(); ,你可以將它命名為任何你想要的用戶定義函數。
void Map_Pot()
{
/* The servos rotate at 180 degrees
but to using it to limits is not
a good idea as it makes the servos buzz continuously
which is annoying so we limit the servo to move
between: 1-179 */
Pot_0 = analogRead(A0); // Read input from pot and store it in the Variable Pot_0.
Servo_0_Pos = map(Pot_0, 0, 1023, 1, 179); //Map servos as per the value between 0 to 1023
Servo_0.write(Servo_0_Pos); //Move the servo to that position.
Pot_1 = analogRead(A1);
Servo_1_Pos = map(Pot_1, 0, 1023, 1, 179);
Servo_1.write(Servo_1_Pos);
Pot_2 = analogRead(A2);
Servo_2_Pos = map(Pot_2, 0, 1023, 1, 179);
Servo_2.write(Servo_2_Pos);
Pot_3 = analogRead(A3);
Servo_3_Pos = map(Pot_3, 0, 1023, 1, 179);
Servo_3.write(Servo_3_Pos);
Pot_4 = analogRead(A4);
Servo_4_Pos = map(Pot_4, 0, 1023 , 1, 179);
Servo_4.write(Servo_4_Pos);
}
現在我們將編寫循環函數:
void loop()
{
Map_Pot(); //Function call to read pot values
while (Serial.available() 》 0)
{
data = Serial.read();
if (data == ‘R’)
Serial.println(“Recording Moves.。.”);
if (data == ‘P’)
Serial.println(“Playing Recorded Moves.。.”);
}
if (data == ‘R’) //If ‘R’ is entered, start recording.
{
//Store the values in a variable
Prev_0_Pos = Servo_0_Pos;
Prev_1_Pos = Servo_1_Pos;
Prev_2_Pos = Servo_2_Pos;
Prev_3_Pos = Servo_3_Pos;
Prev_4_Pos = Servo_4_Pos;
Map_Pot(); // Map function recalled for comparison
if (abs(Prev_0_Pos == Servo_0_Pos)) // absolute value is obtained by comparing
{
Servo_0.write(Servo_0_Pos); // If values match servo is repositioned
if (Current_0_Pos != Servo_0_Pos) // If values don‘t match
{
Storage[Index] = Servo_0_Pos + 0; // Value is added to array
Index++; // Index value incremented by 1
}
Current_0_Pos = Servo_0_Pos;
}
/* Similarly the value comparison is done for all the servos, +100 is added every for entry
as a differential value. */
if (abs(Prev_1_Pos == Servo_1_Pos))
{
Servo_1.write(Servo_1_Pos);
if (Current_1_Pos != Servo_1_Pos)
{
Storage[Index] = Servo_1_Pos + 100;
Index++;
}
Current_1_Pos = Servo_1_Pos;
}
if (abs(Prev_2_Pos == Servo_2_Pos))
{
Servo_2.write(Servo_2_Pos);
if (Current_2_Pos != Servo_2_Pos)
{
Storage[Index] = Servo_2_Pos + 200;
Index++;
}
Current_2_Pos = Servo_2_Pos;
}
if (abs(Prev_3_Pos == Servo_3_Pos))
{
Servo_3.write(Servo_3_Pos);
if (Current_3_Pos != Servo_3_Pos)
{
Storage[Index] = Servo_3_Pos + 300;
Index++;
}
Current_3_Pos = Servo_3_Pos;
}
if (abs(Prev_4_Pos == Servo_4_Pos))
{
Servo_4.write(Servo_4_Pos);
if (Current_4_Pos != Servo_4_Pos)
{
Storage[Index] = Servo_4_Pos + 400;
Index++;
}
Current_4_Pos = Servo_4_Pos;
}
/* Values are printed on serial monitor, ’ ‘ is for displaying values in tabular format */
Serial.print(Servo_0_Pos);
Serial.print(“ ”);
Serial.print(Servo_1_Pos);
Serial.print(“ ”);
Serial.print(Servo_2_Pos);
Serial.print(“ ”);
Serial.print(Servo_3_Pos);
Serial.print(“ ”);
Serial.println(Servo_4_Pos);
Serial.print (“Index = ”);
Serial.println(Index);
delay(50);
}
if (data == ’P‘) //IF ’P‘ is entered , Start playing recorded moves.
{
for (int i = 0; i 《 Index; i++) //Traverse the array using for loop
{
Servo_Number = Storage[i] / 100; // Finds number of servo
Servo_Position = Storage[i] % 100; // Finds position of servo
switch(Servo_Number)
{
case 0:
Servo_0.write(Servo_Position);
break;
case 1:
Servo_1.write(Servo_Position);
break;
case 2:
Servo_2.write(Servo_Position);
break;
case 3:
Servo_3.write(Servo_Position);
break;
case 4:
Servo_4.write(Servo_Position);
break;
}
delay(50);
}
}
}
代碼準備好后,立即將其上傳到arduino板。
Smart arm已準備就緒。這個功能還不如Stoerpeak制作的那么順暢。
如果您可以更好地編寫代碼或對我有任何建議,請在評論部分告訴我。
有人說過,讓我們繼續測試。..。
步驟5:測試: -
將代碼成功上傳到電路板后,打開“串行監視器”,您可以在“工具”選項中找到它。當串行監視器啟動時,arduino將重置。現在,您可以使用主臂控制機械臂。但沒有記錄任何東西。
要開始錄制,請在顯示器中輸入“R”,然后您可以執行要錄制的移動。
移動完成后,您必須輸入“P”才能播放錄制的動作。只要電路板未復位,伺服器就會繼續執行移動。
責任編輯:wv
-
機器人
+關注
關注
211文章
28582瀏覽量
207816 -
Arduino
+關注
關注
188文章
6477瀏覽量
187477
發布評論請先 登錄
相關推薦
【「具身智能機器人系統」閱讀體驗】2.具身智能機器人的基礎模塊
《具身智能機器人系統》第10-13章閱讀心得之具身智能機器人計算挑戰
【「具身智能機器人系統」閱讀體驗】+兩本互為支持的書
【「具身智能機器人系統」閱讀體驗】2.具身智能機器人大模型
【「具身智能機器人系統」閱讀體驗】1.初步理解具身智能
【「具身智能機器人系統」閱讀體驗】1.全書概覽與第一章學習
【「具身智能機器人系統」閱讀體驗】+初品的體驗
《具身智能機器人系統》第1-6章閱讀心得之具身智能機器人系統背景知識與基礎模塊
變速齒輪在機器人中的使用
舵機技術深度解析,讓機器人更智能!
開源項目!用ESP32做一個可愛的無用機器人
開源項目!用ESP32做一個可愛的無用機器人
助力風電行業!深視智能SR7400線激光以機器人手眼標定實現風力葉片切割引導

AMD Kria? KR 260套件+ROS 2快速開發機器人解決方案


 使用Arduino的簡易智能機器人手臂的制作


評論