最近特無聊是吧,那在家學點做點科技類的小事業吧。
應用的編程環境HALCON18.05,這里講一種常用套路
*表示程序注釋
1.采圖或者自己寫下字母和數字,分成訓練與識別兩個部分;
2.閾值分割出字符;
3.創建手寫體識別器;
4.訓練該識別器;
5.執行識別;
具體過程如下:
**--------------------------------------
*(1) Training of the OCR ofhandwrite letter
* 關閉更新
dev_update_off()
* Set theimage path (make sure, that you have set HALCONIMAGES to the HALCON imagedirectory)
*
* Step 0:Preparations 文件路徑
FontName:= 'E:/Halcon/OCR/handwirteC/'
*
* Step 1:Segmentation 讀圖與字符分割
dev_update_window('off')
dev_get_window(WindowHandle)
read_image(Image,FontName+ '/handword1.jpg')
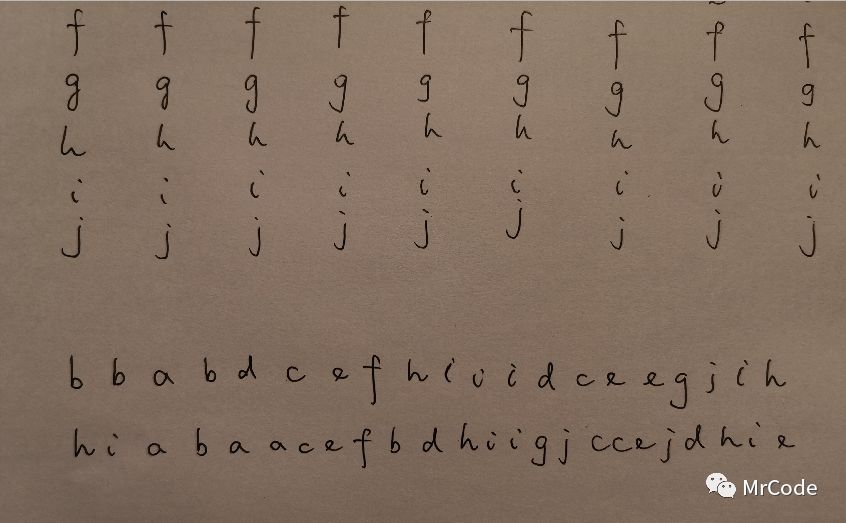
有時間可以寫各種字符,每個相同字符多寫幾次,越多越好,增加訓練的精準度;
把這欄作為訓練樣本

閾值分割出字符。注意:這里要用一次膨脹,把i與j這些字符的點與字符體連接在一起,構成一個整體字符;
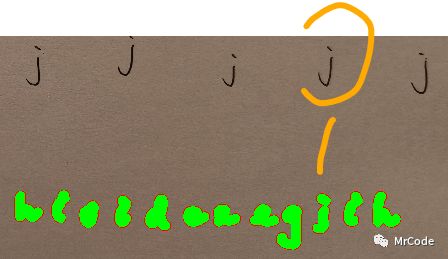
threshold(ImageReduced, RawSegmentation, 0, 75)
* Connectthe i's and j's with their dots
* 將i與j的點與線連接起來,構成一個整體
dilation_circle(RawSegmentation, RegionDilation, 19)
dev_set_color('green')
dev_display(RegionDilation)
connection(RegionDilation, ConnectedRegions)
* Reduceeach connected component (character) to its original shape
intersection(ConnectedRegions, RegionDilation, RegionIntersection)
count_obj(ConnectedRegions, Number)
sort_region(RegionIntersection, FinalLetters, 'first_point', 'true', 'column')
*Displaysegments
*顯示分割塊
dev_clear_window()
dev_display(ImageReduced)
dev_set_color('green')
dev_set_line_width(2)
dev_set_shape('rectangle1')
dev_set_draw('margin')
dev_display(FinalLetters)
我們來檢查一下各個字符的分割與排序情況,尤其是對于i,j這類字符有沒有實現整體性
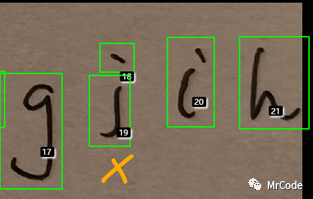
我們看到20個字母被分割成了21個,原因就是這個j 沒有被構成一個整體。然后我們再次調整一下dialation參數到22,并且注意也被膨脹太多了把相鄰字母也連進來了
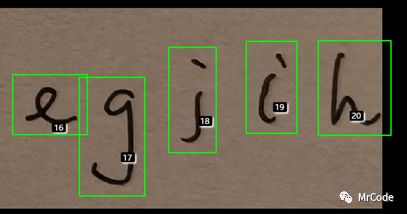
dilation_circle(RawSegmentation, RegionDilation, 22)
這次很好,20個字母完整分割
* Step2: Training filegeneration
* 把teacher信號自己手寫進來,創建訓練文件TrainingFileName,訓練文件都是.trf格式的,可以在硬盤里查詢到。
*這里我們用append的函數把teacher信號一個一個地與被訓練字符聯系起來。
TrainingNames:=['b','b','a','b','d','c','e','f','h','i','i','i','d','c','e','e','g','j','i','h']
*訓練文件TrainingFileName
TrainingFileName:= FontName + 'TrainingFile.trf'
sort_region(FinalLetters, SortedRegions, 'first_point', 'true', 'column')
shape_trans(SortedRegions, RegionTrans, 'rectangle1')
area_center(RegionTrans, Area, Row, Column)
MeanRow:= mean(Row)
dev_set_check('give_error')
for I :=0 to |TrainingNames| -1by 1
select_obj (SortedRegions, CharaterRegions,I+1)
append_ocr_trainf (CharaterRegions, Image,TrainingNames[I], TrainingFileName)
disp_message(WindowHandle, TrainingNames[I], 'image', MeanRow - 140, Column[I] - 6,'yellow', 'false')
endfor

可以查詢一下訓練文件
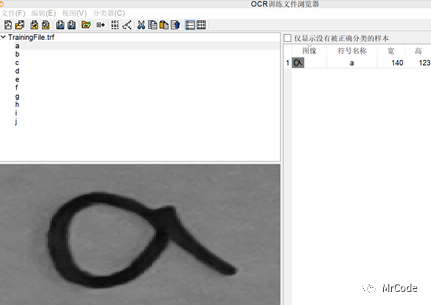
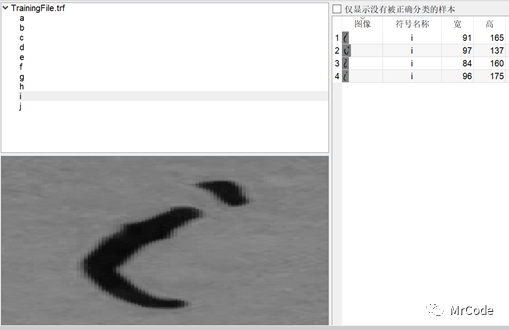
* Step3: Training 執行訓練
CharNames:= uniq(sort(TrainingNames))
create_ocr_class_mlp(8, 10, 'constant', 'default', CharNames, 10, 'none', 10, 42, OCRHandle)
trainf_ocr_class_mlp(OCRHandle, TrainingFileName, 200, 1, 0.01, Error, ErrorLog)
*write_ocr_class_mlp產生一個.omc文件
write_ocr_class_mlp(OCRHandle, FontName+'Classifier')
clear_ocr_class_mlp(OCRHandle)
_________________________________
Do OCR執行識別
打開新的圖片,建立被識別區域,步驟如下

* Step 0: Preparations
FontName :='E:/Halcon/OCR/handwirteC/'
TrainingDocument:=FontName+'Classifier.omc'
*TrainingDocument:=FontName+'Class1.omc'
*
* Step 1: Segmentation
dev_update_window ('off')
dev_get_window (WindowHandle)
read_image (Image,FontName+'/handword1.jpg')
gen_rectangle1 (ROI_new, 2077.7,301.848, 2327.78, 2235.87)
reduce_domain (Image, ROI_new,ImageReducedNew)
binary_threshold (ImageReducedNew,Region_1, 'max_separability', 'dark', UsedThreshold1)
dilation_circle (Region_1,RegionDilation, 25.5)
dev_set_color ('green')
dev_display (RegionDilation)
connection (RegionDilation,ConnectedRegions)
intersection (ConnectedRegions,RegionDilation, RegionIntersection)
sort_region (RegionIntersection,Characters, 'character', 'true', 'row')
在這里,我們還是要查看一下膨脹的設置是否正確,尤其對于i,j類字符

*Step 3 讀取分類器
read_ocr_class_mlp(TrainingDocument, OCRHandle1)
*Classification
do_ocr_multi_class_mlp(Characters, Image, OCRHandle1, Class, Confidence)
* Step 4 Display results
area_center(Characters, Area, Row, Column)
dev_display(Image)
set_display_font(WindowHandle, 16, 'sans', 'true', 'false')
disp_message(WindowHandle, Class, 'image', Row - 146, Column + 8, 'blue', 'false')
*set_display_font(WindowHandle, 16, 'mono', 'true', 'false')
disp_message(WindowHandle, 'Classification result', 'window', 12, 12, 'black', 'true')
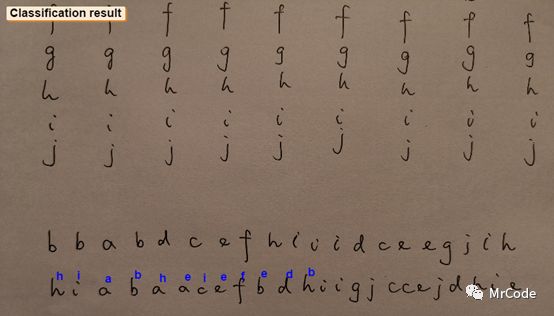
我們看到手寫體的確不容易做好,這里與訓練樣本有關系,所以需要更大的樣本量來優化識別器。
這里我們可以打開訓練文件.trf,在不自己繼續添加樣本的情況下做一下無監督學習,把已有的字體做扭曲與各種變換的訓練。
然后再次訓練這個.trf文件,替換掉之前的訓練文件。
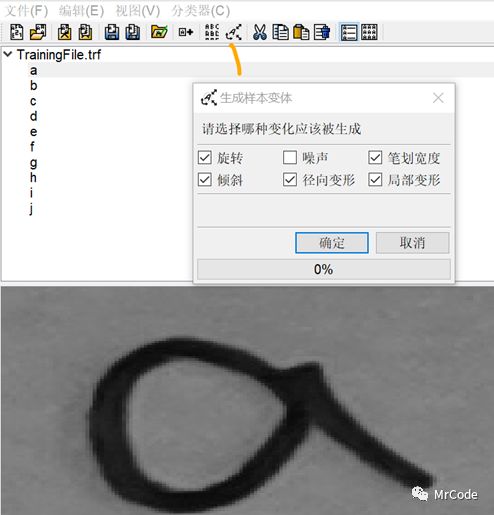
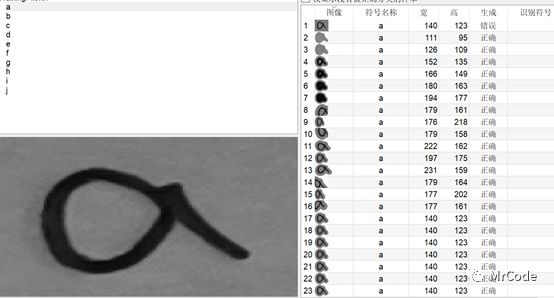
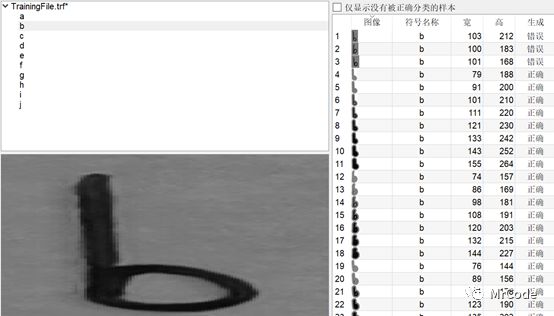
訓練完后,再次讀取新的分類器,執行OCR, 這里重復代碼
*Step 3 讀取分類器
read_ocr_class_mlp(TrainingDocument, OCRHandle1)
*Classification
do_ocr_multi_class_mlp(Characters, Image, OCRHandle1, Class, Confidence)
* Step 4 Display results
area_center(Characters, Area, Row, Column)
dev_display(Image)
set_display_font(WindowHandle, 16, 'sans', 'true', 'false')
disp_message(WindowHandle, Class, 'image', Row - 146, Column + 8, 'blue', 'false')
*set_display_font(WindowHandle, 16, 'mono', 'true', 'false')
disp_message(WindowHandle, 'Classification result', 'window', 12, 12, 'black', 'true')
我們看到,新的識別器(上圖)效果好于第一次的識別器(下圖)
從 7/12提高到8/12


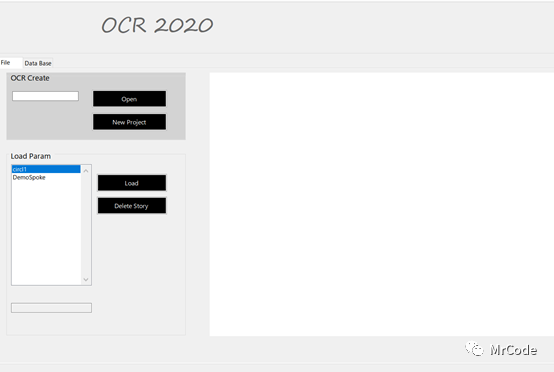
最后有必要就可以寫操作界面了, 這里不再贅述
責任編輯:lq
-
編程
+關注
關注
88文章
3623瀏覽量
93797 -
閾值
+關注
關注
0文章
123瀏覽量
18507 -
識別器
+關注
關注
0文章
20瀏覽量
7616
原文標題:在家做手寫體識別器
文章出處:【微信號:vision263com,微信公眾號:新機器視覺】歡迎添加關注!文章轉載請注明出處。
發布評論請先 登錄
相關推薦
如何快速入門HAL庫編程 HAL庫與裸機編程的比較
視覺軟件HALCON的數據結構

MCU編程語言和開發環境介紹
PLC遠程編程網關是什么

esp32用什么軟件編程
Labview與Halcon圖片Image互相轉換
C編程環境配置


 應用的編程環境HALCON18.05


評論