本文介紹了cocotb的安裝、python tb文件的寫法、用xrun仿真cocotb的腳本等,我們來看看體驗如何。
一、準備
二、寫RTL
top.svmodule top(input wire clk,input wire rst_n,input wire [7:0] din,output reg [7:0] dout);initial begin$fsdbDumpfile("top.fsdb");top);endclk, negedge rst_n)if(!rst_n)dout <= 'd0;elsedout <= din;endmodule // top
三、寫tb
# tb.pyimport cocotbfromcocotb.triggersimportTimer, FallingEdgeasync def gen_clk(dut):for cycle in range(100):dut.clk.value = 0await Timer(10, units="ns")dut.clk.value = 1awaitTimer(10,units="ns")async def gen_rst(dut):dut.rst_n.value = 0await Timer(22, units="ns")dut.rst_n.value = 1print("ResetDone")async def tb(dut):await cocotb.start(gen_clk(dut))await cocotb.start(gen_rst(dut))test_data_list = range(0,50, 5)for test_data in test_data_list:await FallingEdge(dut.clk)dut.din.value=test_dataawait Timer(100, units="ns")
6~11行:定義了一個時鐘,50MHz,100個周期。
13~17行:定義了一個復位信號,低電平有效。復位拉高打印“Reset Done”,方便看log。
19行:用@cocotb.test()裝飾器指定了tb的頂層主函數(shù)。
22行:異步啟動gen_clk
23行:異步啟動gen_rst
25~28行:產(chǎn)生了一些測試數(shù)據(jù),在時鐘下降沿后驅動dut的din。
30行:等待100ns結束仿真
四、寫仿真腳本Makefile
SIM ?= xceliumTOPLEVEL_LANG ?= verilogVERILOG_SOURCES += ./top.svTOPLEVEL = topMODULE = tbinclude $(shell cocotb-config --makefiles)/Makefile.sim
設置默認仿真器為cadence xcellium,RTL語言選verilog,指定RTL頂層模塊名字(就是dut的名字),testbench的名字為tb,最后include一個cocotb共用的makefile。
五、仿真和看波形
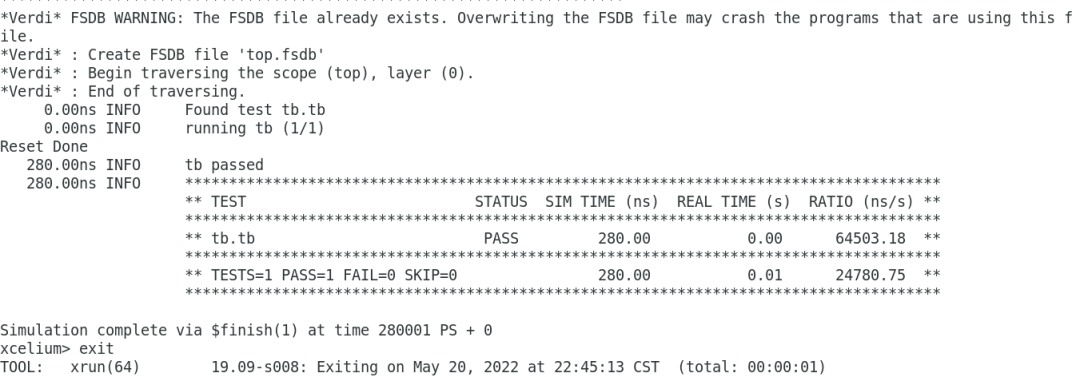
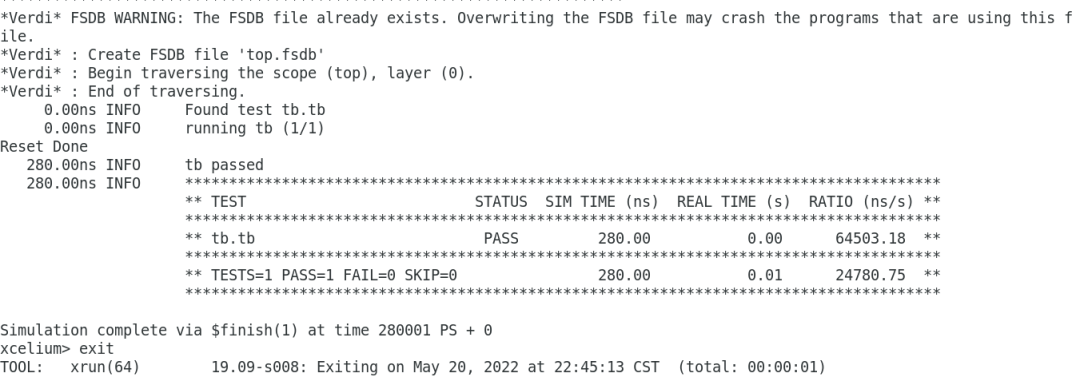
把top.sv、tb.py、Makefile放同一個目錄下,敲linux命令:make。不出意外的話,仿真可以正確編譯和仿真,如下圖:

由于我們在RTL頂層加入了dump fsdb波形的代碼,所以在log里可以看到有波形產(chǎn)生。280ns仿真結束,并顯示“tb passed”,并打印出匯總信息。可見log還是很友好的。
用verdi打開fsdb,與預期一致:

審核編輯 :李倩
-
仿真器
+關注
關注
14文章
1019瀏覽量
83895 -
代碼
+關注
關注
30文章
4823瀏覽量
68939 -
python
+關注
關注
56文章
4807瀏覽量
84975
原文標題:厭倦了sv/uvm?來看看用python寫驗證環(huán)境
文章出處:【微信號:處芯積律,微信公眾號:處芯積律】歡迎添加關注!文章轉載請注明出處。
發(fā)布評論請先 登錄
相關推薦
使用Python實現(xiàn)xgboost教程
電腦是已經(jīng)安裝了python2.7,為什么打開GUI的script window時,一直提示未找到python2.7?
使用Python搭建簡易本地http服務器,升級WIPI模組

如何實現(xiàn)Python復制文件操作
用pycharm進行python爬蟲的步驟
安裝依賴的Python軟件包時報錯如何解決?
安裝cryptography文件時,其依賴程序cffi安裝失敗,為什么?
用離線安裝器安裝的idf,其創(chuàng)建的Python虛擬環(huán)境無激活腳本是怎么回事?
Efinity軟件安裝教程與Efinity入門使用教程 大牛手把手教程


 cocotb的安裝、python tb文件的寫法


評論