本文來(lái)源電子發(fā)燒友社區(qū),作者:碼農(nóng)愛(ài)學(xué)習(xí), 帖子地址:https://bbs.elecfans.com/jishu_2307951_1_1.html
EASY EAI Nano AI人臉檢測(cè)測(cè)試(附上體驗(yàn)視頻,詳細(xì)見(jiàn)原作者帖子)
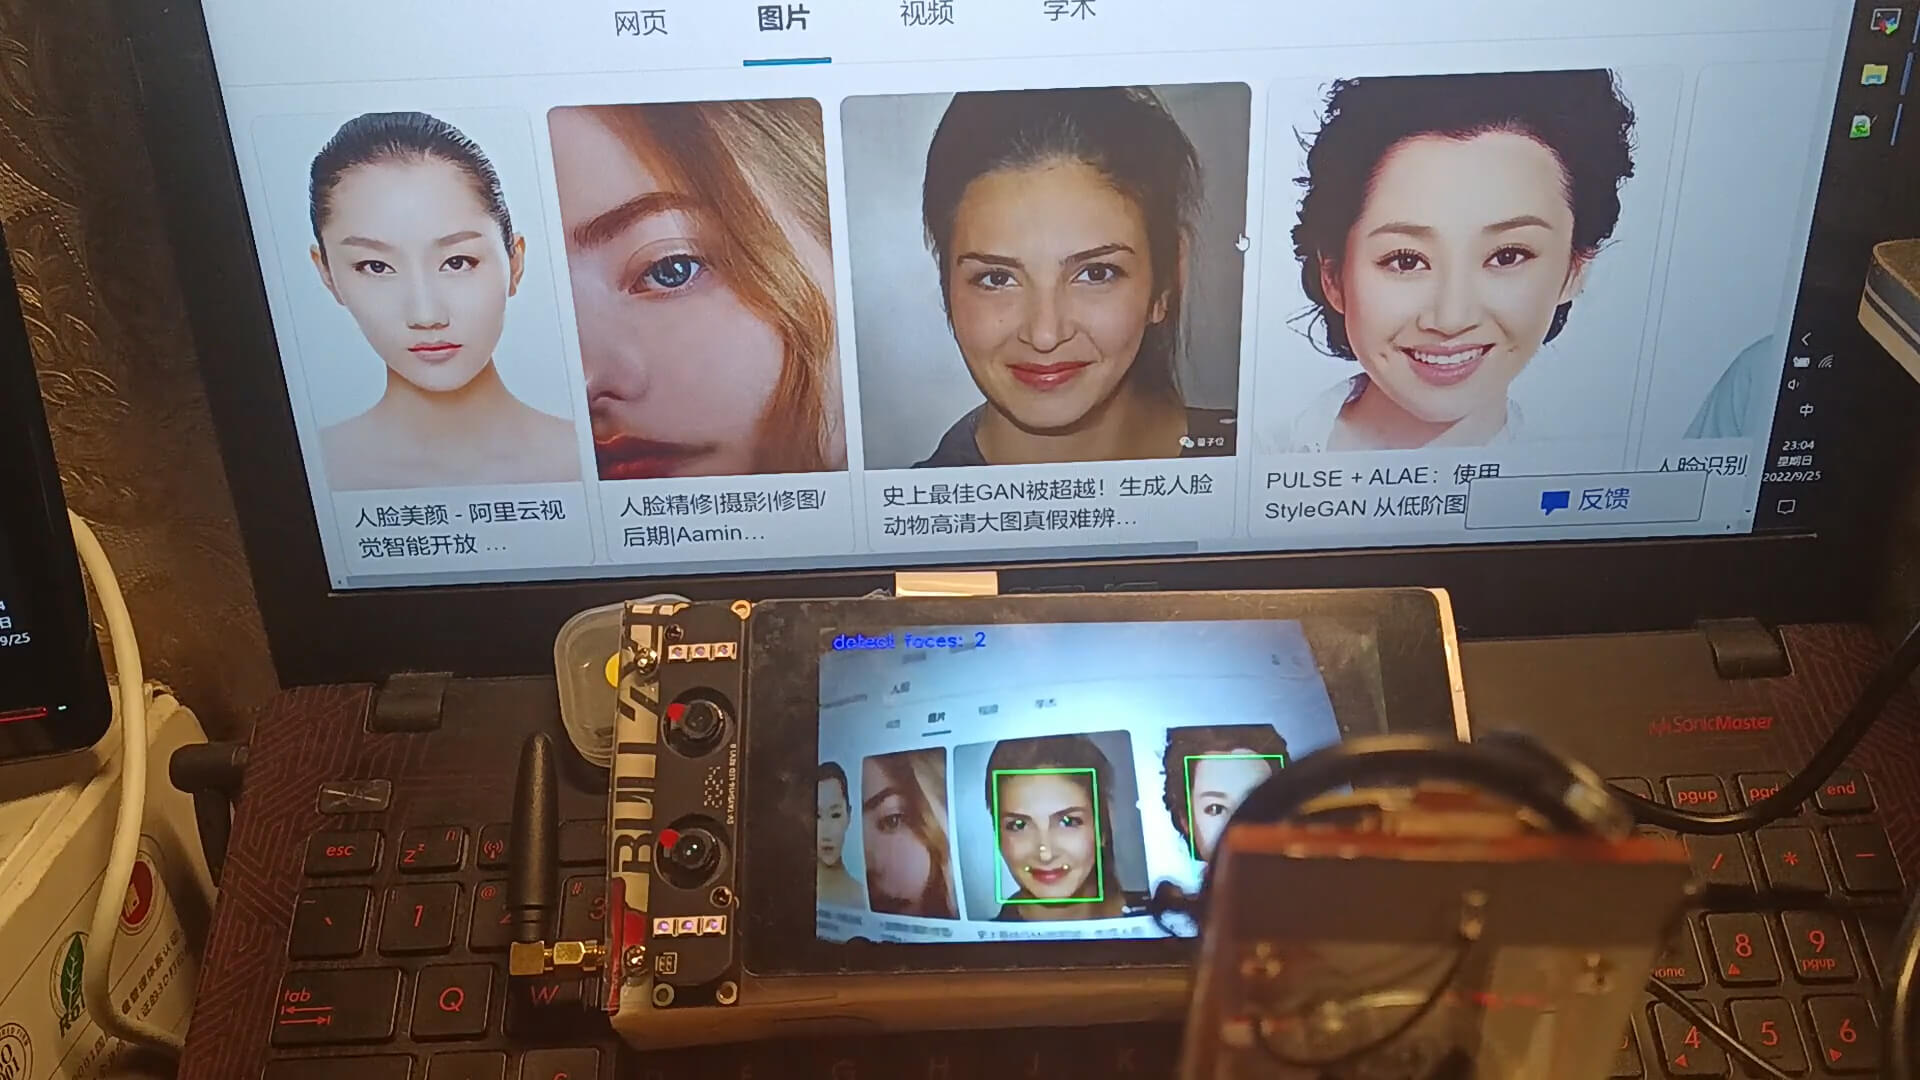
本篇介紹EASY EAI Nano的AI人臉檢測(cè)功能,先看下測(cè)試效果:

本篇參考官方文檔:https://www.easy-eai.com/document_details/3/109
1 代碼下載
下載官方測(cè)試代碼:https://github.com/EASY-EAI/EASY-EAI-Toolkit-C-Solution.git,本篇來(lái)修改face_detect中的代碼并測(cè)試。
下載AI算法模型face_detect.model,百度網(wǎng)盤(pán):https://pan.baidu.com/s/1mrhVHxHWJ8cY9Fl9k5KtYg#list/path=%2F提取碼:0k7j
總的資料百度網(wǎng)盤(pán)了也有算法模型:https://pan.baidu.com/s/1AjOIu77mzFM4cDA0MMVr2A#list/path=%2F,提取碼:5ttf
我先使用總的資料里下載的模型測(cè)試。
2 人臉檢測(cè)API接口介紹
| 組件 | 頭文件以及庫(kù)路徑 | 描述 |
|---|---|---|
| 系統(tǒng)操作組件 | easyeai-api/common_api/system_opt | 提供線程操作函數(shù) |
| 攝像頭組件 | easyeai-api/peripheral_api/camera | 提供攝像頭操作函數(shù) |
| 顯示屏組件 | easyeai-api/peripheral_api/display | 提供顯示屏操作函數(shù) |
| 人臉檢測(cè)組件 | easyeai-api/algorithm_api/face_detect | 提供人臉檢測(cè)操作函數(shù) |
主要來(lái)看下人臉檢測(cè)組件。
face_detect.h主要內(nèi)容如下,包括一個(gè)det(detect)類(lèi)的3個(gè)人臉檢測(cè)API函數(shù):
class det {
public:
    det(){
landmarks.resize(5);
    }
    ~det(){
    }
?
    bool operator<(const det &t) const {
return score < t.score;
}
?
    bool operator>(const det &t) const {
return score > t.score;
}
?
    cv::Rect_ box;
    std::vector landmarks;
    float score;
?
    void print() {
printf("finalbox(x1y1x2y2) %f %f %f %f, score %fn", box.x, box.y, box.br().x, box.br().y, score);
printf("landmarks ");
int point_number = landmarks.size();
for (int i = 0; i < point_number; i++) {
printf("%f %f, ", landmarks[i].x, landmarks[i].y);
}
printf("n");
}

};
?
int face_detect_init(rknn_context *ctx, const char *path);
?
int face_detect_run(rknn_context ctx, cv::Mat &input_image, std::vector &result);
?
int face_detect_release(rknn_context ctx);
一些參數(shù):
- ctx:輸入?yún)?shù),rknn_context句柄
- path:輸入?yún)?shù),算法模型路徑
- input_image:輸入?yún)?shù), Opencv Mat格式圖像
- result:輸出參數(shù), 人臉檢測(cè)的結(jié)果輸出
3 代碼分析與修改
官方例程使用的是雙目攝像頭中的RGB攝像頭,本篇測(cè)試修改為使用外接USB攝像頭來(lái)采集圖像,并將采集的圖像橫屏顯示。另外,在識(shí)別到人臉后,通過(guò)OpenCV函數(shù),在屏幕左上角顯示出識(shí)別到的人臉個(gè)數(shù)。
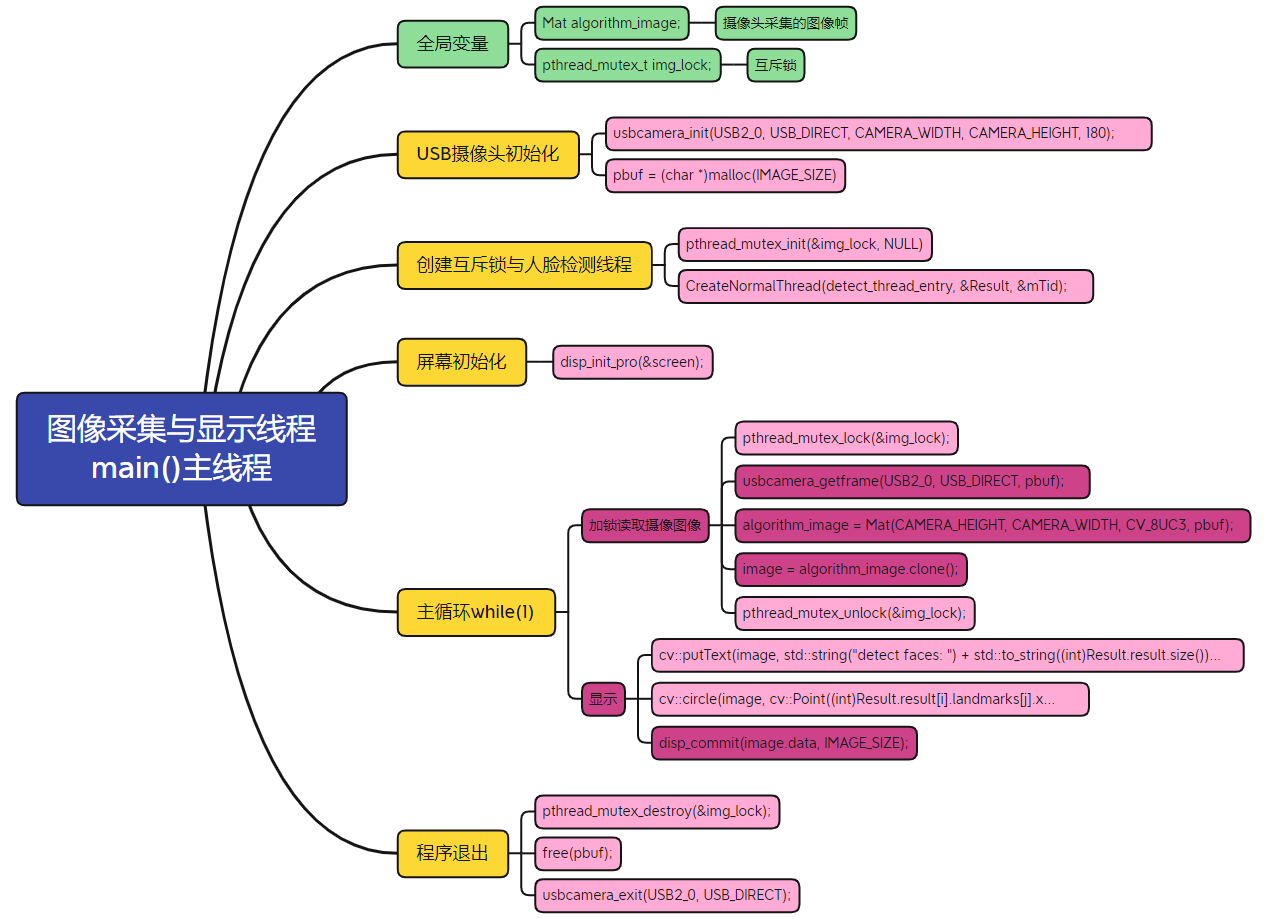
3.1 圖像采集與顯示線程(主線程)
修改后的主程序邏輯如下:

主要代碼結(jié)構(gòu)如下:
Mat algorithm_image;
pthread_mutex_t img_lock;
?
int main(int argc, char **argv)
{
//省略...
pthread_t mTid;
Result_t Result;
Mat image;
// 1.打開(kāi)USB攝像頭
//省略...
// 2.創(chuàng)建識(shí)別線程,以及圖像互斥鎖
pthread_mutex_init(&img_lock, NULL);
Result.result.clear();
Result.face_number = 0;
CreateNormalThread(detect_thread_entry, &Result, &mTid);
// 3.顯示初始化
    //省略...
// 4.(取流 + 顯示)循環(huán)
while(1){
// 4.1、取流
pthread_mutex_lock(&img_lock);
ret = usbcamera_getframe(USB2_0, USB_DIRECT, pbuf);
if (ret) {
printf("error: %s, %dn", __func__, __LINE__);
pthread_mutex_unlock(&img_lock);
continue;
}
algorithm_image = Mat(CAMERA_HEIGHT, CAMERA_WIDTH, CV_8UC3, pbuf);
image = algorithm_image.clone();
pthread_mutex_unlock(&img_lock);
// 4.2、顯示
        cv::putText(image, std::string("detect faces: ") + std::to_string((int)Result.result.size()),
                    cv::Point2f(30, 50), cv::FONT_HERSHEY_SIMPLEX,1.45, CV_RGB(255,0,0),3.0);
for (int i = 0; i < (int)Result.result.size(); i++)
{
// 標(biāo)出人臉框
int x = (int)(Result.result[i].box.x);
int y = (int)(Result.result[i].box.y);
int w = (int)(Result.result[i].box.width);
int h = (int)(Result.result[i].box.height);
rectangle(image, Rect(x, y, w, h), Scalar(0, 255, 0), 2, 8, 0);
// 標(biāo)出人臉定位標(biāo)記
for (int j = 0; j < (int)Result.result[i].landmarks.size(); ++j) {
cv::circle(image, cv::Point((int)Result.result[i].landmarks[j].x, (int)Result.result[i].landmarks[j].y), 2, cv::Scalar(0, 255, 0), 3, 8);
}
}
        disp_commit(image.data, IMAGE_SIZE);

        usleep(20*1000);
}
?
//省略...
}
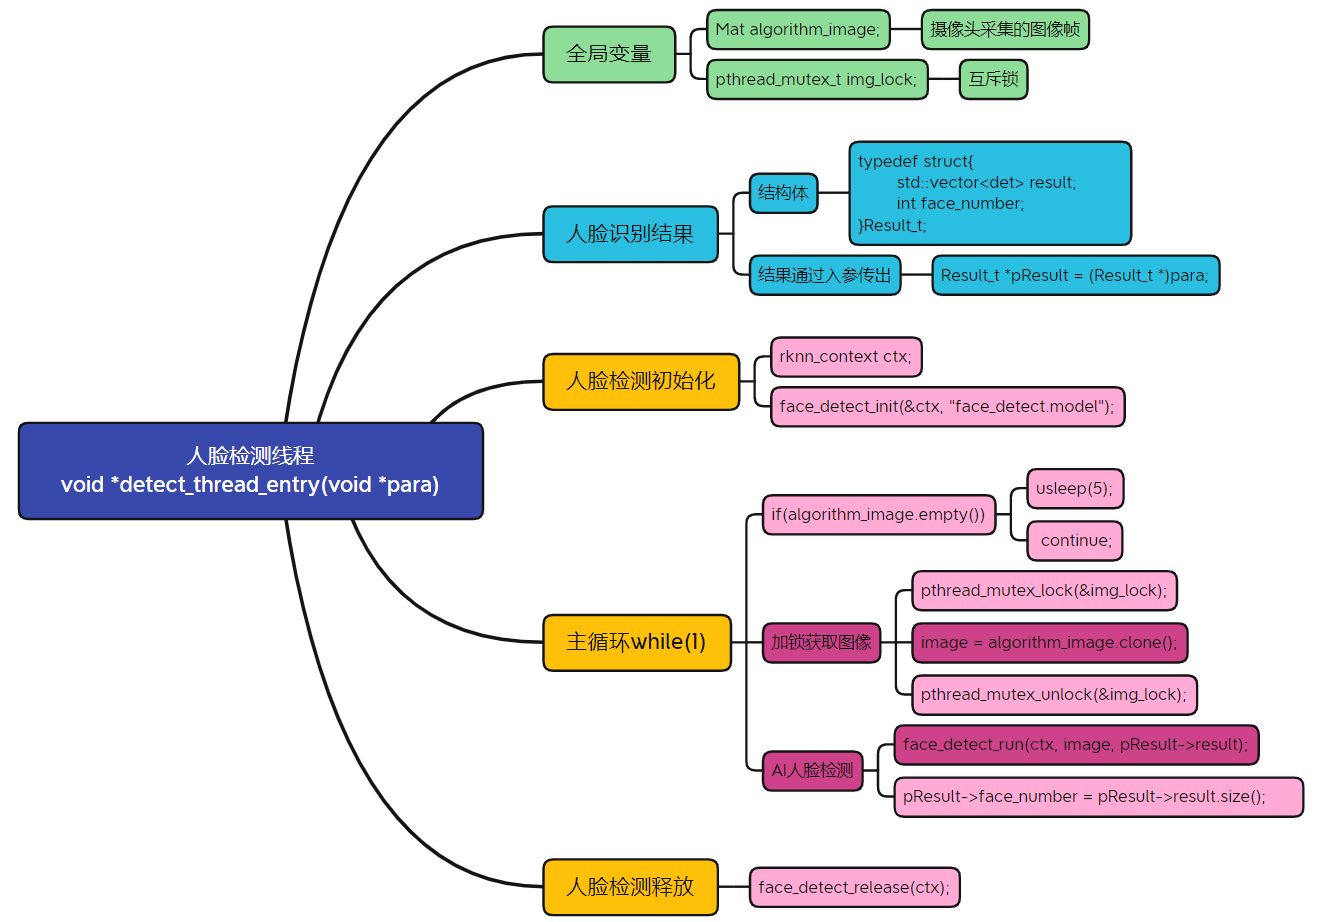
3.2 人臉檢測(cè)處理
人臉檢測(cè)處理序邏輯如下:

代碼如下:
// 識(shí)別線程
void *detect_thread_entry(void *para)
{
int ret;
Result_t *pResult = (Result_t *)para;

// 人臉檢測(cè)初始化
rknn_context ctx;
face_detect_init(&ctx, "face_detect.model");

Mat image;
while(1)
{
        if(algorithm_image.empty()) {
usleep(5);
            continue;
        }

pthread_mutex_lock(&img_lock);
image = algorithm_image.clone();
pthread_mutex_unlock(&img_lock);
// 算法分析
ret = face_detect_run(ctx, image, pResult->result);
pResult->face_number = pResult->result.size();
if(ret <= 0){
pResult->result.clear();
usleep(1000);
continue;
}

printf("n>>>>>>>>>>>>>>>>>>>>>>>>>>>>>>>n");
printf("face number : %dn", pResult->face_number);

        usleep(16*1000);
}
/* 人臉檢測(cè)釋放 */
face_detect_release(ctx);
return NULL;
}
4 測(cè)試
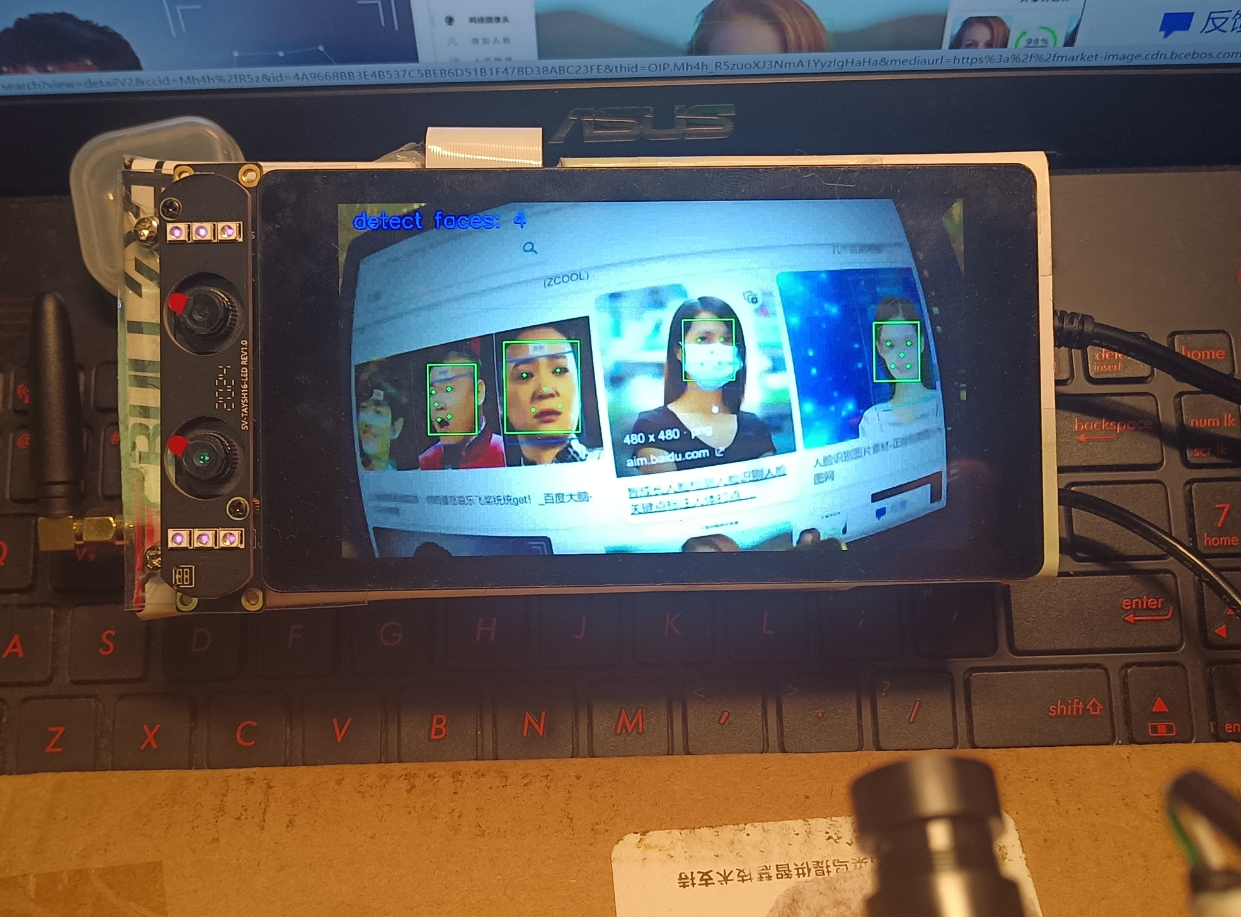
測(cè)試效果如下,可以同時(shí)檢測(cè)到多張人臉,在屏幕左上角標(biāo)注有檢測(cè)到的人臉個(gè)數(shù):

5 總結(jié)
本篇介紹了EASY EAI Nano的AI人臉檢測(cè)功能,修改官方代碼,改用外接USB攝像頭來(lái)采集圖像,并在識(shí)別到人臉后,通過(guò)OpenCV函數(shù),在屏幕左上角顯示出識(shí)別到的人臉個(gè)數(shù)。
-
開(kāi)發(fā)板
+關(guān)注
關(guān)注
25文章
5082瀏覽量
97708 -
靈眸
+關(guān)注
關(guān)注
0文章
19瀏覽量
3212
發(fā)布評(píng)論請(qǐng)先 登錄
相關(guān)推薦


 【EASY EAI Nano開(kāi)源套件試用體驗(yàn)】4AI功能測(cè)試之人臉檢測(cè)


評(píng)論