 YOLOv5在OpenCV上的推理程序
測試與發現
YOLOv5官方給出的YOLOv5在OpenCV上推理的程序相對來說是比較通俗易懂的,條理清晰,有基本的封裝,直接可用!但是我也發現,模型的推理時間跟前后處理的時間相差無幾,特別是當視頻流有多個檢測到的對象時候,整個幀率會有明顯下降!官方推薦的參考示例代碼鏈接為:
https://github.com/doleron/yolov5-opencv-cpp-python/blob/main/python/yolo-tiny.py最后發現推理時間沒有明顯變化,主要是前后處理,有兩個函數耗時比較高!從輸入圖像轉換到模型輸入數據的函數:
cv2.dnn.blobFromImage(input_image , 1/255.0, (640, 640), swapRB=True)推理之后的重疊目標框非最大抑制函數:
indexes = cv2.dnn.NMSBoxes(boxes, confidences, 0.25, 0.45)特別是非最大抑制函數,隨著圖像中目標數目增多,導致幀率成明顯下降趨勢!
修改輸入轉換
cv2.dnn.blobFromImage(input_image , 1/255.0, (640, 640), swapRB=True)
可以通過下面的代碼等價替換:
rgb=cv.cvtColor(image,cv.COLOR_BGR2RGB)
input_image=cv.resize(src=rgb,dsize=(INPUT_WIDTH,INPUT_HEIGHT))
blob_img=np.float32(input_image)/255.0
input_x=blob_img.transpose((2,0,1))
input_blob=np.expand_dims(input_x,0)
修改之后測試發現該替代降低了執行時間,說明替代有效!
修改非最大抑制
indexes = cv2.dnn.NMSBoxes(boxes, confidences, 0.25, 0.45)
輸入的box格式x, y,w,h,我參考了網上的代碼,修改實現一個基于并交比最簡單的NMS抑制算法,基于矩陣計算,保證不會因為對象變得多了,增加計算耗時,然后把它們封裝成一個單獨的方法,導入該方法直接替換之前的代碼行為:
class_ids, boxes = non_max_suppression_fast(np.asarray(class_ids), np.asarray(boxes), 0.75)
該函數完整的實現代碼如下:
importnumpyasnp


defnon_max_suppression_fast(class_ids,boxes,nms_threshold):
#iftherearenoboxes,return
iflen(boxes)==0:
return[],[]

ifboxes.dtype.kind=="i":
boxes=boxes.astype("float")

#initializethelistofpickedindexes
pick=[]

#grabthecoordinatesoftheboundingboxes
x1=boxes[:,0]
y1=boxes[:,1]
x2=boxes[:,2]
y2=boxes[:,3]

#computetheareaoftheboundingboxesandsortthebounding
#boxesbythebottom-righty-coordinateoftheboundingbox
area=(x2-x1+1)*(y2-y1+1)
idxs=np.argsort(y2)

#keeploopingwhilesomeindexesstillremainintheindexes
#list
whilelen(idxs)>0:
#grabthelastindexintheindexeslistandaddthe
#indexvaluetothelistofpickedindexes
last=len(idxs)-1
i=idxs[last]
pick.append(i)

#findthelargest(x,y)coordinatesforthestartof
#theboundingboxandthesmallest(x,y)coordinates
#fortheendoftheboundingbox
xx1=np.maximum(x1[i],x1[idxs[:last]])
yy1=np.maximum(y1[i],y1[idxs[:last]])
xx2=np.minimum(x2[i],x2[idxs[:last]])
yy2=np.minimum(y2[i],y2[idxs[:last]])

#computethewidthandheightoftheboundingbox
w=np.maximum(0,xx2-xx1+1)
h=np.maximum(0,yy2-yy1+1)

#computetheratioofoverlap
overlap=(w*h)/area[idxs[:last]]

#deleteallindexesfromtheindexlistthathave
idxs=np.delete(idxs,np.concatenate(([last],
np.where(overlap>nms_threshold)[0])))

#returnonlytheboundingboxesthatwerepickedusingthe
#integerdatatype
returnclass_ids[pick],boxes[pick].astype("int")


if__name__=="__main__":
boxes=[]
boxes.append((163,0,27+163,41))
boxes.append((164,0,28+164,43))
boxes.append((165,0,29+165,42))
res=non_max_suppression_fast(None,np.asarray(boxes),0.25)
print(res)
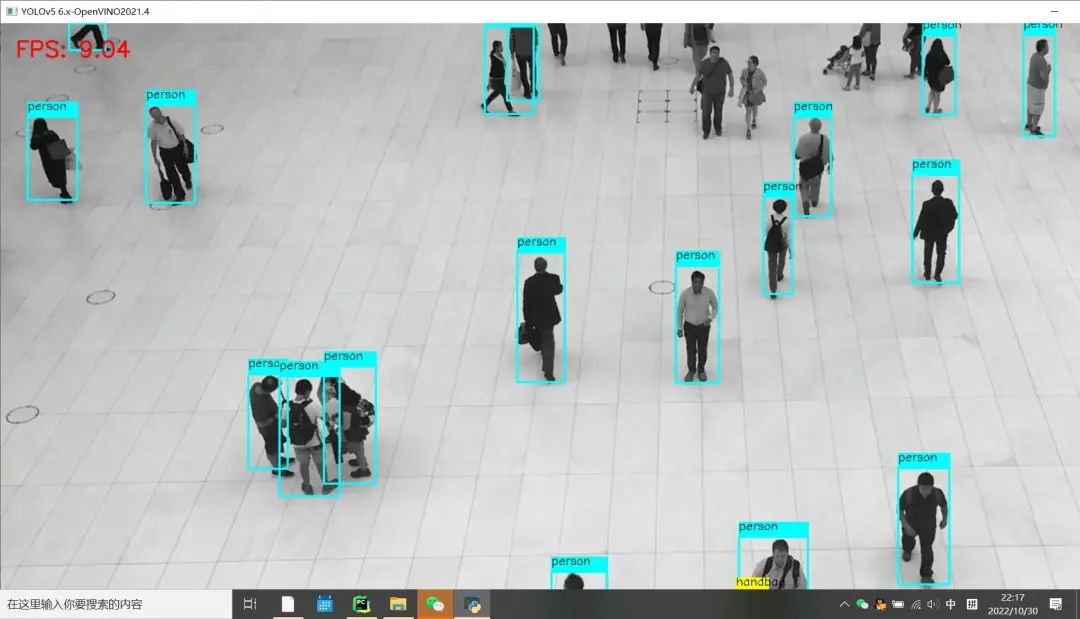
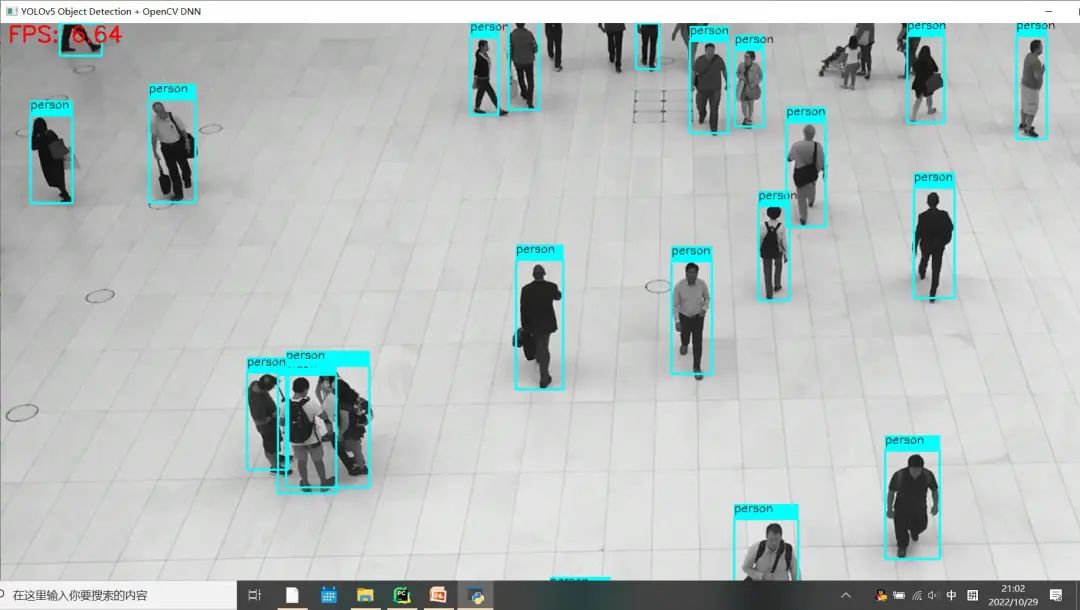
對比測試
兩處都修改完成之后,其它輸入條件與代碼不變,硬件相同條件下對比測試效果如下:修改之前 Python版本OpenCV與OpenVINO上推理速度:

修改之后Python版本OpenCV與OpenVINO上推理速度:
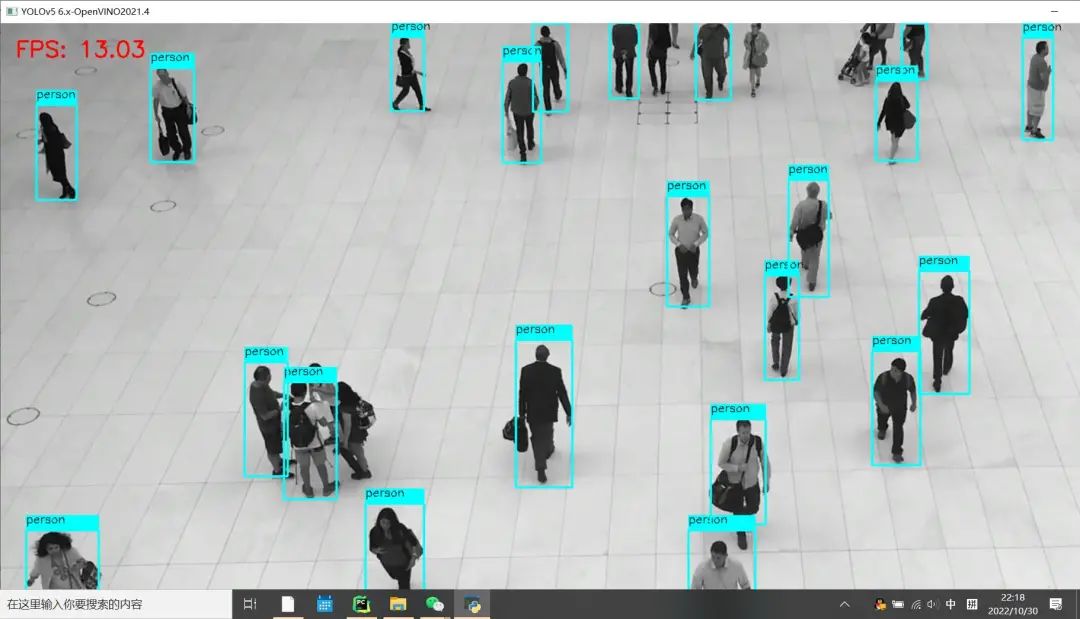
可以看到FPS較之前有明顯的提升!
審核編輯:彭靜
聲明:本文內容及配圖由入駐作者撰寫或者入駐合作網站授權轉載。文章觀點僅代表作者本人,不代表電子發燒友網立場。文章及其配圖僅供工程師學習之用,如有內容侵權或者其他違規問題,請聯系本站處理。
舉報投訴
-
數據
+關注
關注
8文章
7224瀏覽量
90196 -
程序
+關注
關注
117文章
3807瀏覽量
81728 -
模型
+關注
關注
1文章
3418瀏覽量
49482 -
OpenCV
+關注
關注
31文章
636瀏覽量
41815
原文標題:替換前后處理的兩個函數,Python版YOLOv5+OpenCV推理幀率提升1.5倍
文章出處:【微信號:CVSCHOOL,微信公眾號:OpenCV學堂】歡迎添加關注!文章轉載請注明出處。
發布評論請先 登錄
相關推薦
在Jetson Nano上使用TensorRT C++實現YOLOv5模型推理
前面有一篇文章詳細說明了如何在Jetson Nano上安裝YOLOv5,然后運行,這里只需在導出的時候導出engine模型文件支持。
發表于 11-17 09:38
?4770次閱讀
Yolov5算法解讀
yolov5于2020年由glenn-jocher首次提出,直至今日yolov5仍然在不斷進行升級迭代。 Yolov5有YOLOv5s、
在C++中使用OpenVINO工具包部署YOLOv5-Seg模型
YOLOv5兼具速度和精度,工程化做的特別好,Git clone到本地即可在自己的數據集上實現目標檢測任務的訓練和推理,在產業界中應用廣泛。開源社區對
在RK3568教學實驗箱上實現基于YOLOV5的算法物體識別案例詳解
安裝了所有必要的依賴。這通常包括 torch、torchvision 和 opencv-python。
(2)下載預訓練模型
YOLOv5 提供了多個預訓練模型,可以從官方倉庫或相關資源中下載。
(3
發表于 12-03 14:56
YOLOv5類中rgb888p_size這個參數要與模型推理和訓練的尺寸一致嗎?一致會達到更好的效果?
YOLOv5類中rgb888p_size這個參數要與模型推理和訓練的尺寸一致嗎,一致會達到更好的效果
發表于 03-11 08:12
怎樣使用PyTorch Hub去加載YOLOv5模型
顯示了PIL和OpenCV圖像源的批量推理。可以打印到控制臺,保存到,在支持的環境中顯示到屏幕上,并以張量或pandas數據幀的形式返回。對于所有推
發表于 07-22 16:02
使用Yolov5 - i.MX8MP進行NPU錯誤檢測是什么原因?
的時機(yolov5s 模型,輸入為 448x448 ~ 70ms)。 現在我正在嘗試使用 Yolov5(uint8 量化),但我嘗試使用不同的預訓練模型獲得相同的行為,在 CPU 上進行良好檢測,
發表于 03-31 07:38
如何YOLOv5測試代碼?
使用文檔“使用 YOLOv5 進行對象檢測”我試圖從文檔第 10 頁訪問以下鏈接(在 i.MX8MP 上部署 yolov5s 的步驟 - NXP 社區)
...但是這樣做時會被拒絕訪問。該文檔沒有說明需要特殊許可才能下載 tes
發表于 05-18 06:08
yolov5模型onnx轉bmodel無法識別出結果如何解決?
推理硬件:質算盒SE5,芯片BM1684。
2. SDK: v2.7.0
代碼:
1. 模型來源yolov5官方:https://github.com/ultralytics/yolov5
發表于 09-15 07:30
在C++中使用OpenVINO工具包部署YOLOv5模型
下載并轉換YOLOv5預訓練模型的詳細步驟,請參考:《基于OpenVINO?2022.2和蝰蛇峽谷優化并部署YOLOv5模型》,本文所使用的OpenVINO是2022.3 LTS版。
使用旭日X3派的BPU部署Yolov5
本次主要介紹在旭日x3的BPU中部署yolov5。首先在ubuntu20.04安裝yolov5,并運行yolov5并使用pytoch的pt模型文件轉ONNX。
yolov5和YOLOX正負樣本分配策略
整體上在正負樣本分配中,yolov7的策略算是yolov5和YOLOX的結合。因此本文先從yolov5和YOLOX正負樣本分配策略分析入手,
發表于 08-14 11:45
?2439次閱讀

OpenCV4.8+YOLOv8對象檢測C++推理演示
自從YOLOv5更新成7.0版本,YOLOv8推出以后,OpenCV4.6以前的版本都無法再加載導出ONNX格式模型了,只有OpenCV4.7以上版本才可以支持最新版本
基于OpenCV DNN實現YOLOv8的模型部署與推理演示
基于OpenCV DNN實現YOLOv8推理的好處就是一套代碼就可以部署在Windows10系統、烏班圖系統、Jetson的Jetpack系統


 工商網監
工商網監
評論