顯示器是任何機器的必要部分,無論是任何家用電器還是工業機器。顯示屏不僅顯示操作機器的控制選項,還顯示該機器執行的任務的狀態和輸出。電子產品中使用的顯示器類型很多,如 7 段顯示器、16x2 LCD 顯示器、TFT 觸摸屏顯示器、OLED 顯示器等。
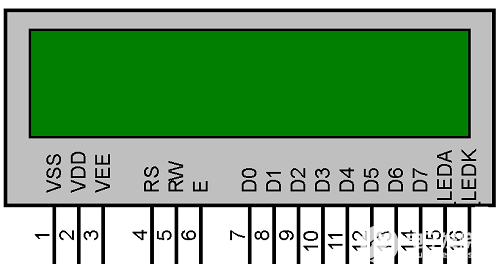
16x2 LCD顯示器是最基本的顯示模塊,也用于一些小型電子設備,如計算器,數字儀表等。
在本教程中,我們將了解如何將16x2 LCD 與 Atmega16 AVR 微控制器連接并顯示簡單的歡迎消息。
所需組件
阿特梅加16
16x2液晶模塊
運動員
面包板
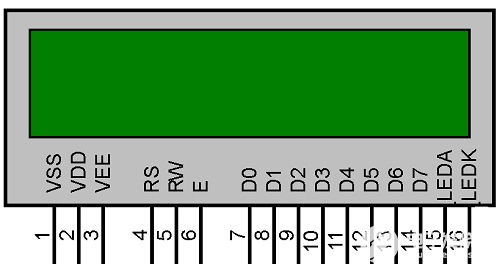
電路圖
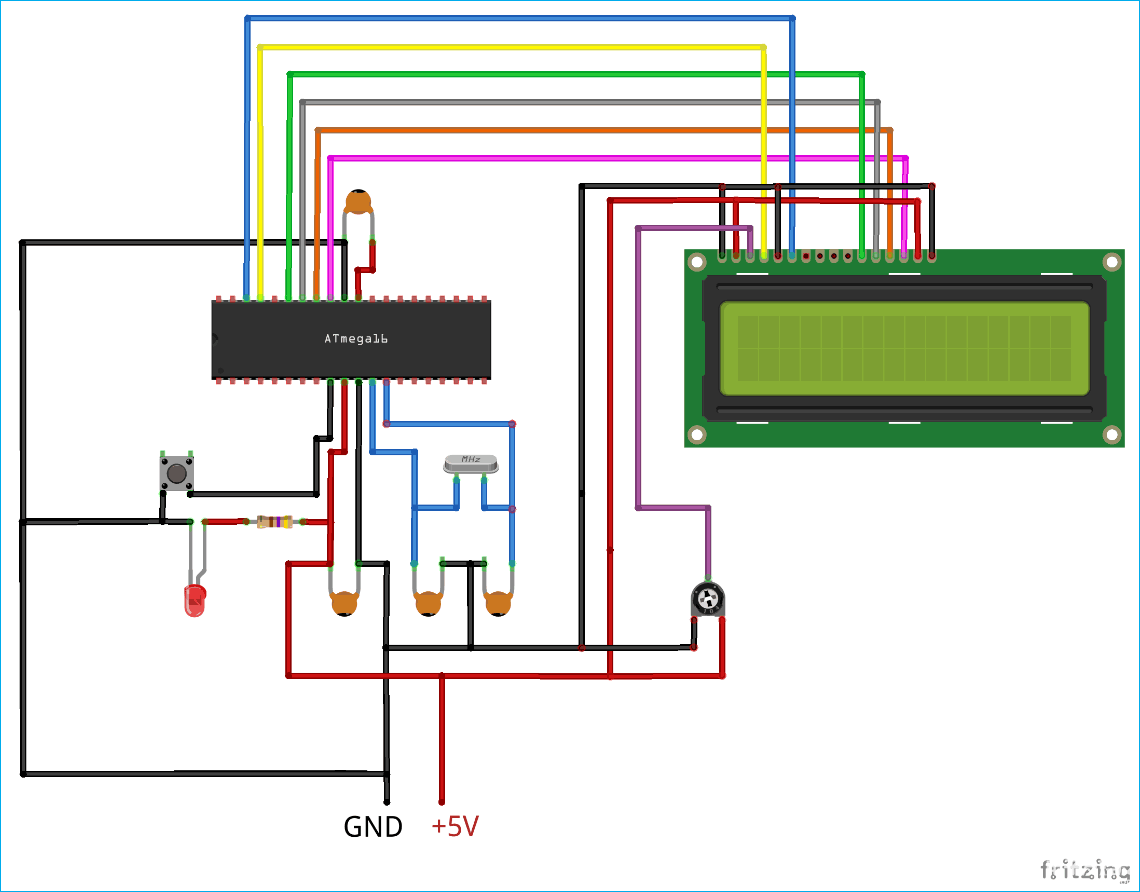
用于 16x2 LCD 顯示器的 Atmega16 編程
編程不需要任何外部庫。在這里,
Atmega16使用USBASP和Atmel Studio7.0進行編程
。項目結束時會給出
完整的程序和工作視頻
,只需在 Atmega16 中上傳程序并旋轉 10k POT 即可調整 LCD 的亮度。
首先定義 CPU 頻率,并包含 Atmel Studio 軟件包附帶的必要庫,例如用于訪問 IO 引腳的 和用于在程序中生成延遲的 。
#include
#include
在程序中定義LCD的RS和EN引腳。RS 引腳用于選擇數據和命令寄存器。使能引腳鎖存數據。
#define en PA3
#define rs PA2
還要定義Atmega16的哪個端口將用于連接LCD。這里,使用了PORTA。
#define lcdPort PORTA
下一步是構造一個函數,該函數將通過傳遞參數來接受命令。有許多液晶屏十六進制命令。十六進制命令用于定義LCD的功能。由于我們使用LCD的4位模式,因此字節(8位)將以兩個數據包發送。一個數據包將是上半字節(4位),另一個數據包將是下半字節(4位)。
void lcdCommand( unsigned char commands )
{
lcdPort = (lcdPort & 0x0F) | (commands & 0xF0);
lcdPort &= ~ (1<
lcdPort |= (1<
_delay_us(1);
lcdPort &= ~ (1<
_delay_us(200);
lcdPort = (lcdPort & 0x0F) | (commands << 4);
lcdPort |= (1<
_delay_us(1);
lcdPort &= ~ (1<
_delay_ms(2);
}
下一步是接受字符并將其鎖定到LCD端口。接收到的字符然后通過半字節發送到液晶屏半字節。該函數使用傳遞參數獲取字符,然后獲取上下半字節。對于數據寄存器,“rs”引腳設置為高電平,然后發送一個上升脈沖以鎖存數據。類似地,通過更改使能值并發送使能的上升脈沖來發送較低的半字節。
void lcdChar( unsigned char string )
{
lcdPort = (lcdPort & 0x0F) | (string & 0xF0);
lcdPort |= (1<
lcdPort|= (1<
_delay_us(1);
lcdPort &= ~ (1<
_delay_us(200);
lcdPort = (lcdPort & 0x0F) | (string << 4); ??
lcdPort |= (1<
_delay_us(1);
lcdPort &= ~ (1<
_delay_ms(2);
}
此函數只是將字符轉換為字符串,以后可以在需要寫入字符串的程序中使用。
void lcdString (char *str)
{
int j;
for(j=0;str[j]!=0;j++)
{
lcdChar (str[j]);
}
}
現在編寫一個函數只是為了清除屏幕。您只需要在十六進制中發送命令 01,然后將光標設置為初始位置即可。
void lcdClear()
{
lcdCommand (0x01);
_delay_ms(2);
lcdCommand (0x80);
}
現在在主功能中,LCD已初始化。最初將液晶屏的端口方向設置為接口。在這里,端口設置為輸出,因此設置 FF。
lcdDirection = 0xFF;
_delay_ms(20)
然后通過以十六進制發送 02 將 LCD 設置為 4 位模式。同時以十六進制發送 28,以將其設置為 4 位模式下的 2 行 15x7 矩陣像素。
lcdCommand(0x02);
lcdCommand(0x28);
命令 0c 和 06 用于控制光標位置。最后只需通過發送十六進制 01 來清除屏幕。這將完成LCD的初始化。
lcdCommand(0x0c);
lcdCommand(0x06);
lcdCommand(0x01);
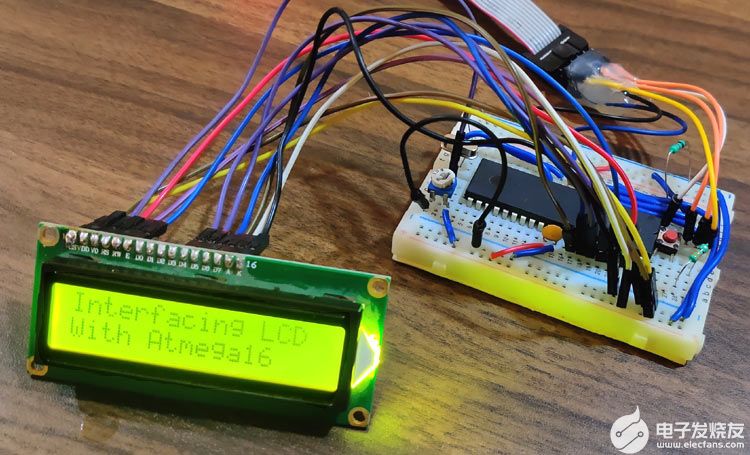
初始化完成后,只需發送字符串來測試液晶屏。在這里,我們在 1 中發送一個字符串“接口 LCD”圣排。
lcdString("Interfacing LCD");
然后通過發送十六進制命令 c0 將光標移動到下一行。最后在這個位置上,寫下字符串“With Atmega16”。
lcdCommand(0xC0);
lcdString("With Atmega16");
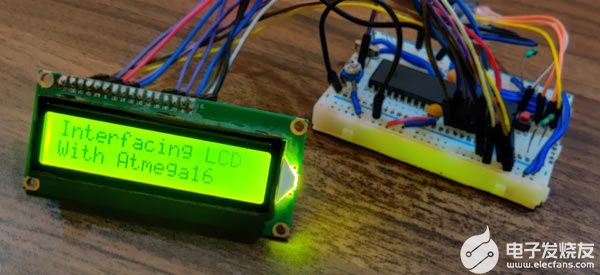
關于將16x2 LCD與Atmega16接口的完整教程到此結束。請注意,如果您沒有得到任何圖像或像素,請根據代碼和電路圖檢查接線,或者更改連接到LCDV0引腳的POT的值。
/*
LCD16x2 4 bit ATmega16 interface
CircuitDigest(www.circuitdigest.com)
*/
#define F_CPU 16000000UL // Define CPU Frequency here it 16MHz
#include // Include AVR std. library file
#include // Include Delay header file
#define en PA3 // Define Enable pin
#define rs PA2 // Define Register Select pin
#define lcdDirection DDRA // Define LCD data direction port
#define lcdPort PORTA //Define LCD data port
void lcdCommand( unsigned char commands ) // commands will be sent from this function
{
lcdPort = (lcdPort & 0x0F) | (commands & 0xF0); // send upper nibble of 8 bit
lcdPort &= ~ (1<
lcdPort |= (1<
_delay_us(1);
lcdPort &= ~ (1<
_delay_us(200);
lcdPort = (lcdPort & 0x0F) | (commands << 4); // sending lower nibble of 8 bit i.e 1byte
lcdPort |= (1<
_delay_us(1);
lcdPort &= ~ (1<
_delay_ms(2);
}
void lcdChar( unsigned char string )
{
lcdPort = (lcdPort & 0x0F) | (string & 0xF0); // send upper nibble
lcdPort |= (1<
lcdPort|= (1<
_delay_us(1);
lcdPort &= ~ (1<
_delay_us(200);
lcdPort = (lcdPort & 0x0F) | (string << 4); //send lower nibble?
lcdPort |= (1<
_delay_us(1);
lcdPort &= ~ (1<
_delay_ms(2);
}
void lcdString (char *str) // convert char to string fucntion
{
int j;
for(j=0;str[j]!=0;j++)
{
lcdChar (str[j]);
}
}
void lcdClear()
{
lcdCommand (0x01); // send hex 01 to Clear display
_delay_ms(2);
lcdCommand (0x80); // send hex 80 to Cursor at home position
}
int main()
{
// start Initializing 16x2 LCD
lcdDirection = 0xFF; // set LCD port direction in output
_delay_ms(20); // keep LCD Power ON delay >15ms always
lcdCommand(0x02); // send for 4 bit initialization of LCD
lcdCommand(0x28); // 2 line, 5*7 matrix in 4-bit mode
lcdCommand(0x0c); // Display on cursor off
lcdCommand(0x06); // take curson to next position (shift cursor to right)
lcdCommand(0x01); // Clear display screen
_delay_ms(2); //little delay
lcdString("Interfacing LCD"); // Write string on 1st row of 16x2 LCD
lcdCommand(0xC0); // move to 2nd row
lcdString("With Atmega16"); // write string on second line
}
-
微控制器
+關注
關注
48文章
7553瀏覽量
151426 -
lcd
+關注
關注
34文章
4426瀏覽量
167509 -
ATmega16
+關注
關注
5文章
154瀏覽量
45824
發布評論請先 登錄
相關推薦
基于ATmega16的簡易示波器設計
基于ATMEGA16單片機實現LCD128x64顯示程序的資料合集免費下載


 如何將16x2 LCD與Atmega16 AVR連接并顯示簡單的歡迎消息


評論