接上一篇 OpenHarmony 分布式相機(上),今天我們來說下如何實現分布式相機。
實現分布式相機其實很簡單,正如官方介紹的一樣,當被控端相機被連接成功后,可以像使用本地設備一樣使用遠程相機。
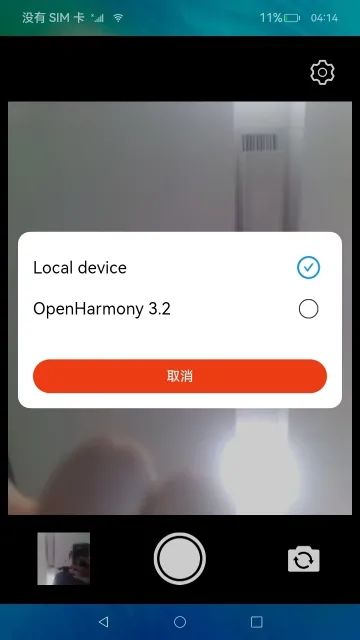
我們先看下效果:

上一篇已經完整的介紹了如何開發(fā)一個本地相機,對于分布式相機我們需要完成以下幾個步驟。
前置條件:
兩臺帶攝像頭的設備
建議使用相同版本的 OH 系統(tǒng),本案例使用 OpenHarmony 3.2 beta5
連接在同一個網絡
開發(fā)步驟:
引入設備管理(@ohos.distributedHardware.deviceManager)
通過 deviceManager 發(fā)現周邊設備
獲取和展示可信設備
在可信設備直接選擇切換不同設備的攝像頭
在主控端查看被控端的攝像頭圖像
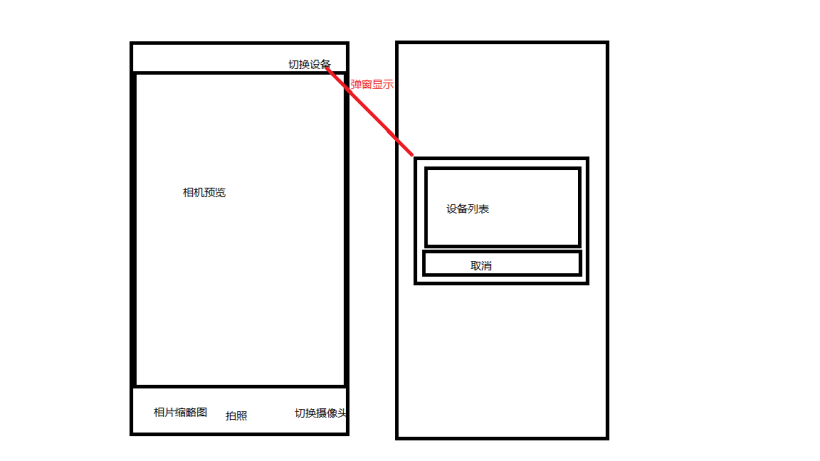
以上描述的功能在應用開發(fā)時可以使用一張草圖來表示,草圖中切換設備->彈窗顯示設備列表的過程,草圖如下:

代碼
①RemoteDeviceModel.ts
說明:遠程設備業(yè)務處理類,包括獲取可信設備列表、獲取周邊設備列表、監(jiān)聽設備狀態(tài)(上線、下線、狀態(tài)變化)、監(jiān)聽設備連接失敗、設備授信認證、卸載設備狀態(tài)監(jiān)聽等。
代碼如下:
importdeviceManagerfrom'@ohos.distributedHardware.deviceManager' importLoggerfrom'./util/Logger' constTAG:string='RemoteDeviceModel' letsubscribeId:number=-1 exportclassRemoteDeviceModel{ privatedeviceList:Array=[] privatediscoverList:Array =[] privatecallback:()=>void privateauthCallback:()=>void privatedeviceManager:deviceManager.DeviceManager constructor(){ } publicregisterDeviceListCallback(bundleName:string,callback){ if(typeof(this.deviceManager)!=='undefined'){ this.registerDeviceListCallbackImplement(callback) return } Logger.info(TAG,`deviceManager.createDeviceManagerbegin`) try{ deviceManager.createDeviceManager(bundleName,(error,value)=>{ if(error){ Logger.info(TAG,`createDeviceManagerfailed.`) return } this.deviceManager=value this.registerDeviceListCallbackImplement(callback) Logger.info(TAG,`createDeviceManagercallbackreturned,error=${error},value=${value}`) }) }catch(err){ Logger.error(TAG,`createDeviceManagerfailed,codeis${err.code},messageis${err.message}`) } Logger.info(TAG,`deviceManager.createDeviceManagerend`) } privatedeviceStateChangeActionOffline(device){ if(this.deviceList.length<=?0)?{ ????????????this.callback() ????????????return ????????} ????????for?(let?j?=?0;?j?{ if(data===null){ return } Logger.info(TAG,`deviceStateChangedata=${JSON.stringify(data)}`) switch(data.action){ casedeviceManager.DeviceStateChangeAction.READY: this.discoverList=[] this.deviceList.push(data.device) try{ letlist=this.deviceManager.getTrustedDeviceListSync() if(typeof(list)!=='undefined'&&typeof(list.length)!=='undefined'){ this.deviceList=list } this.callback() }catch(err){ Logger.error(TAG,`getTrustedDeviceListSyncfailed,codeis${err.code},messageis${err.message}`) } break casedeviceManager.DeviceStateChangeAction.OFFLINE: casedeviceManager.DeviceStateChangeAction.CHANGE: this.deviceStateChangeActionOffline(data.device) break default: break } }) this.deviceManager.on('deviceFound',(data)=>{ if(data===null){ return } Logger.info(TAG,`deviceFounddata=${JSON.stringify(data)}`) this.deviceFound(data) }) this.deviceManager.on('discoverFail',(data)=>{ Logger.info(TAG,`discoverFaildata=${JSON.stringify(data)}`) }) this.deviceManager.on('serviceDie',()=>{ Logger.info(TAG,`serviceDie`) }) this.startDeviceDiscovery() } privatedeviceFound(data){ for(vari=0;i=0){ Logger.info(TAG,`startedDeviceDiscovery`) return } subscribeId=Math.floor(65536*Math.random()) letinfo={ subscribeId:subscribeId, mode:deviceManager.DiscoverMode.DISCOVER_MODE_ACTIVE, medium:deviceManager.ExchangeMedium.COAP, freq:deviceManager.ExchangeFreq.HIGH, isSameAccount:false, isWakeRemote:true, capability:deviceManager.SubscribeCap.SUBSCRIBE_CAPABILITY_DDMP } Logger.info(TAG,`startDeviceDiscovery${subscribeId}`) try{ // todo 多次啟動發(fā)現周邊設備有什么影響嗎? this.deviceManager.startDeviceDiscovery(info) }catch(err){ Logger.error(TAG,`startDeviceDiscoveryfailed,codeis${err.code},messageis${err.message}`) } } publicunregisterDeviceListCallback(){ Logger.info(TAG,`stopDeviceDiscovery$subscribeId}`) this.deviceList=[] this.discoverList=[] try{ this.deviceManager.stopDeviceDiscovery(subscribeId) }catch(err){ Logger.error(TAG,`stopDeviceDiscoveryfailed,codeis${err.code},messageis${err.message}`) } this.deviceManager.off('deviceStateChange') this.deviceManager.off('deviceFound') this.deviceManager.off('discoverFail') this.deviceManager.off('serviceDie') } publicauthenticateDevice(device,extraInfo,callBack){ Logger.info(TAG,`authenticateDevice${JSON.stringify(device)}`) for(leti=0;i{ if(err){ Logger.error(TAG,`authenticateDeviceerror:${JSON.stringify(err)}`) this.authCallback=null return } Logger.info(TAG,`authenticateDevicesucceed:${JSON.stringify(data)}`) this.authCallback=callBack }) }catch(err){ Logger.error(TAG,`authenticateDevicefailed,codeis${err.code},messageis${err.message}`) } } } /** *已認證設備列表 */ publicgetDeviceList():Array { returnthis.deviceList } /** *發(fā)現設備列表 */ publicgetDiscoverList():Array { returnthis.discoverList } }
getDeviceList() :獲取已認證的設備列表;getDiscoverList:發(fā)現周邊設備的列表。
②DeviceDialog.ets
說明:通過 RemoteDeviceModel.getDiscoverList() 和通過 RemoteDeviceModel.getDeviceList() 獲取到所有周邊設備列表,用戶通過點擊"切換設備"按鈕彈窗顯示所有設備列表信息。
importdeviceManagerfrom'@ohos.distributedHardware.deviceManager'; constTAG='DeviceDialog' //分布式設備選擇彈窗 @CustomDialog exportstructDeviceDialog{ privatecontroller?:CustomDialogController//彈窗控制器 @LinkdeviceList:Array③打開設備列表彈窗//設備列表 @LinkselectIndex:number//選中的標簽 build(){ Column(){ List(){ ForEach(this.deviceList,(item:deviceManager.DeviceInfo,index)=>{ ListItem(){ Row(){ Text(item.deviceName) .fontSize(22) .width(350) .fontColor(Color.Black) Image(index===this.selectIndex?$r('app.media.checked'):$r('app.media.uncheck')) .width(35) .objectFit(ImageFit.Contain) } .height(55) .onClick(()=>{ console.info(`${TAG}selectdevice${item.deviceId}`) if(index===this.selectIndex){ console.info(`${TAG}devicenotchange`) }else{ this.selectIndex=index } this.controller.close() }) } },item=>item.deviceName) } .width('100%') .height(150) Button(){ Text($r('app.string.cancel')) .width('100%') .height(45) .fontSize(18) .fontColor(Color.White) .textAlign(TextAlign.Center) }.onClick(()=>{ this.controller.close() }) .backgroundColor('#ed3c13') } .width('100%') .padding(20) .backgroundColor(Color.White) .border({ color:Color.White, radius:20 }) } }
說明:在 index.ets 頁面中,點擊“切換設備”按鈕即可以開啟設備列表彈窗,通過 @Watch(‘selectedIndexChange’) 監(jiān)聽用戶選擇的設備標簽,在 devices 中獲取到具體的 DeviceInfo 對象。
代碼如下:
@State@Watch('selectedIndexChange')selectIndex:number=0
//設備列表
@Statedevices:Array=[]
//設備選擇彈窗
privatedialogController:CustomDialogController=newCustomDialogController({
builder:DeviceDialog({
deviceList:$devices,
selectIndex:$selectIndex,
}),
autoCancel:true,
alignment:DialogAlignment.Center
})


showDialog(){
console.info(`${TAG}RegisterDeviceListCallbackbegin`)
distributed.registerDeviceListCallback(BUNDLE_NAME,()=>{
console.info(`${TAG}RegisterDeviceListCallbackcallbackentered`)
this.devices=[]
//添加本地設備
this.devices.push({
deviceId:Constant.LOCAL_DEVICE_ID,
deviceName:Constant.LOCAL_DEVICE_NAME,
deviceType:0,
networkId:'',
range:1//發(fā)現設備的距離
})
letdiscoverList=distributed.getDiscoverList()
letdeviceList=distributed.getDeviceList()
letdiscoveredDeviceSize=discoverList.length
letdeviceSize=deviceList.length
console.info(`${TAG}discoveredDeviceSize:${discoveredDeviceSize}deviceSize:${deviceSize}`)
letdeviceTemp=discoveredDeviceSize>0?discoverList:deviceList
for(letindex=0;index=distributed.getDiscoverList()
if(discoverList.length<=?0)?{
??????this.mCurDeviceID?=?this.devices[this.selectIndex].deviceId
??????await?this.switchDevice()
??????this.devices?=?[]
??????return
????}
????let?selectDeviceName?=?this.devices[this.selectIndex].deviceName
????let?extraInfo?=?{
??????'targetPkgName':?BUNDLE_NAME,
??????'appName':?APP_NAME,
??????'appDescription':?APP_NAME,
??????'business':?'0'
????}
????distributed.authenticateDevice(this.devices[this.selectIndex],?extraInfo,?async?()?=>{
//獲取到相關的設備ID,啟動遠程應用
for(varindex=0;index


	④重新加載相機

	說明:根據用戶選擇的設備標簽獲取到當前用戶需要切換的相機設備對象,重新加載相機,重新加載需要釋放原有的相機資源,然后重新構建 createCameraInput、createPreviewOutput、createSession。 可能你注意到這里好像沒有執(zhí)行 createPhotoOutput,這是因為在實踐過程中發(fā)現,添加了一個當前設備所支持的拍照配置到會話管理(CaptureSession.addOutput())時,系統(tǒng)會返回當前拍照配置流不支持,并關閉相機,導致相機預覽黑屏,所以這里沒有添加。

	issues:遠程相機拍照失敗 not found in supported streams。


https://gitee.com/openharmony/distributedhardware_distributed_camera/issues/I6E5ZX

 mCameraService:這個是相機管理類,代碼可以查看上一篇:OpenHarmony 分布式相機(上)中查看。


	代碼如下:


/**
*切換攝像頭
*同一臺設備上切換不同攝像頭
*/
asyncswitchCamera(){
console.info(`${TAG}switchCamera`)
letcameraList=this.mCameraService.getDeviceCameras(this.mCurDeviceID)
if(cameraList&&cameraList.length>1){
letcameraCount:number=cameraList.length
console.info(`${TAG}cameralist${cameraCount}}`)
if(this.mCurCameraIndex


	⑤加載過度動畫

	說明:在相機切換中會需要釋放原相機的資源,在重啟新相機,在通過軟總線通道同步遠程相機的預覽數據。 這里需要一些時間,根據目前測試,在網絡穩(wěn)定狀態(tài)下,切換時間 3~5s,網絡不穩(wěn)定狀態(tài)下,切換最長需要 13s,當然有時候會出現無法切換成功,這種情況可能是遠程設備已經下線,無法再獲取到數據。

	代碼如下:


@StateisSwitchDeviceing:boolean=false//是否正在切換相機

if(this.isSwitchDeviceing){
Column(){
Image($r('app.media.load_switch_camera'))
.width(400)
.height(306)
.objectFit(ImageFit.Fill)
Text($r('app.string.switch_camera'))
.width('100%')
.height(50)
.fontSize(16)
.fontColor(Color.White)
.align(Alignment.Center)
}
.width('100%')
.height('100%')
.backgroundColor(Color.Black)
.justifyContent(FlexAlign.Center)
.alignItems(HorizontalAlign.Center)
.onClick(()=>{
})
}

 至此,分布式相機的整體流程就已實現完成。下面我們介紹下分布式相機開發(fā)中所遇到的問題。


	分布式相機問題一覽

	  對于開發(fā)過程中所遇到的一些坑,前面多少有簡單的提到一些,這里做一次規(guī)整,也算是一次回顧。

	①首次授權成功無法顯示相機預覽

	解析:我們正常會在 MainAbility.ts 的 onCreate() 函數加載的時候執(zhí)行申請授權,在 index.ets 頁面中,當 XComponent 組件 onLoad() 回調后執(zhí)行初始化相機操作,代碼如下:

	MainAbility.ts:


constTAG:string='[DistributedCamera]'
letpermissionList:Array=[
"ohos.permission.MEDIA_LOCATION",
"ohos.permission.READ_MEDIA",
"ohos.permission.WRITE_MEDIA",
"ohos.permission.CAMERA",
"ohos.permission.MICROPHONE",
"ohos.permission.DISTRIBUTED_DATASYNC"
]


exportdefaultclassMainAbilityextendsAbility{
asynconCreate(want,launchParam){
console.info(`${TAG}onCreate`)
globalThis.cameraAbilityContext=this.context
awaitglobalThis.cameraAbilityContext.requestPermissionsFromUser(permissionList)
}
}

index.ets:

//...
//截取部分主要代碼

Column(){
XComponent({
id:'componentId',
type:'surface',
controller:this.XComponentController
}).onLoad(async()=>{
console.info(`${TAG}XComponentonLoadiscalled`)
this.XComponentController.setXComponentSurfaceSize({
surfaceWidth:Resolution.DEFAULT_WIDTH,
surfaceHeight:Resolution.DEFAULT_HEIGHT
})
this.surfaceId=this.XComponentController.getXComponentSurfaceId()
console.info(`${TAG}surfaceId:${this.surfaceId}`)
awaitthis.initCamera()
}).height('100%')
.width('100%')
}
.width('100%')
.height('75%')
.margin({
bottom:20
})

//...


	應用啟動后,調用了 requestPermissionsFromUser() 請求權限后,但未手動授權時,查看相關日志:


	日志告訴我們,page 的生命周期已啟動到 onShow,并且頁面布局也完成了加載,XComponent 組件回調 onLoad()。 但是由于還未授權,導致無法初始化相機,此時即便授權成功,也不會再進行初始化,導致相機無法啟動,無預覽視圖。 知道原因后,我們可以有多種方式解決,重點就是在授權完成后,需要再次觸發(fā)初始化相機,讓相機啟動才可以正常預覽。

	我的處理方式:

	在 index.ets 頁面中處理授權

	定義是否已授權的標識,用于判斷是否可以初始化相機

	定義是否已經初始化相機標識,防止對此初始化

	在 page 頁面初始化函數 aboutToAppear() 中請求權限,并在權限申請結果中添加初始化相機操作

	XComponent 組件回調 onLoad() 初始化相機操作不變

	index.ets:


privateisInitCamera:boolean=false//是否已初始化相機
privateisPermissions:boolean=false//是否完成授權

asyncaboutToAppear(){
console.info(`${TAG}aboutToAppear`)
globalThis.cameraAbilityContext.requestPermissionsFromUser(permissionList).then(async(data)=>{
console.info(`${TAG}datapermissions:${JSON.stringify(data.permissions)}`)
console.info(`${TAG}dataauthResult:${JSON.stringify(data.authResults)}`)
//判斷授權是否完成
letresultCount:number=0
for(letresultofdata.authResults){
if(result===0){
resultCount+=1
}
}
if(resultCount===permissionList.length){
this.isPermissions=true
}
awaitthis.initCamera()
//獲取縮略圖
this.mCameraService.getThumbnail(this.functionBackImpl)
})
}


	②相機應用未關閉,系統(tǒng)息屏后重新點亮,重新返回相機應用,無預覽輸出流返回

	解析:從現象看,預覽畫面卡在息屏前的狀態(tài),需要退出應用后,重啟應用才能正常預覽。從日志上看沒有查看到具體的原因,只是 camera_host 的數據量日志消失。

	猜想:相機在系統(tǒng)息屏后強制關閉,需要重新加載相機才能正常預覽,實現方式如下:

	在 page 的 onPageShow() 回調函數中重新初始化相機。

	在 page 的 onPageHide() 函數中釋放相機資源,減少系統(tǒng)資源不必要的消耗。

	index.ets:


asynconPageShow(){
console.info(`${TAG}onPageShow`)
awaitthis.initCamera()
}
onPageHide(){
console.info(`${TAG}onPageHide`)
this.isSwitchDeviceing=false
this.isInitCamera=false
this.mCameraService.releaseCamera()
}

結論:實踐驗證此方法有效解決息屏后點亮返回相機無法預覽的問題。


	③加載遠程相機,在會話管理中添加拍照輸出流,無法拍照,預覽黑屏

	解析:兩臺設備 pin 碼認證通過,連接成功,在主控端選擇一臺被控端設備時,加載相機,流程與加載本地相機相同。

	流程如下:


createCameraInput()
createPreviewOutput()
createPhotoOutput()
createSession()

*createSession.beginConfig()
*createSession.addInput(CameraInput)
*createSession.addOutput(PreviewOutput)
*createSession.addOutput(PhotoOutput)
*createSession.commitConfig()
*createSession.start()


	經過排查,發(fā)現日志中返回異常 not found in supported streams,詳情可以查看關聯issues。


https://gitee.com/openharmony/distributedhardware_distributed_camera/issues/I6E5ZX

 原因:在創(chuàng)建 PhotoOutput 時需要傳遞支持的拍照配置信息 Profile,這里的 Profile 可以通過CmeraManager.getSupportedOutputCapability()返回的相機輸出能力 CameraOutputCapability 對象獲取,但遠程相機設備拍照輸出能力列表返回空。


	但通過查看本地相機拍照輸出能力可知 DAYU200 設備支持的 Profile 信息:


photoProfile{"format":2000,"size":{"width":1280,"height":960}}

 通過此將 photoProfile 作為遠程相機設備構建拍照輸出流的入參場景拍照輸出流,并把此添加到拍照會話管理中,但是界面出現不支持此相機配置,最終關閉了相機,導致黑屏。 解決方案:根據此問題,目前只能根據場景判斷是否需要添加拍照輸出流到會話管理,對于本地相機則可以添加拍照輸出流,執(zhí)行拍照業(yè)務,遠程相機則不添加拍照輸出流,這也就不能執(zhí)行拍照業(yè)務,希望社區(qū)有解決方案。


	④切換不同設備上的相機,相機預覽輸出流出現異常,無法顯示遠程相機的畫面

	解析:此問題存在的原因可能有多種,這里我說下我遇到的情況。 (1)分布式連接被斷開,但是因為底層機制,設備之間下線需要在一段時間內才能上報(預計 5 分鐘),所以在應用層看到可以連接的遠端設備,其實已經下線了,這時當然不能切換到遠程相機。 (2)與問題 3 中描述的相同,因為添加了一個無法支持的拍照配置信息導致相機被關閉。

	解決方案:

	等待線下通知,再重新連接設備,或者等待設備自動完成重連,簡單粗暴就是重啟設備。

	待社區(qū)反饋。

	⑤相機業(yè)務在主線程執(zhí)行,需要將業(yè)務移動到子線程,防止 UI 線程堵塞

	解析:如題描述,目前可能存在堵塞 UI 線程的可能,需要將一些耗時的操作移動到子線程,比如預覽、拍照保存圖片等。 目前正在修改優(yōu)化,關于 ets 的異步線程 worker 可以查看之前寫的一篇關于:OpenHarmony stage worker 多線程。

	⑥遠程相機預覽數據傳輸存在 500ms 的延遲

	解析:在 wifi 環(huán)境下,被控端相機將預覽數據通過軟總線傳輸到主控端顯示,有 500ms 左右的延遲,此問題待排查,具體是那個環(huán)境出現的延遲。

	⑦no permission for function call

	解析:用戶動態(tài)授予:允許不同設備間的數據(ohos.permission.DISTRIBUTED_DATASYNC) 交換權限后,DeviceManager.startDeviceDiscovery() 啟動發(fā)現周邊設備總會出現異常。

	日志中提示:


discoverFaildata={"subscribeId":26386,"reason":-20007,"errInfo":"nopermissionforfunctioncall."}


	原因:非系統(tǒng)應用無法使用 DeviceManager,詳細可查看:issues。


https://gitee.com/openharmony/distributedhardware_device_manager/issues/I6BYK4

 解決方案:系統(tǒng)應用和普通應用是通過簽名來區(qū)分,那只要通過修改簽名 UnsgnedReleasedProfileTemplate.json 文件中的 app-feature 值為 ohos_system_app,即為系統(tǒng)應用。


	審核編輯:湯梓紅
-
攝像頭
+關注
關注
60文章
4841瀏覽量
95694 -
相機
+關注
關注
4文章
1351瀏覽量
53612 -
設備
+關注
關注
2文章
4509瀏覽量
70638 -
鴻蒙
+關注
關注
57文章
2352瀏覽量
42858 -
OpenHarmony
+關注
關注
25文章
3722瀏覽量
16317
原文標題:鴻蒙分布式相機“踩坑”分享
文章出處:【微信號:gh_834c4b3d87fe,微信公眾號:OpenHarmony技術社區(qū)】歡迎添加關注!文章轉載請注明出處。
發(fā)布評論請先 登錄
相關推薦
HarmonyOS鴻蒙操作系統(tǒng)之什么是“基于微內核的全場景分布式操作系統(tǒng)”?
HarmonyOS教程一分布式語音照相機
分布式系統(tǒng)硬件資源池原理和接入實踐
什么是鴻蒙分布式游戲?為什么要做分布式游戲?
華為鴻蒙系統(tǒng)之分布式游戲詳解
鴻蒙分布式怎么理解
鴻蒙系統(tǒng)底層架構 鴻蒙系統(tǒng)分布式架構
分享一個有趣的鴻蒙分布式小游戲

鴻蒙版JS如何實現分布式仿抖音應用
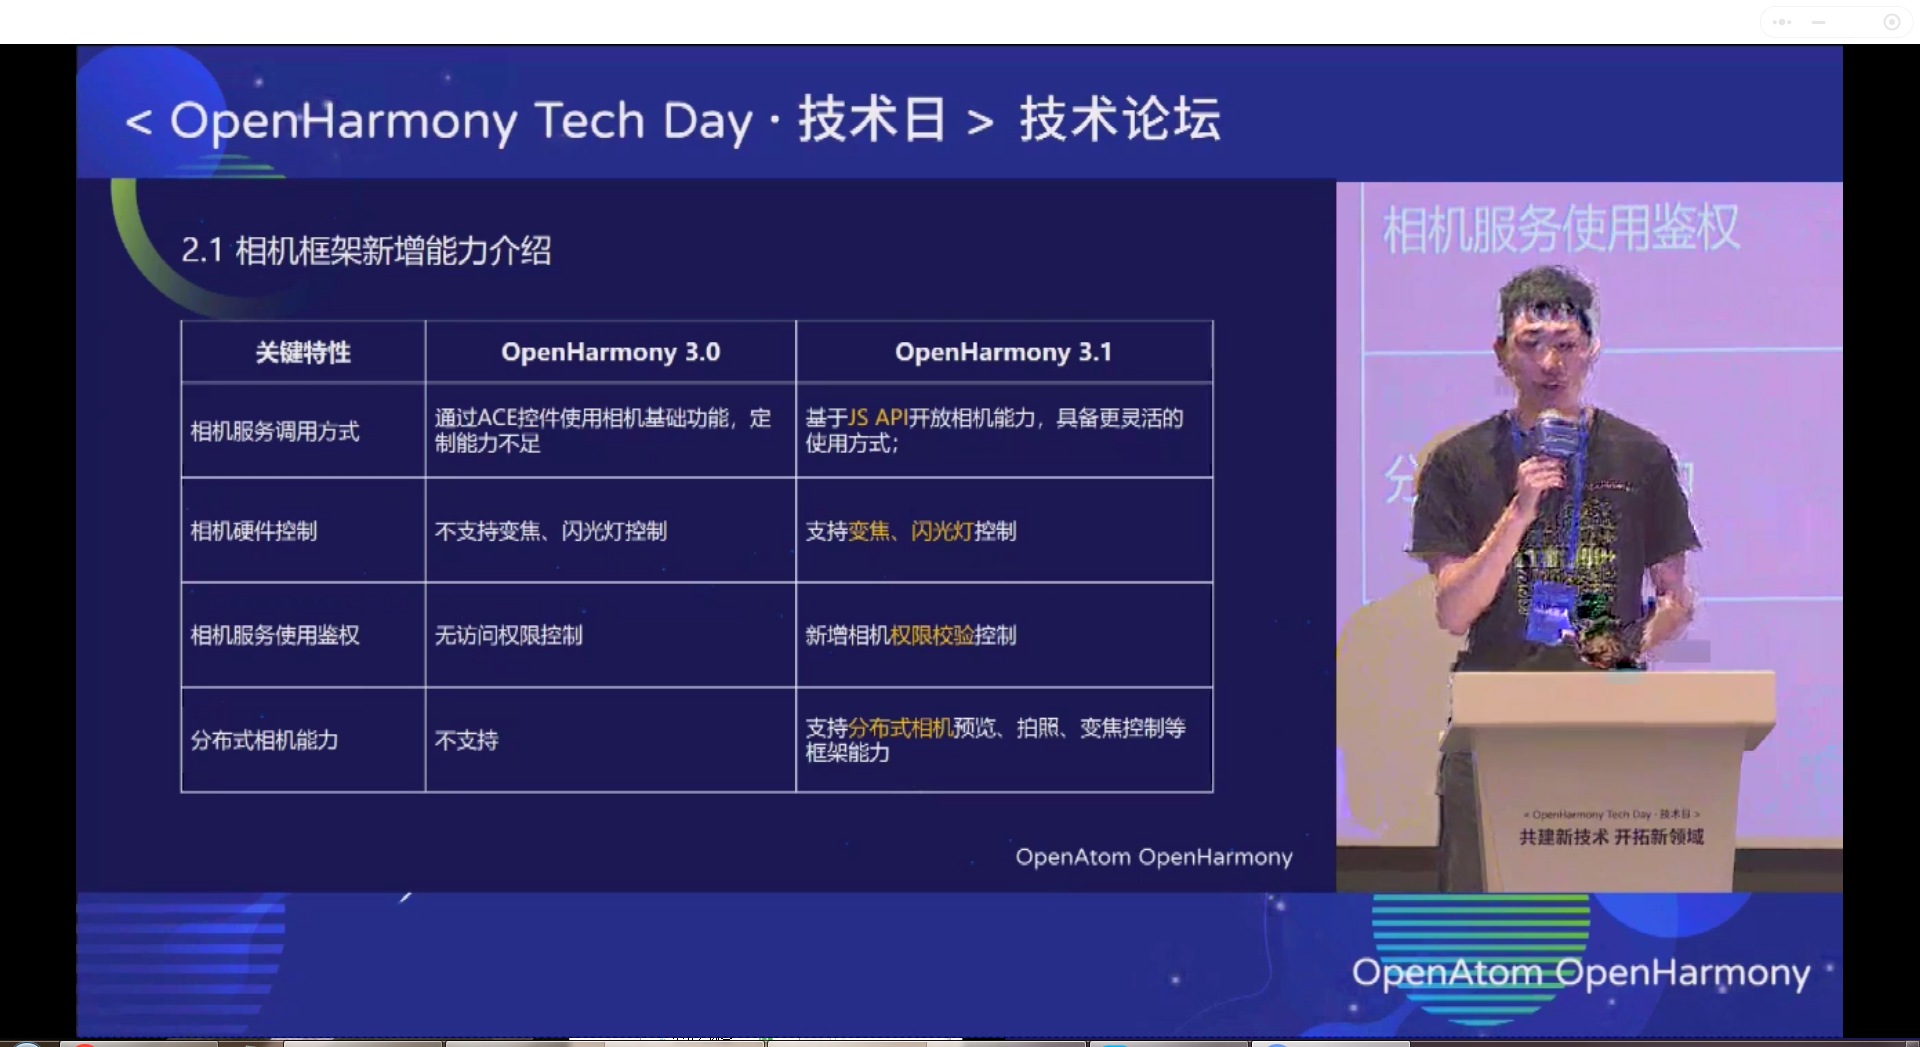
OpenHarmony技術論壇:分布式相機和分布式圖庫功能


 鴻蒙分布式相機“踩坑”分享


評論