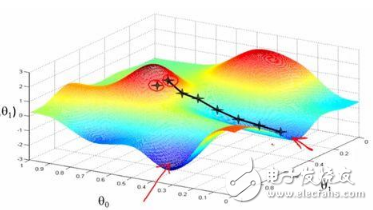
到目前為止,我們在基于梯度的學習方法中遇到了兩個極端:第 12.3 節使用完整數據集來計算梯度和更新參數,一次一個傳遞。相反, 第 12.4 節一次處理一個訓練示例以取得進展。它們中的任何一個都有其自身的缺點。當數據非常相似時,梯度下降并不是特別有效。隨機梯度下降在計算上不是特別有效,因為 CPU 和 GPU 無法利用矢量化的全部功能。這表明可能存在介于兩者之間的東西,事實上,這就是我們迄今為止在討論的示例中一直使用的東西。
12.5.1。矢量化和緩存
決定使用小批量的核心是計算效率。在考慮并行化到多個 GPU 和多個服務器時,這一點最容易理解。在這種情況下,我們需要向每個 GPU 發送至少一張圖像。每臺服務器 8 個 GPU 和 16 個服務器,我們已經達到了不小于 128 的小批量大小。
當涉及到單個 GPU 甚至 CPU 時,事情就有點微妙了。這些設備有多種類型的內存,通常有多種類型的計算單元和它們之間不同的帶寬限制。例如,CPU 有少量寄存器,然后是 L1、L2,在某些情況下甚至是 L3 緩存(在不同處理器內核之間共享)。這些緩存的大小和延遲都在增加(同時它們的帶寬在減少)。可以說,處理器能夠執行的操作比主內存接口能夠提供的要多得多。
首先,具有 16 個內核和 AVX-512 矢量化的 2GHz CPU 最多可以處理2?109?16?32=1012每秒字節數。GPU 的能力很容易超過這個數字的 100 倍。另一方面,中端服務器處理器的帶寬可能不會超過 100 GB/s,即不到保持處理器所需帶寬的十分之一喂。更糟糕的是,并非所有內存訪問都是平等的:內存接口通常為 64 位寬或更寬(例如,在 GPU 上高達 384 位),因此讀取單個字節會產生更寬訪問的成本。
其次,第一次訪問的開銷很大,而順序訪問相對便宜(這通常稱為突發讀取)。還有很多事情要記住,比如當我們有多個套接字、小芯片和其他結構時的緩存。 有關更深入的討論,請參閱此 維基百科文章。
緩解這些限制的方法是使用 CPU 高速緩存的層次結構,這些高速緩存的速度實際上足以為處理器提供數據。這是深度學習中批處理背后的驅動力。為了簡單起見,考慮矩陣-矩陣乘法,比如 A=BC. 我們有多種計算方法A. 例如,我們可以嘗試以下操作:
我們可以計算 Aij=Bi,:C:,j,即,我們可以通過點積的方式逐元素計算它。
我們可以計算 A:,j=BC:,j,也就是說,我們可以一次計算一列。同樣我們可以計算 A一排Ai,:一次。
我們可以簡單地計算A=BC.
我們可以打破B和C分成更小的塊矩陣并計算A一次一個塊。
如果我們遵循第一個選項,每次我們想要計算一個元素時,我們都需要將一行和一列向量復制到 CPU 中 Aij. 更糟糕的是,由于矩陣元素是順序對齊的,因此當我們從內存中讀取兩個向量之一時,我們需要訪問許多不相交的位置。第二種選擇要有利得多。在其中,我們能夠保留列向量C:,j在 CPU 緩存中,同時我們繼續遍歷B. 這將內存帶寬要求減半,訪問速度也相應加快。當然,選項 3 是最可取的。不幸的是,大多數矩陣可能無法完全放入緩存(畢竟這是我們正在討論的內容)。然而,選項 4 提供了一個實用的替代方法:我們可以將矩陣的塊移動到緩存中并在本地將它們相乘。優化的庫會為我們解決這個問題。讓我們看看這些操作在實踐中的效率如何。
除了計算效率之外,Python 和深度學習框架本身引入的開銷也相當可觀。回想一下,每次我們執行命令時,Python 解釋器都會向 MXNet 引擎發送命令,而 MXNet 引擎需要將其插入計算圖中并在調度期間對其進行處理。這種開銷可能非常有害。簡而言之,強烈建議盡可能使用矢量化(和矩陣)。
%matplotlib inline
import time
import numpy as np
import torch
from torch import nn
from d2l import torch as d2l

A = torch.zeros(256, 256)
B = torch.randn(256, 256)
C = torch.randn(256, 256)
%matplotlib inline
import time
from mxnet import autograd, gluon, init, np, npx
from mxnet.gluon import nn
from d2l import mxnet as d2l

npx.set_np()

A = np.zeros((256, 256))
B = np.random.normal(0, 1, (256, 256))
C = np.random.normal(0, 1, (256, 256))
%matplotlib inline
import time
import numpy as np
import tensorflow as tf
from d2l import tensorflow as d2l

A = tf.Variable(tf.zeros((256, 256)))
B = tf.Variable(tf.random.normal([256, 256], 0, 1))
C = tf.Variable(tf.random.normal([256, 256], 0, 1))
由于我們將在本書的其余部分頻繁地對運行時間進行基準測試,因此讓我們定義一個計時器。
class Timer: #@save
  """Record multiple running times."""
  def __init__(self):
    self.times = []
    self.start()

  def start(self):
    """Start the timer."""
    self.tik = time.time()

  def stop(self):
    """Stop the timer and record the time in a list."""
    self.times.append(time.time() - self.tik)
    return self.times[-1]

  def avg(self):
    """Return the average time."""
    return sum(self.times) / len(self.times)

  def sum(self):
    """Return the sum of time."""
    return sum(self.times)

  def cumsum(self):
    """Return the accumulated time."""
    return np.array(self.times).cumsum().tolist()

timer = Timer()
逐元素賦值簡單地遍歷所有行和列 B和C分別賦值給A.
# Compute A = BC one element at a time
timer.start()
for i in range(256):
  for j in range(256):
    A[i, j] = torch.dot(B[i, :], C[:, j])
timer.stop()
1.5775339603424072
# Compute A = BC one element at a time
timer.start()
for i in range(256):
  for j in range(256):
    A[i, j] = np.dot(B[i, :], C[:, j])
A.wait_to_read()
timer.stop()
2547.9816353321075
# Compute A = BC one element at a time
timer.start()
for i in range(256):
  for j in range(256):
    A[i, j].assign(tf.tensordot(B[i, :], C[:, j], axes=1))
timer.stop()
164.52903413772583
更快的策略是按列分配。
# Compute A = BC one column at a time
timer.start()
for j in range(256):
  A[:, j] = torch.mv(B, C[:, j])
timer.stop()
1.0594699382781982
# Compute A = BC one column at a time
timer.start()
for j in range(256):
  A[:, j] = np.dot(B, C[:, j])
A.wait_to_read()
timer.stop()
6.320310592651367
timer.start()
for j in range(256):
  A[:, j].assign(tf.tensordot(B, C[:, j], axes=1))
timer.stop()
0.5073747634887695
最后,最有效的方式是在一個塊中執行整個操作。請注意,將任意兩個矩陣相乘 B∈Rm×n和 C∈Rn×p大約需要 2mnp浮點運算,當標量乘法和加法被視為單獨的運算時(實際上是融合的)。因此,乘以兩個256×256矩陣需要0.03 億個浮點運算。讓我們看看各自的操作速度是多少。
# Compute A = BC in one go
timer.start()
A = torch.mm(B, C)
timer.stop()

gigaflops = [0.03 / i for i in timer.times]
print(f'performance in Gigaflops: element {gigaflops[0]:.3f}, '
   f'column {gigaflops[1]:.3f}, full {gigaflops[2]:.3f}')
performance in Gigaflops: element 0.019, column 0.028, full 2.167
# Compute A = BC in one go
timer.start()
A = np.dot(B, C)
A.wait_to_read()
timer.stop()

gigaflops = [0.03 / i for i in timer.times]
print(f'performance in Gigaflops: element {gigaflops[0]:.3f}, '
   f'column {gigaflops[1]:.3f}, full {gigaflops[2]:.3f}')
performance in Gigaflops: element 0.000, column 0.005, full 1.746
timer.start()
A.assign(tf.tensordot(B, C, axes=1))
timer.stop()

gigaflops = [0.03 / i for i in timer.times]
print(f'performance in Gigaflops: element {gigaflops[0]:.3f}, '
   f'column {gigaflops[1]:.3f}, full {gigaflops[2]:.3f}')
performance in Gigaflops: element 0.000, column 0.059, full 1.155
12.5.2。小批量
在過去,我們理所當然地認為我們會讀取小批量數據而不是單個觀察來更新參數。我們現在給出一個簡短的理由。處理單個觀測值需要我們執行許多單個矩陣-向量(甚至向量-向量)乘法,這是非常昂貴的,并且代表底層深度學習框架會產生大量開銷。這既適用于在應用于數據時評估網絡(通常稱為推理),也適用于計算梯度以更新參數時。也就是說,這適用于我們執行的任何時候 w←w?ηtgt在哪里
(12.5.1)gt=?wf(xt,w)
我們可以通過一次將其應用于一小批觀察來提高此操作的計算效率。也就是我們替換梯度gt一個人對一小批人的一次觀察
(12.5.2)gt=?w1|Bt|∑i∈Btf(xi,w)
讓我們看看這對 gt: 因為兩者xt以及小批量的所有元素Bt從訓練集中均勻地隨機抽取,梯度的期望保持不變。另一方面,方差顯著減少。由于小批量梯度由 b=def|Bt|被平均的獨立梯度,它的標準偏差減少了一個因素b?12. 這本身就是一件好事,因為這意味著更新更可靠地與完整梯度對齊。
天真地說,這表明選擇一個大的 minibatch Bt將是普遍可取的。las,在某個時間點之后,與計算成本的線性增加相比,標準偏差的額外減少是最小的。在實踐中,我們選擇一個足夠大的小批量來提供良好的計算效率,同時仍然適合 GPU 的內存。為了說明節省的成本,讓我們看一些代碼。我們在其中執行相同的矩陣乘法,但這次分解為一次 64 列的“小批量”。
timer.start()
for j in range(0, 256, 64):
  A[:, j:j+64] = torch.mm(B, C[:, j:j+64])
timer.stop()
print(f'performance in Gigaflops: block {0.03 / timer.times[3]:.3f}')
performance in Gigaflops: block 0.655
timer.start()
for j in range(0, 256, 64):
  A[:, j:j+64] = np.dot(B, C[:, j:j+64])
timer.stop()
print(f'performance in Gigaflops: block {0.03 / timer.times[3]:.3f}')
performance in Gigaflops: block 1.983
timer.start()
for j in range(0, 256, 64):
  A[:, j:j+64].assign(tf.tensordot(B, C[:, j:j+64], axes=1))
timer.stop()
print(f'performance in Gigaflops: block {0.03 / timer.times[3]:.3f}')
performance in Gigaflops: block 2.796
正如我們所見,小批量的計算基本上與全矩陣一樣有效。需要注意的是。在 第 8.5 節中,我們使用了一種正則化,這種正則化在很大程度上取決于小批量中的方差量。當我們增加后者時,方差會減少,并且由于批量歸一化而帶來的噪聲注入的好處也會隨之減少。有關如何重新縮放和計算適當項的詳細信息,請參見例如 Ioffe ( 2017 ) 。
12.5.3。讀取數據集
讓我們看看如何從數據中有效地生成小批量。下面我們使用 NASA 開發的數據集測試不同飛機的機翼噪聲 來比較這些優化算法。為了方便我們只使用第一個1,500例子。數據被白化以進行預處理,即我們去除均值并將方差重新調整為 1每個坐標。
#@save
d2l.DATA_HUB['airfoil'] = (d2l.DATA_URL + 'airfoil_self_noise.dat',
              '76e5be1548fd8222e5074cf0faae75edff8cf93f')

#@save
def get_data_ch11(batch_size=10, n=1500):
  data = np.genfromtxt(d2l.download('airfoil'),
             dtype=np.float32, delimiter='t')
  data = torch.from_numpy((data - data.mean(axis=0)) / data.std(axis=0))
  data_iter = d2l.load_array((data[:n, :-1], data[:n, -1]),
                batch_size, is_train=True)
  return data_iter, data.shape[1]-1
#@save
d2l.DATA_HUB['airfoil'] = (d2l.DATA_URL + 'airfoil_self_noise.dat',
              '76e5be1548fd8222e5074cf0faae75edff8cf93f')

#@save
def get_data_ch11(batch_size=10, n=1500):
  data = np.genfromtxt(d2l.download('airfoil'),
             dtype=np.float32, delimiter='t')
  data = (data - data.mean(axis=0)) / data.std(axis=0)
  data_iter = d2l.load_array(
    (data[:n, :-1], data[:n, -1]), batch_size, is_train=True)
  return data_iter, data.shape[1]-1
#@save
d2l.DATA_HUB['airfoil'] = (d2l.DATA_URL + 'airfoil_self_noise.dat',
              '76e5be1548fd8222e5074cf0faae75edff8cf93f')

#@save
def get_data_ch11(batch_size=10, n=1500):
  data = np.genfromtxt(d2l.download('airfoil'),
             dtype=np.float32, delimiter='t')
  data = (data - data.mean(axis=0)) / data.std(axis=0)
  data_iter = d2l.load_array((data[:n, :-1], data[:n, -1]),
                batch_size, is_train=True)
  return data_iter, data.shape[1]-1
12.5.4。從零開始實施
回憶一下3.4 節中的小批量隨機梯度下降實現 。在下文中,我們提供了一個稍微更通用的實現。為方便起見,它與本章稍后介紹的其他優化算法具有相同的調用簽名。具體來說,我們添加狀態輸入states并將超參數放入字典中hyperparams。另外,我們會在訓練函數中平均每個minibatch樣本的損失,因此優化算法中的梯度不需要除以batch size。
def sgd(params, states, hyperparams):
  for p in params:
    p.data.sub_(hyperparams['lr'] * p.grad)
    p.grad.data.zero_()
def sgd(params, states, hyperparams):
  for p in params:
    p[:] -= hyperparams['lr'] * p.grad
def sgd(params, grads, states, hyperparams):
  for param, grad in zip(params, grads):
    param.assign_sub(hyperparams['lr']*grad)
接下來,我們實現一個通用的訓練函數,以方便使用本章后面介紹的其他優化算法。它初始化了一個線性回歸模型,可以用來用小批量隨機梯度下降和隨后介紹的其他算法來訓練模型。
#@save
def train_ch11(trainer_fn, states, hyperparams, data_iter,
        feature_dim, num_epochs=2):
  # Initialization
  w = torch.normal(mean=0.0, std=0.01, size=(feature_dim, 1),
           requires_grad=True)
  b = torch.zeros((1), requires_grad=True)
  net, loss = lambda X: d2l.linreg(X, w, b), d2l.squared_loss
  # Train
  animator = d2l.Animator(xlabel='epoch', ylabel='loss',
              xlim=[0, num_epochs], ylim=[0.22, 0.35])
  n, timer = 0, d2l.Timer()
  for _ in range(num_epochs):
    for X, y in data_iter:
      l = loss(net(X), y).mean()
      l.backward()
      trainer_fn([w, b], states, hyperparams)
      n += X.shape[0]
      if n % 200 == 0:
        timer.stop()
        animator.add(n/X.shape[0]/len(data_iter),
               (d2l.evaluate_loss(net, data_iter, loss),))
        timer.start()
  print(f'loss: {animator.Y[0][-1]:.3f}, {timer.sum()/num_epochs:.3f} sec/epoch')
  return timer.cumsum(), animator.Y[0]
#@save
def train_ch11(trainer_fn, states, hyperparams, data_iter,
        feature_dim, num_epochs=2):
  # Initialization
  w = np.random.normal(scale=0.01, size=(feature_dim, 1))
  b = np.zeros(1)
  w.attach_grad()
  b.attach_grad()
  net, loss = lambda X: d2l.linreg(X, w, b), d2l.squared_loss
  # Train
  animator = d2l.Animator(xlabel='epoch', ylabel='loss',
              xlim=[0, num_epochs], ylim=[0.22, 0.35])
  n, timer = 0, d2l.Timer()
  for _ in range(num_epochs):
    for X, y in data_iter:
      with autograd.record():
        l = loss(net(X), y).mean()
      l.backward()
      trainer_fn([w, b], states, hyperparams)
      n += X.shape[0]
      if n % 200 == 0:
        timer.stop()
        animator.add(n/X.shape[0]/len(data_iter),
               (d2l.evaluate_loss(net, data_iter, loss),))
        timer.start()
  print(f'loss: {animator.Y[0][-1]:.3f}, {timer.sum()/num_epochs:.3f} sec/epoch')
  return timer.cumsum(), animator.Y[0]
#@save
def train_ch11(trainer_fn, states, hyperparams, data_iter,
        feature_dim, num_epochs=2):
  # Initialization
  w = tf.Variable(tf.random.normal(shape=(feature_dim, 1),
                  mean=0, stddev=0.01),trainable=True)
  b = tf.Variable(tf.zeros(1), trainable=True)

  # Train
  net, loss = lambda X: d2l.linreg(X, w, b), d2l.squared_loss
  animator = d2l.Animator(xlabel='epoch', ylabel='loss',
              xlim=[0, num_epochs], ylim=[0.22, 0.35])
  n, timer = 0, d2l.Timer()

  for _ in range(num_epochs):
    for X, y in data_iter:
     with tf.GradientTape() as g:
      l = tf.math.reduce_mean(loss(net(X), y))

     dw, db = g.gradient(l, [w, b])
     trainer_fn([w, b], [dw, db], states, hyperparams)
     n += X.shape[0]
     if n % 200 == 0:
       timer.stop()
       p = n/X.shape[0]
       q = p/tf.data.experimental.cardinality(data_iter).numpy()
       r = (d2l.evaluate_loss(net, data_iter, loss),)
       animator.add(q, r)
       timer.start()
  print(f'loss: {animator.Y[0][-1]:.3f}, {timer.sum()/num_epochs:.3f} sec/epoch')
  return timer.cumsum(), animator.Y[0]
讓我們看看優化是如何進行批量梯度下降的。這可以通過將小批量大小設置為 1500(即示例總數)來實現。因此,模型參數每個時期僅更新一次。進展甚微。事實上,在 6 個步驟之后,進度停滯了。
def train_sgd(lr, batch_size, num_epochs=2):
  data_iter, feature_dim = get_data_ch11(batch_size)
  return train_ch11(
    sgd, None, {'lr': lr}, data_iter, feature_dim, num_epochs)

gd_res = train_sgd(1, 1500, 10)
loss: 0.249, 0.036 sec/epoch
def train_sgd(lr, batch_size, num_epochs=2):
  data_iter, feature_dim = get_data_ch11(batch_size)
  return train_ch11(
    sgd, None, {'lr': lr}, data_iter, feature_dim, num_epochs)

gd_res = train_sgd(1, 1500, 10)
loss: 0.254, 5.565 sec/epoch
def train_sgd(lr, batch_size, num_epochs=2):
  data_iter, feature_dim = get_data_ch11(batch_size)
  return train_ch11(
    sgd, None, {'lr': lr}, data_iter, feature_dim, num_epochs)

gd_res = train_sgd(1, 1500, 10)
loss: 0.244, 0.027 sec/epoch
當批量大小等于 1 時,我們使用隨機梯度下降進行優化。為了簡化實施,我們選擇了一個恒定(盡管很小)的學習率。在隨機梯度下降中,每當處理一個示例時,模型參數都會更新。在我們的例子中,這相當于每個時期 1500 次更新。正如我們所看到的,目標函數值的下降在一個 epoch 之后變慢了。盡管這兩個過程在一個時期內處理了 1500 個示例,但在我們的實驗中,隨機梯度下降比梯度下降消耗更多的時間。這是因為隨機梯度下降更頻繁地更新參數,并且一次處理單個觀測值的效率較低。
sgd_res = train_sgd(0.005, 1)
loss: 0.242, 0.767 sec/epoch
sgd_res = train_sgd(0.005, 1)
loss: 0.243, 65.299 sec/epoch
sgd_res = train_sgd(0.005, 1)
loss: 0.244, 6.689 sec/epoch
最后,當 batch size 等于 100 時,我們使用 minibatch 隨機梯度下降進行優化。每個時期所需的時間比隨機梯度下降所需的時間和批量梯度下降所需的時間短。
mini1_res = train_sgd(.4, 100)
loss: 0.242, 0.028 sec/epoch
mini1_res = train_sgd(.4, 100)
loss: 0.251, 20.161 sec/epoch
mini1_res = train_sgd(.4, 100)
loss: 0.246, 0.085 sec/epoch
將批處理大小減少到 10,每個時期的時間都會增加,因為每個批處理的工作負載執行效率較低。
mini2_res = train_sgd(.05, 10)
loss: 0.247, 0.107 sec/epoch
mini2_res = train_sgd(.05, 10)
loss: 0.243, 20.888 sec/epoch
mini2_res = train_sgd(.05, 10)
loss: 0.243, 0.698 sec/epoch
現在我們可以比較前四個實驗的時間與損失。可以看出,盡管隨機梯度下降在處理的示例數量方面比 GD 收斂得更快,但它比 GD 使用更多的時間來達到相同的損失,因為逐個示例計算梯度示例效率不高。Minibatch 隨機梯度下降能夠權衡收斂速度和計算效率。小批量大小為 10 比隨機梯度下降更有效;就運行時間而言,100 的小批量甚至優于 GD。
d2l.set_figsize([6, 3])
d2l.plot(*list(map(list, zip(gd_res, sgd_res, mini1_res, mini2_res))),
     'time (sec)', 'loss', xlim=[1e-2, 10],
     legend=['gd', 'sgd', 'batch size=100', 'batch size=10'])
d2l.plt.gca().set_xscale('log')
d2l.set_figsize([6, 3])
d2l.plot(*list(map(list, zip(gd_res, sgd_res, mini1_res, mini2_res))),
     'time (sec)', 'loss', xlim=[1e-2, 10],
     legend=['gd', 'sgd', 'batch size=100', 'batch size=10'])
d2l.plt.gca().set_xscale('log')
d2l.set_figsize([6, 3])
d2l.plot(*list(map(list, zip(gd_res, sgd_res, mini1_res, mini2_res))),
     'time (sec)', 'loss', xlim=[1e-2, 10],
     legend=['gd', 'sgd', 'batch size=100', 'batch size=10'])
d2l.plt.gca().set_xscale('log')
12.5.5。簡潔的實現
在 Gluon 中,我們可以使用Trainer類來調用優化算法。這用于實現通用訓練功能。我們將在當前章節中使用它。
#@save
def train_concise_ch11(trainer_fn, hyperparams, data_iter, num_epochs=4):
  # Initialization
  net = nn.Sequential(nn.Linear(5, 1))
  def init_weights(module):
    if type(module) == nn.Linear:
      torch.nn.init.normal_(module.weight, std=0.01)
  net.apply(init_weights)

  optimizer = trainer_fn(net.parameters(), **hyperparams)
  loss = nn.MSELoss(reduction='none')
  animator = d2l.Animator(xlabel='epoch', ylabel='loss',
              xlim=[0, num_epochs], ylim=[0.22, 0.35])
  n, timer = 0, d2l.Timer()
  for _ in range(num_epochs):
    for X, y in data_iter:
      optimizer.zero_grad()
      out = net(X)
      y = y.reshape(out.shape)
      l = loss(out, y)
      l.mean().backward()
      optimizer.step()
      n += X.shape[0]
      if n % 200 == 0:
        timer.stop()
        # `MSELoss` computes squared error without the 1/2 factor
        animator.add(n/X.shape[0]/len(data_iter),
               (d2l.evaluate_loss(net, data_iter, loss) / 2,))
        timer.start()
  print(f'loss: {animator.Y[0][-1]:.3f}, {timer.sum()/num_epochs:.3f} sec/epoch')
#@save
def train_concise_ch11(tr_name, hyperparams, data_iter, num_epochs=2):
  # Initialization
  net = nn.Sequential()
  net.add(nn.Dense(1))
  net.initialize(init.Normal(sigma=0.01))
  trainer = gluon.Trainer(net.collect_params(), tr_name, hyperparams)
  loss = gluon.loss.L2Loss()
  animator = d2l.Animator(xlabel='epoch', ylabel='loss',
              xlim=[0, num_epochs], ylim=[0.22, 0.35])
  n, timer = 0, d2l.Timer()
  for _ in range(num_epochs):
    for X, y in data_iter:
      with autograd.record():
        l = loss(net(X), y)
      l.backward()
      trainer.step(X.shape[0])
      n += X.shape[0]
      if n % 200 == 0:
        timer.stop()
        animator.add(n/X.shape[0]/len(data_iter),
               (d2l.evaluate_loss(net, data_iter, loss),))
        timer.start()
  print(f'loss: {animator.Y[0][-1]:.3f}, {timer.sum()/num_epochs:.3f} sec/epoch')
#@save
def train_concise_ch11(trainer_fn, hyperparams, data_iter, num_epochs=2):
  # Initialization
  net = tf.keras.Sequential()
  net.add(tf.keras.layers.Dense(1,
      kernel_initializer=tf.random_normal_initializer(stddev=0.01)))
  optimizer = trainer_fn(**hyperparams)
  loss = tf.keras.losses.MeanSquaredError()
  animator = d2l.Animator(xlabel='epoch', ylabel='loss',
              xlim=[0, num_epochs], ylim=[0.22, 0.35])
  n, timer = 0, d2l.Timer()
  for _ in range(num_epochs):
    for X, y in data_iter:
      with tf.GradientTape() as g:
        out = net(X)
        l = loss(y, out)
        params = net.trainable_variables
        grads = g.gradient(l, params)
      optimizer.apply_gradients(zip(grads, params))
      n += X.shape[0]
      if n % 200 == 0:
        timer.stop()
        p = n/X.shape[0]
        q = p/tf.data.experimental.cardinality(data_iter).numpy()
        # `MeanSquaredError` computes squared error without the 1/2
        # factor
        r = (d2l.evaluate_loss(net, data_iter, loss) / 2,)
        animator.add(q, r)
        timer.start()
  print(f'loss: {animator.Y[0][-1]:.3f}, {timer.sum()/num_epochs:.3f} sec/epoch')
使用 Gluon 重復上一個實驗顯示相同的行為。
data_iter, _ = get_data_ch11(10)
trainer = torch.optim.SGD
train_concise_ch11(trainer, {'lr': 0.01}, data_iter)
loss: 0.242, 0.111 sec/epoch
data_iter, _ = get_data_ch11(10)
train_concise_ch11('sgd', {'learning_rate': 0.05}, data_iter)
loss: 0.244, 23.568 sec/epoch
data_iter, _ = get_data_ch11(10)
trainer = tf.keras.optimizers.SGD
train_concise_ch11(trainer, {'learning_rate': 0.05}, data_iter)
loss: 0.253, 1.290 sec/epoch
12.5.6。概括
由于減少了深度學習框架產生的開銷以及更好的內存局部性和 CPU 和 GPU 上的緩存,矢量化使代碼更高效。
隨機梯度下降產生的統計效率與一次處理大批量數據產生的計算效率之間存在權衡。
小批量隨機梯度下降提供了兩全其美的方法:計算和統計效率。
在小批量隨機梯度下降中,我們處理通過訓練數據的隨機排列獲得的批量數據(即,每個觀察每個時期只處理一次,盡管是隨機順序)。
建議在訓練期間降低學習率。
一般來說,當以時鐘時間衡量時,minibatch 隨機梯度下降比隨機梯度下降和梯度下降更快收斂到更小的風險。
12.5.7。練習
修改 batch size 和 learning rate,觀察目標函數值的下降率和每個 epoch 消耗的時間。
閱讀 MXNet 文檔并使用Trainer類 set_learning_rate函數將小批量隨機梯度下降的學習率在每個時期后降低到其先前值的 1/10。
將小批量隨機梯度下降與實際從訓練集中進行替換采樣的變體進行比較。會發生什么?
一個邪惡的精靈在不告訴你的情況下復制你的數據集(即,每次觀察發生兩次,你的數據集增長到原來大小的兩倍,但沒有人告訴你)。隨機梯度下降、小批量隨機梯度下降和梯度下降的行為如何變化?
-
隨機梯度下降
+關注
關注
0文章
4瀏覽量
976 -
pytorch
+關注
關注
2文章
808瀏覽量
13239
發布評論請先 登錄
相關推薦
小批量電路板制作***
PCB樣品及小批量收費標準
分享-----快速小批量SMT樣品貼片
梯度下降算法及其變種:批量梯度下降,小批量梯度下降和隨機梯度下降
PyTorch教程-12.4。隨機梯度下降
MES系統如何支持多品種小批量生產


 PyTorch教程-12.5。小批量隨機梯度下降


評論