就在最近,Atmel終于推出了新版本IDE——Atmel Studio 7.0,該版本采用了微軟最新的 Visual Studio 2015 平臺,在速度、性能和代碼視覺風格上都體現(xiàn)的淋淋盡致,用起來非常順手,下面將結合實例,介紹Atmel Studio 7.0 的使用方法。
第1步:打開Atmel Studio 7.0
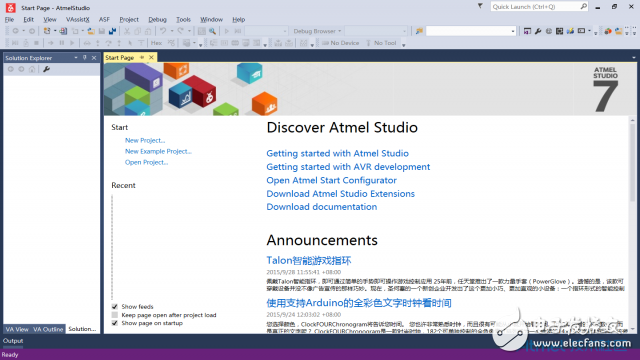
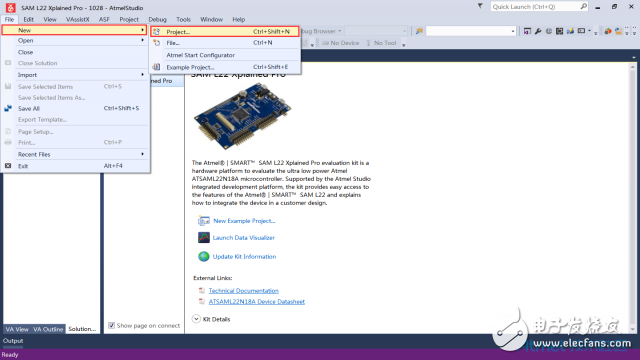
第2步:新建工程項目
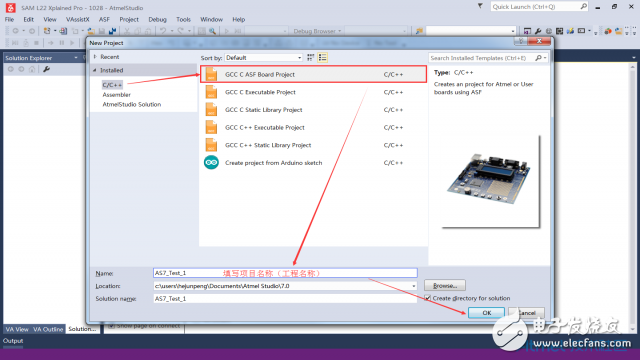
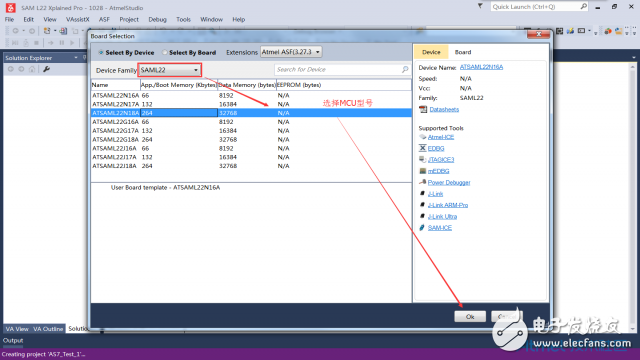
第3步:選擇芯片型號
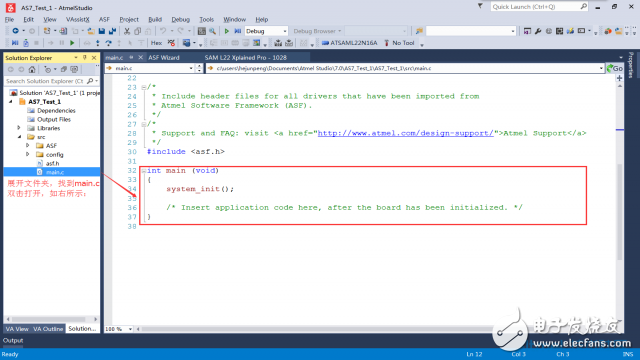
第4步:添加ASF 驅動庫
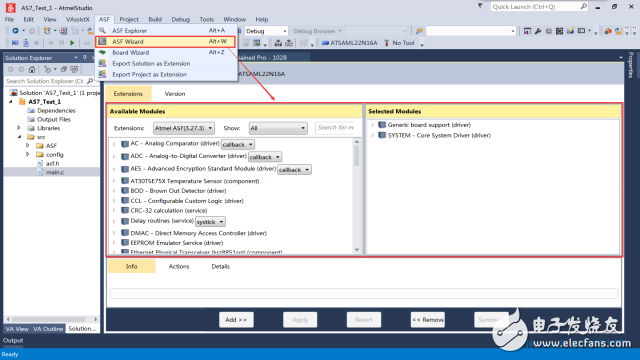
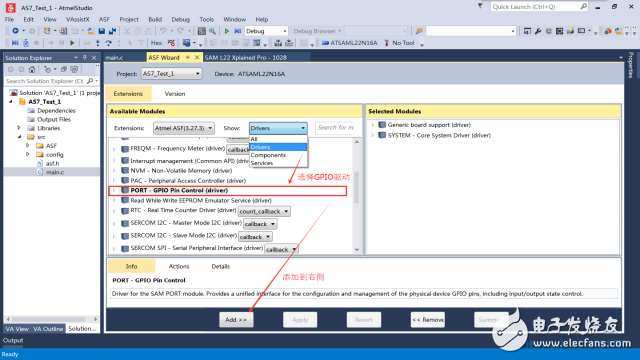
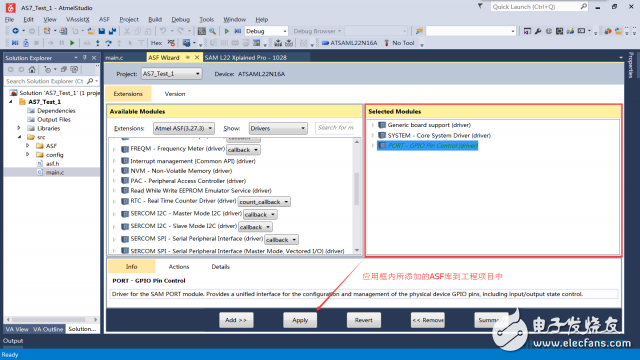
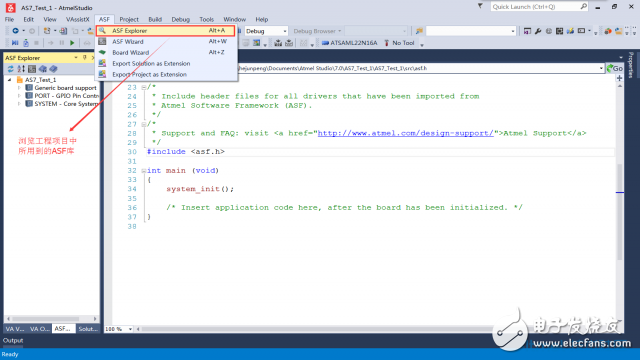
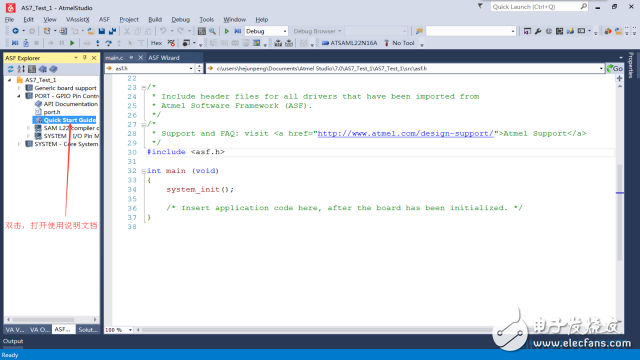
第5步:查看ASF驅動使用說明
第6步:編寫代碼
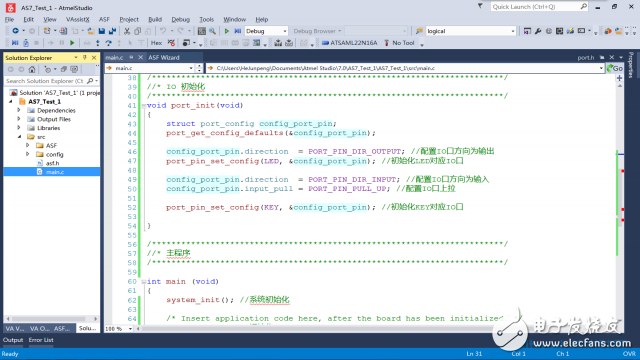
源碼:
#include //包含Atmel MCU軟件庫頭文件
#define LED PIN_PC27 //定義LED所使用的IO口為 PC27
#define KEY PIN_PC01 //定義KEY所使用的IO口為 PC01
void port_init(void); //聲明函數(shù)體
/************************************************************************/
//* IO 初始化
/************************************************************************/
void port_init(void)
{
struct port_config config_port_pin;
port_get_config_defaults(&config_port_pin);
config_port_pin.direction = PORT_PIN_DIR_OUTPUT; //配置IO口方向為輸出
port_pin_set_config(LED, &config_port_pin); //初始化LED對應IO口
config_port_pin.direction = PORT_PIN_DIR_INPUT; //配置IO口方向為輸入
config_port_pin.input_pull = PORT_PIN_PULL_UP; //配置IO口上拉
port_pin_set_config(KEY, &config_port_pin); //初始化KEY對應IO口
}
/************************************************************************/
//* 主程序
/************************************************************************/
int main (void)
{
system_init(); //系統(tǒng)初始化
/* Insert application code here, after the board has been initialized. */
port_init(); //IO初始化
while(1)
{
if (port_pin_get_input_level(KEY) == 0) //KEY按下,LED對應IO電平 = 0
{
port_pin_set_output_level(LED, 0);
}
else
{
port_pin_set_output_level(LED, 1);
}
}
}
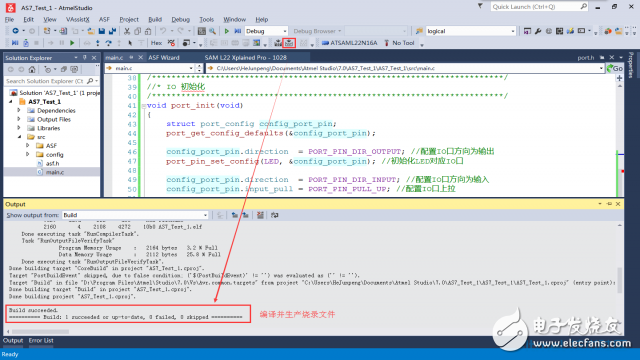
第7步:編譯并生產燒錄文件
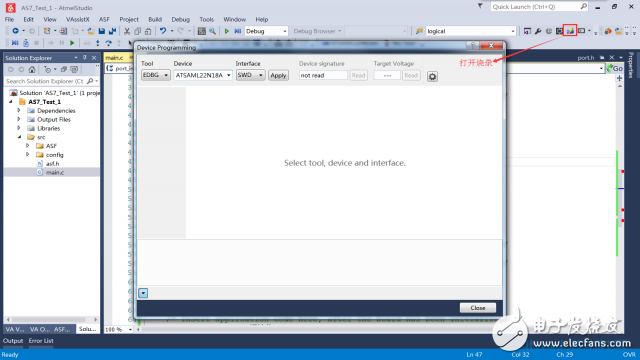
第8步:燒錄文件到開發(fā)板
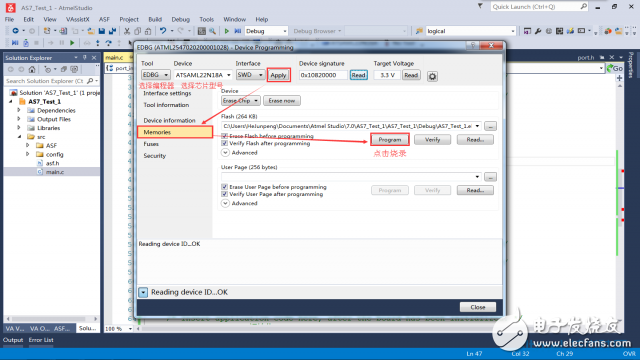
-
Atmel
+關注
關注
17文章
311瀏覽量
107301
發(fā)布評論請先 登錄
相關推薦
轉:Atmel Studio 7.0 安裝說明
Atmel Studio 7.0 軟件關于中文說明
Atmel Studio 7.0編譯優(yōu)化級別在哪里設置?
為什么atmel studo7.0一裝上就是這個問題??atmel studio 6.2就沒有問題 ?
AS7.0中快速創(chuàng)建一個ASF項目的步驟詳解

介紹Atmel軟件框架ASF的結構與設計軟件時使用的方法


 基于ASF的Atmel Studio 7.0使用方法介紹


評論