Dlib是一個深度學習開源工具,基于C++開發,也支持Python開發接口,功能類似于TensorFlow與PyTorch。但是由于Dlib對于人臉特征提取支持很好,有很多訓練好的人臉特征提取模型供開發者使用,所以Dlib人臉識別開發很適合做人臉項目開發。
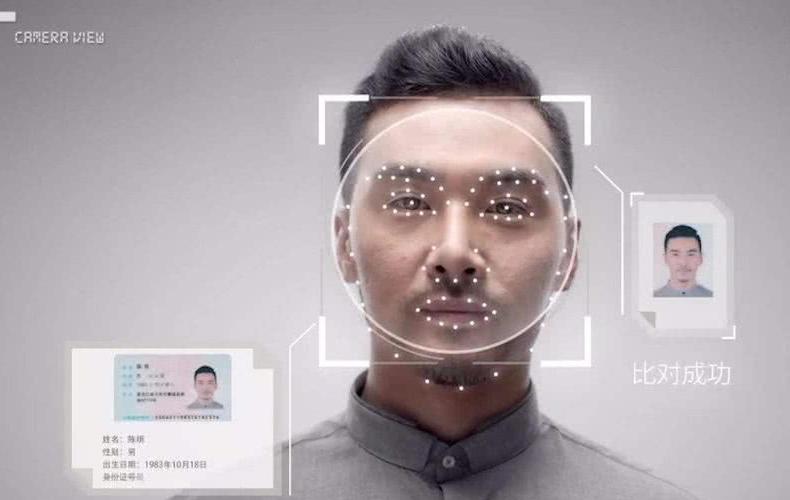
上面所說的人臉識別開發,主要是指人臉驗證,就是輸入兩張人臉照片,系統會對比輸出0或者1,代表判斷是否是同一個人。一般的人臉識別開發可以簡單分為1.人臉特征建模與2.使用人臉特征模型進行驗證(其實還應包括人臉對齊等,這些也可以劃分到1中)。使用Dlib進行開發時,我們直接可以使用訓練好的人臉特征提取模型,主要的工作就變成了如何進行人臉的驗證。
人臉的驗證其實就是計算相似度,同一個人的相似度就會大,不同的人就會比較小。可以采用余弦相似度或者歐式距離來計算相似度。其中余弦相似度就是計算角度,歐式距離就是指平方差。都可以用來表示兩個特征的相似度(距離)。
2.環境搭建
安裝可以參考我的這篇博客:[深度學習工具]·極簡安裝Dlib人臉識別庫,下面說一下需要注意的點::
此博文針對Windows10安裝,其他平臺可以仿照這個步驟來安裝
安裝Miniconda
使用conda指令來安裝Dlib庫,使用Miniconda與Anaconda都可以,我習慣用Miniconda,簡單占用內存小。
推薦使用清華源,下載安裝,選擇合適的平臺版本。python==3.6
安裝dlib
注意一定要以管理員身份進入CMD,執行(如果是Linux Mac 就使用 sudo)
conda install -c conda-forge dlib
需要imageio 庫,可以使用下述命令安裝
conda install imageio
3.開發實戰
1.實現人臉檢測標記
face_test.pyimport dlibfrom imageio import imreadimport globdetector = dlib.get_frontal_face_detector()win = dlib.image_window()path = “f1.jpg”img = imread(path)dets = detector(img)print(‘檢測到了 %d 個人臉’ % len(dets))for i, d in enumerate(dets):print(‘- %d:Left %d Top %d Right %d Bottom %d’ % (i, d.left(), d.top(), d.right(), d.bottom()))win.clear_overlay()win.set_image(img)win.add_overlay(dets)dlib.hit_enter_to_continue()
代碼很簡單,通過imread讀取照片,然后進行檢測,輸出結果為dets的list,有幾張人臉就會有幾個item, 每個item都有.left(), .top(), .right(), .bottom()四個元素,代表人臉框的四個邊界位置。最后通過win.add_overlay(dets)可以將標記的框顯示在原圖上。
原始照片
輸出照片
其實我們就可以使用這個功能做一個簡單的應用,用來檢測圖片或者視頻中人臉的個數。
2.人臉特征點提取
在實戰1的基礎上添加人臉特征提取功能。
import dlibfrom imageio import imreadimport globdetector = dlib.get_frontal_face_detector()win = dlib.image_window()predictor_path = ‘shape_predictor_68_face_landmarks.dat’predictor = dlib.shape_predictor(predictor_path)path = “f2.jpg”img = imread(path)dets = detector(img)print(‘檢測到了 %d 個人臉’ % len(dets))for i, d in enumerate(dets):print(‘- %d: Left %d Top %d Right %d Bottom %d’ % (i, d.left(), d.top(), d.right(), d.bottom()))shape = predictor(img, d) # 第 0 個點和第 1 個點的坐標print(‘Part 0: {}, Part 1: {}’.format(shape.part(0), shape.part(1)))win.clear_overlay()win.set_image(img)win.add_overlay(dets)win.add_overlay(shape)dlib.hit_enter_to_continue()
這段代碼就是在test.py基礎上加入了shape_predictor功能,使之可以在檢測出人臉基礎上,找到人臉的68個特征點。反映在圖中就是藍色的線。
原始圖片
輸出圖片
注意運行這段代碼需要這個文件predictor_path = ‘shape_predictor_68_face_landmarks.dat’,我會放在我的github中,方便大家下載使用。
3.人臉識別驗證
在第二步的基礎上,我們再進一步,實現將人臉提取為特征向量,從而我們就可以對特征向量進行比對來實現人臉的驗證,這里采用的是對比歐式距離的方法。
face_recognition.pyimport dlibfrom imageio import imreadimport globimport numpy as npdetector = dlib.get_frontal_face_detector()predictor_path = ‘shape_predictor_68_face_landmarks.dat’predictor = dlib.shape_predictor(predictor_path)face_rec_model_path = ‘dlib_face_recognition_resnet_model_v1.dat’facerec = dlib.face_recognition_model_v1(face_rec_model_path)def get_feature(path):img = imread(path)dets = detector(img)print(‘檢測到了 %d 個人臉’ % len(dets))# 這里假設每張圖只有一個人臉shape = predictor(img, dets[0])face_vector = facerec.compute_face_descriptor(img, shape)return(face_vector)def distance(a,b):a,b = np.array(a), np.array(b)sub = np.sum((a-b)**2)add = (np.sum(a**2)+np.sum(b**2))/2.return sub/addpath_lists1 = [“f1.jpg”,“f2.jpg”]path_lists2 = [“趙麗穎照片.jpg”,“趙麗穎測試.jpg”]feature_lists1 = [get_feature(path) for path in path_lists1]feature_lists2 = [get_feature(path) for path in path_lists2]print(“feature 1 shape”,feature_lists1[0].shape)out1 = distance(feature_lists1[0],feature_lists1[1])out2 = distance(feature_lists2[0],feature_lists2[1])print(“diff distance is”,out1)print(“same distance is”,out2)out1 = distance(feature_lists1[0],feature_lists1[1])out2 = distance(feature_lists2[0],feature_lists2[1])
輸出結果
檢測到了 1 個人臉檢測到了 1 個人臉檢測到了 1 個人臉檢測到了 1 個人臉feature 1 shape (128, 1)diff distance is 0.254767715912same distance is 0.0620976363391
我們可以看出,每張人臉都被提取為了128維的向量,我們可以理解為128維的坐標(xyz是三維,128維就是有128個軸組成),我們下面需要做的就是計算兩個特征的距離,設定好合適的閾值,小于這個閾值則識別為同一個人。代碼正確運行需要這個文件face_rec_model_path = ‘dlib_face_recognition_resnet_model_v1.dat’,我已經放在自己的github(https://github.com/xiaosongshine/dlib_face_recognition)中,方便大家使用。
我們從上面測試的結果可以看出,不同的距離為0.25,同一個人為0.06,閾值就可以先設置為其間的一個值。我這里先設置為0.09,這個閾值也是需要大量數據來計算的,選擇的準則為使錯誤識別為最低。
下面我們把閾值設置為0.09,來測試系統能否區分出不同的人:在face_recognition.py加入下面代碼
def classifier(a,b,t = 0.09):if(distance(a,b)《=t): ret = Trueelse : ret = Falsereturn(ret)print(“f1 is 趙麗穎”,classifier(feature_lists1[0],feature_lists2[1]))print(“f2 is 趙麗穎”,classifier(feature_lists1[1],feature_lists2[1]))print(“趙麗穎照片.jpg is 趙麗穎測試.jpg”,classifier(feature_lists2[0],feature_lists2[1]))
輸出結果
f1 is 趙麗穎 Falsef2 is 趙麗穎 False趙麗穎照片.jpg is 趙麗穎測試.jpg True
從上面可以看出,已基本滿足對人臉區分的功能,如果如要實用化則需要繼續調優閾值與代碼,調優的準則就是選擇合適的閾值使錯誤識別為最低。
-
人臉識別
+關注
關注
76文章
4014瀏覽量
82104 -
深度學習
+關注
關注
73文章
5511瀏覽量
121357
原文標題:實戰 | 如何用最快的速度學會Dlib人臉識別開發?
文章出處:【微信號:rgznai100,微信公眾號:rgznai100】歡迎添加關注!文章轉載請注明出處。
發布評論請先 登錄
相關推薦


 如何用最快的速度學會Dlib人臉識別開發?


評論