資料介紹
描述
描述
.NET Core 3.0 剛剛在 2019 年 1 月發布了預覽版。正如微軟在他們的文檔中所說,Linux 現在支持 System.IO.Ports.SerialPort。我迫不及待地想用它弄臟我的手。在本文中,我將向您展示如何使用 System.IO.Ports.SerialPort 進行串行讀/寫,以及如何在 Windows 上構建源代碼并在 linux-arm (Raspbian) 上運行二進制文件。
筆記
- 在我寫這篇文章的時候,.NET Core和System.IO.Ports已經處于預覽階段,當你閱讀這篇文章時,請檢查是否有任何新版本。使用最新的穩定版本運行您的代碼。
- 我在 Windows 10 上構建和測試本文的代碼,并在 Raspberry Pi Raspbian 中運行它們。如果您使用 Mac/Linux 作為開發機器,SerialPort 庫也應該可以工作。
開發設置
1. 在您的開發機器上下載并安裝.NET Core 3.0 SDK(非運行時)。安裝后,打開終端,輸入dotnet --version. 您應該會看到像 3.0.x 這樣的 dotnet 版本。
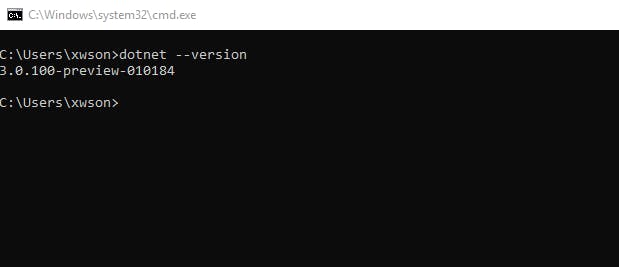
2. 安裝Visual Studio Code作為 C# 代碼編輯器。然后安裝C# 擴展。
3. 在樹莓派上安裝.NET Core。如果你想在開發機器上構建 C# 代碼并在 PI 上運行二進制文件,你只需要安裝.NET Runtime. 如果要在 PI 上構建和運行源代碼,則需要安裝.NET SDK其中還包括 .Net Runtime。請注意,您應該linux arm32為您的 PI 使用構建。為簡單起見,我將向您展示如何在 PI 上安裝 .NET Core SDK:
# in raspberry pi terminal
sudo apt-get update
# install .net core dependencies
sudo apt-get install curl libunwind8 gettext
cd ~
# download .net core 3.0
wget
mkdir -p $HOME/dotnet && tar vzxf dotnet-sdk-3.0.100-preview-010184-linux-arm.tar.gz -C $HOME/dotnet
echo "export PATH=$PATH:$HOME/dotnet" >> ~/.bashrc
echo "export DOTNET_ROOT=$HOME/dotnet" >> ~/.bashrc
export PATH=$PATH:$HOME/dotnet
export DOTNET_ROOT=$HOME/dotnet
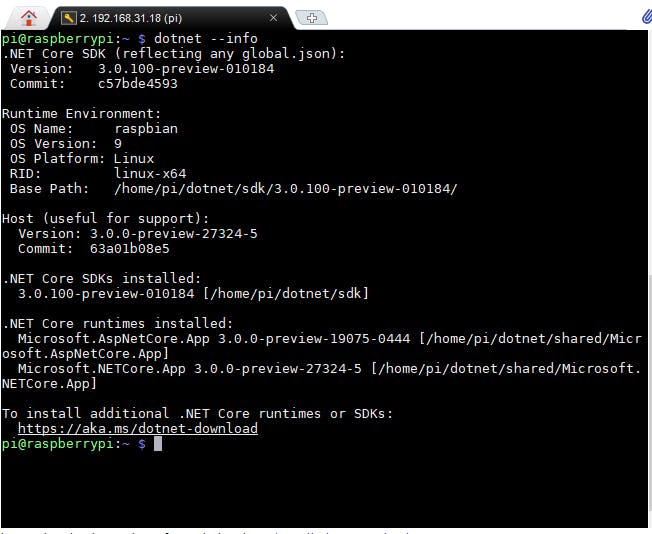
安裝后,使用 dotnet --info 進行驗證。你應該看到這樣的安裝信息:
4. 準備任何啟用串行功能的設備以接收和發送串行消息。對我來說,這是一個 Arduino Uno。
你好串行端口
設置好開發工具后,讓我們從一個簡單的 C# 項目開始我們的旅程,該項目將打印所有可用的串行端口。
在您的開發機器上,使用以下命令啟動一個 dotnet 項目:
mkdir hello-serialport && cd hello-serialport
dotnet new console
dotnet add package System.IO.Ports --version 4.6.0-preview.19073.11
打開program.cs文件,將內容替換為以下代碼:
using System;
using System.IO.Ports;
namespace hello_serialport
{
   class Program    {
      static void Main(string[] args)        {             // Get a list of serial port names.             string[] ports = SerialPort.GetPortNames();             Console.WriteLine("The following serial ports were found:");             // Display each port name to the console.             foreach(string port in ports)             {                 Console.WriteLine(port);             }             Console.ReadLine();        }    }}
鍵入dotnet run以在開發機器上運行代碼。
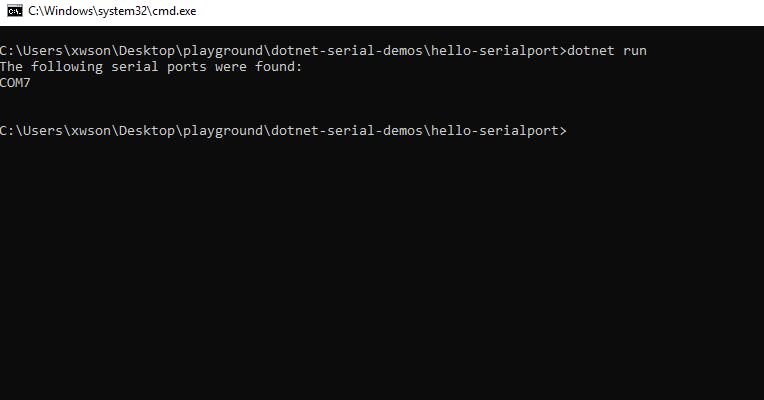
要為 RPi 構建項目,請運行:
dotnet publish -r linux-arm --self-contained false
然后轉到{your_project_root}\bin\Debug\netcoreapp3.0\linux-arm,將文件夾復制publish 到您的 PI。在 Pi 上,轉到發布文件夾,運行:
chmod +x hello-serialport
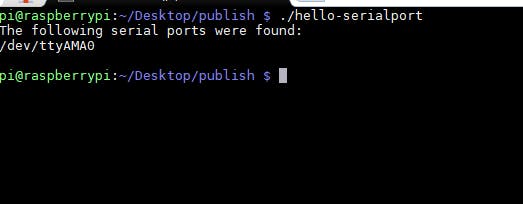
./hello-serialport
您的 hello-serialport 正在 Rapsberry Pi 上運行!
.NET Core 應用程序部署
在 hello serialport 項目中,我們在 windows 上進行開發,構建 linux-arm 二進制文件,然后在 raspberry pi 上運行二進制文件。根據微軟的文檔,我們剛剛制作了一個依賴于框架的可執行文件(FDE),這意味著該可執行文件只能在安裝了正確版本的 .NET Core Runtime 的樹莓派上運行。
您可以通過參考以下文檔來玩不同類型的部署:
串行讀取
打開 Arduino IDE,轉到 File-->Examples-->03.Analog-->AnalogInOutSerial 并將其上傳到 Arduino。在此處粘貼代碼:
/*
 Analog input, analog output, serial output
 Reads an analog input pin, maps the result to a range from 0 to 255 and uses
 the result to set the pulse width modulation (PWM) of an output pin.
 Also prints the results to the Serial Monitor.
 The circuit:
 - potentiometer connected to analog pin 0.
   Center pin of the potentiometer goes to the analog pin.
   side pins of the potentiometer go to +5V and ground
 - LED connected from digital pin 9 to ground
 created 29 Dec. 2008
 modified 9 Apr 2012
 by Tom Igoe
 This example code is in the public domain.
 http://www.arduino.cc/en/Tutorial/AnalogInOutSerial
*/

const int analogInPin = A0;  // Analog input pin that the potentiometer is attached to
const int analogOutPin = 9; // Analog output pin that the LED is attached to
int sensorValue = 0;        // value read from the pot
int outputValue = 0;        // value output to the PWM (analog out)
void setup() {
 // initialize serial communications at 9600 bps:
 Serial.begin(9600);
}
void loop() {
 // read the analog in value:
 sensorValue = analogRead(analogInPin);
 // map it to the range of the analog out:
 outputValue = map(sensorValue, 0, 1023, 0, 255);
 // change the analog out value:
 analogWrite(analogOutPin, outputValue);
 // print the results to the Serial Monitor:
 Serial.print("sensor = ");
 Serial.print(sensorValue);
 Serial.print("\t output = ");
 Serial.println(outputValue);
 // wait 2 milliseconds before the next loop for the analog-to-digital
 // converter to settle after the last reading:
 delay(2);
}
該程序不斷發出模擬引腳的讀數。讓我們編寫一個 C# 程序來讀取消息:
using System;
using System.IO.Ports;
namespace serial_read
{
class Program
{
  static SerialPort _serialPort;
  static void Main(string[] args)
  {
    Console.Write("Port no: ");
    string port = Console.ReadLine();
    Console.Write("baudrate: ");
    string baudrate = Console.ReadLine();
    // Create a new SerialPort on port COM7
    _serialPort = new SerialPort(port, int.Parse(baudrate));
    // Set the read/write timeouts
    _serialPort.ReadTimeout = 1500;
    _serialPort.WriteTimeout = 1500;
    _serialPort.Open();
    while (true)
    {
      Read();
    }
    _serialPort.Close();
  }

  public static void Read()
  {
    try
    {
      string message = _serialPort.ReadLine();
      Console.WriteLine(message);
    }
    catch (TimeoutException) { }
  }
}
}
在 Raspberry Pi 上構建并運行:
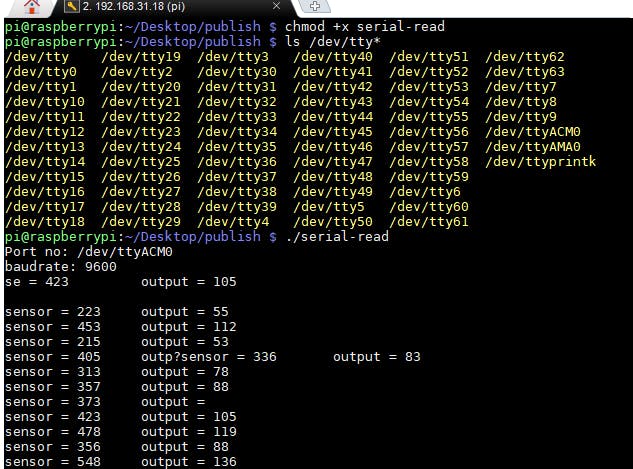
值得一提的是 SerialPort.ReadLine() 是一種阻塞方法。如果您不希望主線程被阻塞,請使用多線程。
請參考微軟提供的例子來學習如何進行串行寫入和多線程。系列活動也是值得探索的好東西。
進一步的工作
- ASP.NET Core 從 .NET Core v1 開始可用。通過結合 SerialPort API 和 ASP.NET,我們可以構建一個 Web UI 來控制一些設備,比如移動機器人。
- Microsoft 開源了WPF和WinForms ,它們都將從 .NET Core 3.0 開始提供。有一天,我們可以安全地將舊的 Windows 桌面串行應用程序移植到所有平臺,甚至可以在 Raspberry Pi 上編寫一個 winForm 串行通信應用程序!
參考
[1] 在 Raspberry Pi 上安裝 .NET Core 2.x SDK 并使用 System.Device.Gpio 閃爍 LED。
- MegaRAID CacheCade Pro 2.0讀/寫緩存軟件
- STM32學習筆記一、 IO模擬串行通訊
- PIC何謂讀-修改-寫,導致的問題及其解決之道
- 單片機IO口操作總結
- 具有讀/寫遙測功能的μ模塊調節器
- PIC16系列單片機的ID碼的讀和寫資料下載
- 51單片機進行串行接收并顯示的程序免費下載
- 使用51單片機普通IO口模擬IIC總線的程序實現資料免費下載
- 如何使用寄存器級讀&寫控制基于PXI平臺的FPGA 12次下載
- 如何使用寄存器級讀&寫控制基于PXI平臺的FPGA 14次下載
- 使用寄存器級讀&寫控制基于PXI平臺的FPGA 10次下載
- SerialPort主要用在通信上 6次下載
- C語言教程之讀/寫BIOS計時器 0次下載
- 電池管理器件的讀/寫操作
- DDR 1&2&3的“讀”和“寫”眼圖分析
- 初識IO-Link及IO-Link設備軟件協議棧 3126次閱讀
- 嵌入式eMMC存儲讀干擾應對方案 825次閱讀
- 如何對MAX22000可配置模擬IO進行編程 1018次閱讀
- 使用STM32F10xxx SWJ引腳作為標準IO 2270次閱讀
- 淺談串行 EEPROM 的讀/寫應用程序 2226次閱讀
- NXP MFRC523高集成讀/寫器的主要特性及應用 3928次閱讀
- 數字溫度傳感器系統中每種串行總線的優缺點介紹 1536次閱讀
- 讀、寫、擦除是SSD對NAND的三大基本操作 9916次閱讀
- 如何把二進制轉換為格雷碼?格雷碼是如何判斷讀空寫滿呢? 8120次閱讀
- 如何解決異步FIFO跨時鐘域亞穩態問題? 5886次閱讀
- Linux下flash操作讀、寫、擦除步驟 1.4w次閱讀
- STM8S利用STVP方式進行IO復用分析 2099次閱讀
- 通過對blktrace的輸出結果進行分析讀、寫操作的磁盤塊進行I/O頻次統計 9328次閱讀
- System generator如何與MATLAB進行匹配? 7526次閱讀
- System Generator實現串口通信(一行HDL代碼都不用寫) 2831次閱讀
下載排行
本周
- 1DC電源插座圖紙
- 0.67 MB | 1次下載 | 免費
- 2AN84-線性技術雜志電路集,第一卷第四集
- 2.28MB | 次下載 | 免費
- 3AN43-橋式電路
- 3.64MB | 次下載 | 免費
- 4AN69-LT1575超快線性控制器提供快速瞬態響應電源
- 218.44KB | 次下載 | 免費
- 5AN98-2004年秋季的信號源、調理器和電源電路
- 864.98KB | 次下載 | 免費
- 6高頻7代電源說明書
- 1.04 MB | 次下載 | 免費
- 7AN-616:AD9430評估板對XTAL振蕩器時鐘的修改
- 162.24KB | 次下載 | 免費
- 8AN-237: 放大器直接數字頻率合成的DAC選型器應用漫談
- 461.58KB | 次下載 | 免費
本月
- 1ADI高性能電源管理解決方案
- 2.43 MB | 450次下載 | 免費
- 2免費開源CC3D飛控資料(電路圖&PCB源文件、BOM、
- 5.67 MB | 137次下載 | 1 積分
- 3基于STM32單片機智能手環心率計步器體溫顯示設計
- 0.10 MB | 128次下載 | 免費
- 4使用單片機實現七人表決器的程序和仿真資料免費下載
- 2.96 MB | 44次下載 | 免費
- 53314A函數發生器維修手冊
- 16.30 MB | 31次下載 | 免費
- 6美的電磁爐維修手冊大全
- 1.56 MB | 22次下載 | 5 積分
- 7如何正確測試電源的紋波
- 0.36 MB | 15次下載 | 免費
- 8感應筆電路圖
- 0.06 MB | 10次下載 | 免費
總榜
- 1matlab軟件下載入口
- 未知 | 935121次下載 | 10 積分
- 2開源硬件-PMP21529.1-4 開關降壓/升壓雙向直流/直流轉換器 PCB layout 設計
- 1.48MB | 420062次下載 | 10 積分
- 3Altium DXP2002下載入口
- 未知 | 233088次下載 | 10 積分
- 4電路仿真軟件multisim 10.0免費下載
- 340992 | 191367次下載 | 10 積分
- 5十天學會AVR單片機與C語言視頻教程 下載
- 158M | 183335次下載 | 10 積分
- 6labview8.5下載
- 未知 | 81581次下載 | 10 積分
- 7Keil工具MDK-Arm免費下載
- 0.02 MB | 73810次下載 | 10 積分
- 8LabVIEW 8.6下載
- 未知 | 65988次下載 | 10 積分
 電子發燒友App


 創作
創作 發文章
發文章 發帖
發帖  提問
提問  發資料
發資料 發視頻
發視頻 上傳資料賺積分


評論